Outside Faucet Leaking from Handle: Fix It Now
Learn to diagnose and repair an outdoor faucet leaking from the handle with a step-by-step approach. Safety tips, common causes, tools, and prevention strategies for homeowners and DIYers.

According to Faucet Fix Guide, the most common cause of an outside faucet leaking from the handle is a worn packing or a loose packing nut. Quick fix: shut off the water, tighten the packing nut or replace the packing, and if the drip persists, replace the faucet or install a frost-free model. Follow our step-by-step guide for safety and precision.
What causes an outside faucet leak around the handle
An outside faucet leaking from the handle is almost always a valve seal issue, not a shattered spout. The primary culprit is the packing around the valve stem wearing out or the packing nut loosening over time. Outdoor fixtures endure temperature swings, moisture, and grit, which degrade the packing material and create a tiny path for water to escape when the handle is operated or even when it’s shut. In cold climates, freeze-thaw cycles can crack the packing or stem seal, leading to persistent dripping that seems to come from the handle area. Less common but plausible causes include a worn washer inside the stem, a corroded valve seat, or a loose escutcheon plate that lets water wick along the body. If the handle feels loose or wobbly, or if tightening the handle worsens the leak, you’re likely dealing with a packing or nut issue rather than a cracked body. Addressing this promptly prevents wasting water and reduces freeze-damage risk. According to Faucet Fix Guide, addressing the packing issue early lowers water waste and limits winter-related damage.
Tools and safety you need before starting
Before you begin, gather a few essential tools: adjustable wrench, flat-head and Phillips screwdrivers, replacement packing kit (packing nut and rubber packing), plumber’s tape, silicone lubricant, thread sealant rated for outdoor use, a bucket, towels, and safety goggles. You’ll also want a shut-off valve key or access to the main shutoff. Safety first: turn off the water supply to the faucet and relieve residual pressure by opening the spigot briefly. If you cannot locate a local shutoff or the area is icy or wet, stop and call a professional. Working on outdoor fixtures in winter or on slick surfaces is risky—wait for safe conditions. Faucet Fix Guide’s guidance emphasizes safety and gradual checks to avoid accidental water damage.
Quick checks you can do safely
Before disassembling anything, try these non-destructive checks:
- Check if the handle is loose and tighten screws without forcing threads.
- Inspect the packing nut at the base of the handle; if it’s loose, tightening a quarter-turn can stop the drip.
- Look inside the packing area for signs of wear on the rubber packing or stem washer; if you can access it, replace the worn parts.
- Observe whether the drip comes only when the handle is pressed or also when it’s released; this helps identify packing vs. seat issues. According to Faucet Fix Guide, many outdoor leaks originate at the packing or nut and do not require replacing the whole faucet. If tightening stops the drip but water still escapes when the faucet is off, the packing is likely degraded and needs replacement.
Diagnosing the leak source (overview)
A leak around the exterior handle can originate from several components. If the leak occurs only when the handle is turned, the valve stem packing or packing nut is suspect. If water drips after the handle is released, the packing might be sealing poorly, or the washer inside the stem may be worn. A slow seep even when the faucet is off generally indicates a worn valve stem packing or a damaged seat. A cracked or corroded faucet body is less common but possible, especially on older units exposed to the elements. Proper diagnosis guides a focused repair, saving time and water.
Step-by-step overview of the most common fix (high level)
The simplest fix for many outdoor leaks is replacing the packing and carefully tightening the packing nut. If water continues to leak after the packing replacement, you may need to replace the entire faucet or upgrade to a frost-free model that reduces freezing damage. Always recheck after each adjustment by running water briefly and observing for drips. If you’re unsure about disassembly, or if the faucet is in poor condition, seek professional help to avoid water damage or personal injury.
When to replace vs repair and what to expect
If the faucet is old, cracked, or shows significant corrosion, replacing the unit is often more cost-effective than repair. A frost-free outdoor faucet can dramatically reduce winter leaks and freeze-related damage. Expect to spend more time on installation for a replacement, including shutoff and possible pipe connections. Repairing by replacing the packing is usually quick and affordable if the body is solid and the leak is limited to the seal area. Safety and local code compliance are important when selecting a replacement model.
Prevention: maintenance habits to avoid future leaks
Seasonal maintenance dramatically reduces leakage risk. Shut off outdoor faucets before winter, drain residual water, and apply a light coat of silicone lubricant on the packing if recommended by the manufacturer. Inspect the handle screws and packing nut annually, especially after rough weather. When replacing components, use compatible parts designed for outdoor use and follow manufacturer torque specs to avoid overtightening. Proactive maintenance minimizes emergency repairs and water waste.
Steps
Estimated time: 30-60 minutes
- 1
Shut off water and prep area
Locate the faucet shutoff (or main) and turn it off. Relieve pressure by opening the faucet briefly and placing a bucket under to catch any residual water. This protects against floods during the fix.
Tip: Keep towels handy to absorb drips and prevent a slippery work area. - 2
Remove the handle and inspect packing
Remove the handle screws and lift the handle off the stem. Inspect the packing nut at the base of the handle and check the rubber packing for wear or cracks.
Tip: Take a photo before disassembly to help with reassembly. - 3
Replace packing and tighten
If the packing is worn, replace it with a compatible packing kit. Reinstall the nut and snug it gently—avoid overtightening, which can crack the stem.
Tip: Apply a small amount of silicone lubricant to the packing as recommended by the kit. - 4
Reassemble and test
Reattach the handle, turn on the water supply, and slowly operate the faucet to check for leaks. Watch the packing area closely for any fresh drips.
Tip: If drips appear, tighten a bit more, then re-check after a few minutes. - 5
Decide on replacement if necessary
If leaks persist after packing replacement, the fixture may be past repair. Consider replacing with a frost-free model or a new exterior faucet assembly.
Tip: Follow local code requirements for external fixtures when replacing.
Diagnosis: Outside faucet handle leaks or drips
Possible Causes
- highWorn packing around the valve stem
- mediumLoose packing nut at the base of the handle
- lowDamaged or worn stem washer
- lowCracked faucet body or corroded valve seat
Fixes
- easyTighten packing nut by small increments and test for leaks
- easyReplace the packing kit (packing and washer) and reassemble
- mediumReplace the entire faucet assembly if leaks persist or body is damaged
- hardCall a professional if corrosion is extensive or freezing damage is suspected
Frequently Asked Questions
Why does my outside faucet leak from the handle after winter?
Winter can crack the packing or stem seal due to freeze-thaw cycles, causing leaks at the handle area. Inspect the packing and consider replacing the packing or the entire faucet if repeated leaks occur.
Winter damage often cracks the seal around the stem, so inspect the packing and replace as needed.
Is it safe to fix an outdoor faucet myself?
Yes, with basic tools and safety precautions. Shut off water, relieve pressure, and wear goggles. If you’re unsure about gas or buried lines, contact a professional.
Yes, but make safety your priority and know your limits.
Do I need to shut off the house water supply to fix it?
It’s best to shut off the local faucet supply or the main house shutoff before starting any repair to prevent flooding.
Yes—turn off the water first to avoid big spills.
How do I know if I should replace the faucet instead of repairing it?
If the body is cracked, corroded, or leaks persist after packing replacement, replacement is usually more reliable and cost-effective.
If leaks stay after repairs, replacement is usually the way to go.
What maintenance helps prevent future leaks?
Winterize outdoor faucets, perform annual inspections, and use frost-free valves when possible. Regularly check handle screws and packing nuts for wear.
Regular maintenance helps prevent leaks before they start.
Watch Video
Top Takeaways
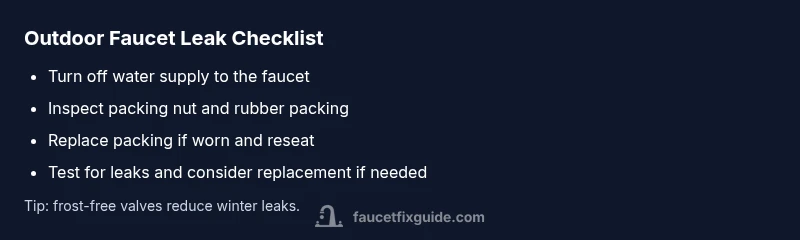
- Shut off water before any repair.
- Tighten or replace packing as first fix.
- Test leaks after each step to confirm progress.
- Replace the faucet if leaks persist.
- Winterize outdoor faucets to prevent freezes.