How to Fix an Outside Water Faucet Leaking
A comprehensive, urgent troubleshooting guide to diagnose and fix an outside water faucet leaking safely and efficiently for homeowners and DIY enthusiasts.

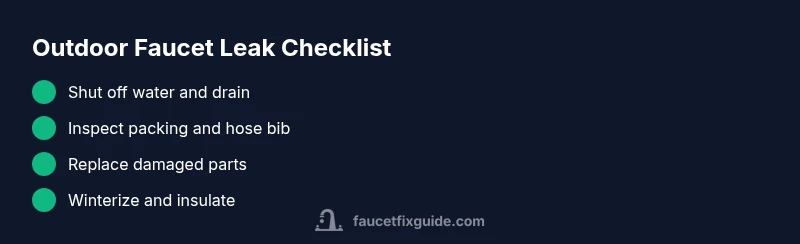
Most outdoor faucet leaks come from worn packing or a cracked hose bib. Quick fix: shut off the outdoor water supply, drain the line, and tighten or replace the packing nut. If dripping continues from the spout, replace the packing washer or the faucet itself. For frost-free models, winterize to prevent future leaks.
Why outside water faucet leaks happen
A leaking outdoor faucet is not just a nuisance; it wastes water and can cause damage to your home’s exterior wall and foundation. When you search for 'outside water faucet leaking', you’ll likely discover that most leaks originate at the control area around the handle or the hose bib spout. The first step is to understand where the water is coming from: is it dripping from the packing around the handle, seeping from the faucet stem, or spraying from the spout? In many homes, these leaks are the result of aging parts, temperature swings, or frost damage that undermines seals. According to Faucet Fix Guide, addressing leaks early saves water, prevents mold growth near doors and siding, and reduces long-term repair costs. This guide helps homeowners, renters, and DIY enthusiasts diagnose symptoms, choose safe fixes, and plan prevention measures to keep outdoor faucets trouble-free.
Common causes of outdoor faucet leaks
There are several frequent culprits behind an outside water faucet leaking. A worn packing nut or packing washer around the handle is a common source of slow drips, especially after decades of use. A cracked hose bib, especially on inexpensive frost-free models, can let water seep out around the base or through the spout. Temperature fluctuations that freeze water inside the pipe cause cracks in the faucet body or hose bib, leading to leaks when thaw occurs. Damaged or corroded valves, stems, or seats can also produce persistent leaks that worsen over time. Finally, improper installation, loose mounting hardware, or a compromised backflow preventer can create additional leakage paths. In practical terms, if water drips when you close the handle, the packing is usually the culprit; if water leaks even when the handle is off, the hose bib or pipe joint is more likely damaged. This is where safe testing and staged fixes come in.
Safety first: shutting off water and preparing tools
Before poking at an outdoor faucet, prioritize safety and minimize water damage. Start by locating and turning off the shut-off valve for the outdoor line; in some homes this is a separate valve on the wall, in others it’s a main-house shutoff. Then, open the faucet to relieve pressure and drain residual water. Gather basic tools: adjustable wrench, screwdriver, replacement packing nut or washer, teflon tape, and a new hose bib if needed. If you’re in a freezing climate, consider draining and insulating the line to prevent later bursts. Wear eye protection as a precaution against sudden spurts of water, and never work on a live electrical outlet or wiring near the faucet. By following these safety steps, you’ll reduce the risk of injury and avoid creating new leaks while you troubleshoot.
How to inspect an outdoor faucet without removing it
A careful inspection helps you pinpoint the leak source before ordering parts. Look for moisture at the packing nut behind the handle; if you see water seepage when the faucet is turned off, the packing washer is often the issue. Check the hose bib base for cracks or corrosion; run water briefly and observe where the water escapes. Listen for a dripping sound inside the wall, which may indicate a failed valve seat or stem. Inspect the mounting hardware for looseness, which can allow the faucet to wobble and leak around joints. For frost-free models, identify whether the leak originates from the spout or from the rear stem, as this affects the repair approach. Documenting the symptom with a photo can help you order the right replacement parts and communicate with a hardware professional if needed.
Quick checks you can perform before replacement
Not every leak requires replacing the faucet. Start with simple checks: tighten the packing nut a quarter to a half turn (careful not to overtighten and crack the handle). If the leak persists, replace the packing washer or the entire packing gland. For hose bibs with a wobble or crack, replace the faucet body or the entire hose bib assembly. If your faucet is frost-free, winterization steps such as shutting off the indoor supply valve, draining the line, and insulating exposed pipe sections can prevent future leaks when temperatures drop. After each fix, test the faucet by turning on water slowly and watching for new drips. If the leak is stubborn or involves the main supply line, it’s time to call a professional plumber.
Prevention and maintenance to extend faucet life
Prevention is easier than repair. Regularly check the packing nut and washer for wear, especially after winter cycles. Apply plumber’s tape to threaded connections and keep hose bib caps intact to protect from debris. Install a frost-free faucet with proper backflow prevention if you live in a cold climate, and winterize outdoor lines before freezing temperatures arrive. Consider weatherproof covers to protect the faucet from exposure to sun and rain. Schedule annual inspections to catch corrosion or mineral buildup early. Good maintenance reduces water waste and lowers the likelihood of larger leaks.
Steps
Estimated time: 45-60 minutes
- 1
Shut off the outdoor water supply
Locate the shut-off valve for the outdoor line and turn it fully clockwise to stop water flow. If you can’t find a separate valve, shut off the main water supply to the house. Open the outdoor faucet to confirm the line is depressurized.
Tip: If the valve is stiff, don’t force it; apply a little penetrating oil and wait a minute before trying again. - 2
Drain the line and protect the area
Open the faucet to allow remaining water to drain out. Place a bucket or towels to catch any residual drips and protect your siding and soil from water damage.
Tip: Do this outdoors on a dry day to minimize mess and track moisture away from foundations. - 3
Access the packing and inspect the handle
Remove the handle with a screwdriver to expose the packing nut. Inspect the packing washer for wear, cracking, or deformation. If damaged, replace with a matching washer.
Tip: Take a photo of the original arrangement before disassembly to aid reassembly. - 4
Tighten or replace the packing
If the packing nut is loose, tighten it lightly. If wear is evident, replace the washer or the entire packing assembly. Reassemble the handle.
Tip: Avoid overtightening; resin or metal threads can strip easily. - 5
Check the hose bib body and threads
Examine the base of the hose bib for cracks or corrosion. If the body is cracked or heavily corroded, replace the hose bib.
Tip: Match the thread size and hose bib type to avoid compatibility issues. - 6
Test the repair and observe
Turn the indoor shut-off back on gradually and watch for any new leaks. Open the outdoor faucet slowly and inspect all joints for moisture.
Tip: If leaks reappear, move to a heavier replacement option such as a new faucet or a professional inspection. - 7
Winterize for frost-prone climates
If you live in a cold area, winterize by draining lines, insulating exposed pipes, and closing the indoor valve to minimize freeze damage.
Tip: Keep spare packing washers on hand for spring maintenance. - 8
Document results and plan next steps
Take notes on what worked and what didn’t, and order the right parts if a full replacement is needed. Consider scheduling an annual check to prevent future leaks.
Tip: Record model numbers and part sizes for faster future repairs.
Diagnosis: Outdoor faucet leaks (drips, spraying, or steady seep) after winter or during use
Possible Causes
- highWorn packing nut or packing washer around the handle
- highCracked hose bib or faucet body
- mediumFrozen water in line causing cracks
- lowLoose mounting hardware or leaking joint at wall valve
- lowBackflow preventer or internal valve seat failure
Fixes
- easyTighten or replace packing nut/washer
- mediumReplace hose bib or faucet body
- easyDrain and insulate frozen lines; winterize outdoor plumbing
- easyTighten mounting hardware or reseal joints with plumber's tape
- hardReplace internal valve seat or whole faucet if necessary
Frequently Asked Questions
What is the most common cause of an outside water faucet leaking?
The most common causes are worn packing around the handle or a cracked hose bib. Replacing the packing washer or the faucet body usually resolves these leaks.
Usually the packing or hose bib is the culprit, and replacing those parts fixes most leaks.
Can I fix an outdoor faucet leak myself?
Yes, many leaks can be fixed with basic tools and careful steps. For severe corrosion or frost damage, replacement may be necessary.
Yes, most fixes are DIY-friendly, but call a pro for serious damage.
When should I replace the faucet instead of repairing the packing?
If the faucet is old, heavily corroded, or the packing area is worn beyond repair, replacing the faucet is more reliable.
If the faucet looks worn out, replacement is usually the best option.
How do I shut off the water supply to the outdoor faucet?
Locate the dedicated shut-off valve for the outdoor line or use the main house shutoff. Turn it clockwise until snug.
Find the valve and turn it off clockwise to stop the water flow.
Will winterizing prevent future leaks?
Winterizing helps protect against freeze-thaw damage and reduces future leaks by draining and insulating the line.
Yes, winterizing is a smart preventative step.
Should I use plumber’s tape on the faucet threads?
Yes, applying Teflon tape to threaded connections helps seal, but apply smoothly and avoid excess.
Using plumber’s tape can help seal threads during reassembly.
Watch Video
Top Takeaways
- Identify whether the leak is from the packing or the hose bib.
- Always shut off water before starting work.
- Replace worn packing washers or damaged hose bib as first-line fixes.
- Winterize outdoor lines to prevent future leaks and freeze damage.