Outside Water Faucet Repair: Step-by-Step Guide
Learn to diagnose, disassemble, and repair outdoor faucets safely. This Faucet Fix Guide tutorial covers leaks, freezing, winterization, and maintenance to protect your home’s water supply.

Within this guide, you’ll learn how to diagnose leaks or freezing in an outside water faucet repair, safely shut off supply, and perform common repairs. We'll cover replacing packing washers, reseating a stem, and winterizing to prevent future issues. Whether you’re a DIY enthusiast or a cautious homeowner, this article provides clear steps and safety tips.
What is an outside water faucet and common failure modes
An outside water faucet, also known as a hose bib or spigot, is the point where your home’s plumbing meets the outdoor environment. Over time, exposure to sun, rain, and freezing temperatures can cause wear that leads to leaks, drips, or difficult operation. If you’re experiencing a wet spigot or a handle that won’t shut off, you’re dealing with an outside water faucet repair scenario. According to Faucet Fix Guide, outdoor faucets face weather exposure that accelerates wear and can turn simple fixes into a bigger job if neglected. Common failure modes include worn packing washers, corroded stems, loose connections at the hose bib neck, and ice damage from freezing weather. Understanding these failure modes helps you choose the right repair approach, whether you’re replacing a washer, reseating a stem, or upgrading to a frost-free model for cold climates. This article will guide you through safe diagnosis, tool selection, step-by-step repairs, and preventive maintenance to keep your outdoor faucet turning smoothly and stop wasteful leaks.
The focus on outside water faucet repair is practical for homeowners who want reliable, recurring results. By recognizing early signs—like a constant drip after shutoff or a stiff handle—you can decide quickly whether a quick washer swap will suffice or if a full stem replacement is warranted. This groundwork reduces the chance of water damage and saves money over the long run.
Safety first: shut off water, PPE, and weather precautions
Before touching any outdoor faucet, safety is paramount. Start by locating and fully shutting off the water supply to the line feeding the faucet. If you can’t find an individual shutoff at the faucet, shut off the main house water supply and relieve pressure by opening a nearby outdoor faucet or a sink valve. Wear eye protection and gloves; outdoor work can expose you to sharp edges, rust, and hidden debris. In freezing weather, never work on a faucet with ice in the line; allow the line to warm or apply a hair dryer to the pipe for a short period. Keep a bucket and towels handy to catch water that may spill when you loosen fittings. If you feel unsure or the valve is stubborn, stop and call a professional. Following proper safety steps minimizes water damage and personal injury during outside water faucet repair.
Safety isn’t optional here—frozen lines can burst, creating costly water damage and potentially dangerous mold growth. Always verify you’ve isolated the line before any disassembly, and keep children and pets away from the work area while you test fittings.
Diagnosing issues with outdoor spigots
Start by testing the symptoms: is the faucet dripping when closed, is there low water pressure, or is the handle stiff or loose? Drips often indicate a worn packing washer or a corroded stem. A few other clues: a leaky neck seal around the hose connection suggests loose fittings or old cartridge seals. If the faucet is completely frozen in cold weather, the pipes leading to it may be at risk of bursting. Based on Faucet Fix Guide Analysis, 2026, most outdoor faucet problems originate from wear on packing washers, corrosion, or inadequate winterization. Document the symptoms with photos, which helps you decide whether to replace a washer, reseat a stem, or upgrade to a frost-free faucet. This step is foundational to choosing the correct repair path and avoiding unnecessary disassembly.
Tools and parts you’ll likely need
Before you begin, assemble the necessary tools and replacement parts. Having the right gear speeds repair and reduces the risk of over-tightening. Common items include:
- Adjustable wrench (8-12 inch) — essential for loosening fittings.
- Slip-joint pliers — helps grip curved surfaces.
- Screwdrivers (flathead and Phillips) — for removing screws on the handle.
- Bucket and towels — catch and absorb water.
- PTFE tape or pipe thread sealant — seal threaded connections.
- Replacement packing washers for hose bibs — size varies; bring an old washer for sizing.
- O-ring kit and faucet stem if you see replacement options — optional.
- Lubricant for O-rings — optional.
- Penetrating oil (WD-40 or similar) — for corroded parts.
- Heat source (hair dryer) — if pipes are cold or slightly frozen — optional.
Having a prepared toolkit minimizes delays and helps you stay safe during outside water faucet repair.
Step-by-step approach to basic repairs
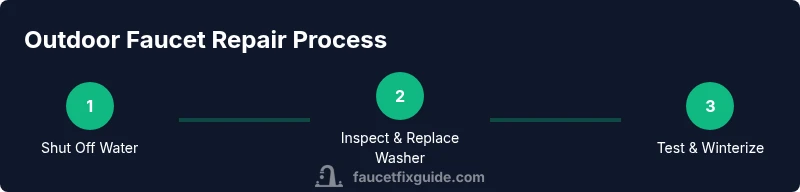
This section offers a practical framework you can follow in most situations. You’ll find a dedicated, detailed STEP-BY-STEP later, but knowing the workflow helps you prepare mentally and physically. Start by verifying the shutoff, then inspect the handle and packing, replace worn washers, inspect the stem, reassemble, and finally test for leaks. If you detect serious corrosion or a damaged body, it may be wiser to upgrade rather than risk repeated failures. This approach emphasizes caution, clean work, and progressive testing to confirm each fix before moving forward. It also aligns with best practices recommended by Faucet Fix Guide for reliable, long-lasting results.
Adopt a calm pace: if anything feels overly stiff, don’t force it—apply penetrating oil and wait, or skip to a replacement path to avoid creating a bigger problem.
Seasonal maintenance to prevent future leaks
Seasonal maintenance is the best defense against repeated issues with outside water faucet repair. In fall, drain and cap the line to prevent freezing; in winter, insulate the faucet with a foam cover or wrap and keep the area dry. In spring, inspect for rust and mineral buildup, especially on hose bibs that see frequent use. Regular cleaning with a soft brush helps remove mineral deposits that can impede operation. A simple annual check—washer condition, stem alignment, and sealing integrity—reduces leak incidents and water waste. By adopting a routine maintenance habit, you’ll extend faucet life and preserve curb appeal while avoiding costly emergency repairs.
Pro tip: log maintenance dates in a notebook or digital reminder so you don’t overlook tasks in hot or cold seasons.
When to replace vs repair and cost considerations
Not every outdoor faucet repair is worth the time or cost, especially with older or heavily corroded fixtures. If the faucet leaks around the stem after multiple washer replacements, if the body shows pitting or cracks, or if freezing has caused internal damage, replacement with a frost-free faucet may offer a longer life and lower total cost of ownership. Compare the price of a new hose bib with the cost of repeated repairs and water waste. The decision also depends on climate—colder regions benefit more from frost-free designs. As a guiding principle, start with inexpensive fixes (washers, seals) and escalate only as needed. The Faucet Fix Guide team recommends balancing upfront costs with long-term reliability to avoid ongoing maintenance headaches.
Tools & Materials
- Adjustable wrench(8-12 inch)
- Slip-joint pliers(Curved or groove-jointed)
- Screwdrivers (flathead and Phillips)(Handle screws)
- Bucket(Catches water; place under the line)
- Towels or rags(Dry surface and catch spills)
- PTFE tape or pipe thread sealant(Seal threaded connections)
- Replacement packing washers for hose bibs(Bring size or washer sample)
- O-ring kit and faucet stem (if applicable)(Optional depending on faucet)
- Lubricant for O-rings(Silicone-based recommended)
- Penetrating oil (e.g., WD-40)(Loosen seized parts)
- Heat source (hair dryer)(For slightly frozen fittings)
- Faucet cover or insulation(Winter protection)
Steps
Estimated time: 60-90 minutes
- 1
Shut off the water supply
Locate the outdoor shutoff valve for the faucet line and turn it to the off position. If the individual valve is not accessible, shut off the main house water supply and relieve pressure by opening a nearby spigot. This prevents water from spraying when you loosen fittings.
Tip: Label the shutoff valve for future reference to avoid accidental run-ins during maintenance. - 2
Remove the handle and access packing
Use the appropriate screwdriver to remove the handle screw, lift the handle away, and unscrew the bonnet nut if present. Expose the packing area where the washer sits and inspect for wear or damage.
Tip: Take a quick photo before disassembly to help reassembly later. - 3
Inspect and replace the packing washer
Check the washer for cracks, hardness, or deformation. If worn, replace with a washer that matches the faucet model. Re-seat the stem ensuring the washer sits cleanly against the seat.
Tip: Replace with a washer of the same thickness to avoid over-tightening the packing. - 4
Inspect stem, cartridge, and seat
Look for corrosion or pitting on the stem and inspect the seat for wear. If the stem is stripped or the seat is damaged, replace the stem or resurface the seat as needed. Clean threads with a wire brush and apply a light coat of lubricant if recommended by the manufacturer.
Tip: Apply penetrating oil to stubborn threads and wait a few minutes before attempting removal. - 5
Reassemble and test for leaks
Reinstall the packing, bonnet, and handle. Turn the water back on slowly and observe all joints for leaks. Tighten gradually at the packing area if minor leaks appear—avoid overtightening to prevent damage.
Tip: Run water briefly and check for drips at each joint before leaving the faucet unattended. - 6
Winterize or insulate for cold climates
Drain the line after use in late fall, cap the faucet, and install a frost-proof cover if your climate freezes. Proper insulation protects exposed piping and reduces freeze-thaw cycling that can drive leaks.
Tip: Consider relocating to a frost-free faucet if repeated freeze issues occur in your area. - 7
Upgrade or call a professional if leaks persist
If leaks continue after basic repairs, consider replacing with a frost-free model or seek a licensed plumber. Persistent leaks beyond simple washers and stems indicate larger fixture or line issues.
Tip: A frost-free hose bib places the valve farther inside the heated space, reducing freeze risk.
Frequently Asked Questions
Do I need to shut off the main water supply to repair an outdoor faucet?
Yes. Always shut off the water supply to the line feeding the faucet before starting repairs to prevent water spray and potential flooding. If you can’t locate an individual shutoff, use the main household valve and drain the line first.
Yes. Always shut off the water supply and drain the line before starting repairs to avoid water spray and damage.
Why is my outdoor faucet leaking even when the handle is off?
Leaks with the handle off usually indicate a worn packing washer or a damaged stem. Replacing the washer or reseating the stem often resolves the issue; if the body is corroded, replacement might be necessary.
Leaks with the handle off usually point to a worn washer or damaged stem. Replace the washer or stem if needed.
Can I repair an outdoor faucet without replacing washers?
In many cases, replacing the packing washer is the simplest and most cost-effective fix. If the washer is sound but leaks persist, inspect the stem, seat, and threads for wear or damage.
Often the washer replacement solves the leak; if not, check the stem and seat as well.
What’s the best way to winterize an outdoor faucet?
Drain the line after the last use of the season, close any external shutoff, and install a frost-proof faucet cover or insulation. In colder regions, this practice minimizes freezing risk and reduces the chance of burst pipes.
Drain the line, cover or insulate, and close the external shutoff to prevent freezing.
When should I replace an outdoor faucet rather than repair it?
If corrosion, pitting, or internal damage is extensive or if leaks persist after multiple repairs, replacing with a frost-free faucet is often more reliable and economical in the long run.
If repairs keep failing or the fixture is corroded, replacement is usually best.
Are frost-free outdoor faucets worth upgrading to?
Yes, frost-free models place valves inside the heated part of the home, reducing freeze risk and water waste. They’re a durable option for climates with cold winters.
Yes—frost-free faucets help prevent leaks caused by freezing.
Watch Video
Top Takeaways
- Shut off water before any disassembly
- Inspect and replace worn packing washers
- Test for leaks after reassembly and adjust as needed
- Winterize outdoor faucets to prevent freezing damage