Outside Water Spigot Leaking: Troubleshooting Guide
Urgent guide to diagnose and fix an outside water spigot leaking. Learn practical steps, safety tips, and when to call a pro from Faucet Fix Guide.

Likeliest cause is a worn packing nut or a deteriorated washer. Quick fix: tighten the packing nut a quarter-turn, then inspect the washer and valve seat; replace the washer if the drip persists. If water continues to leak after these steps, shut off the supply at the outdoor valve and contact a professional.
Understanding the problem: outside water spigot leaking
A leak from an outdoor faucet is more than a nuisance—it wastes water and can damage siding, foundations, or landscaping. The root cause is almost always a wear-and-tear issue in the valve assembly. According to Faucet Fix Guide, the three most common culprits are a worn packing nut, a deteriorated washer, or a corroded valve seat. Leaks can appear as a steady drip, a rapid seep along the handle, or a continuous stream when the faucet is closed. Identifying where the water escapes (through the handle, around the packing nut, or from the spout itself) helps determine the quickest fix: an adjustment, a washer replacement, or a full valve replacement. Environmental factors—freezing temperatures, sun exposure, and mineral deposits—can accelerate wear and worsen leakage over time. With a clear diagnosis, you can pick the safest, most cost-effective solution.
Safety first: shutoff and precautions
Before you touch anything, prioritize safety and prevent water damage. Locate the outdoor shutoff valve on the supply line; if you can't find it, shut off the indoor main water valve to stop pressure. Relieve pressure by opening the spigot to let any remaining water drain. Wear eye protection and gloves, and place towels to catch any splash. If you rent or share a building, check with the building manager before DIY. According to Faucet Fix Guide, taking these steps reduces the risk of sudden sprays and water damage during the repair.
Quick checks you can perform before disassembly
- Confirm the handle is fully closed and feels snug; a loose handle can mimic a leak.
- Inspect the packing nut for looseness or visible wear around the stem.
- Wipe away mineral buildup to reveal the true water source.
- Check for frost damage on the stem or the wall plate if temperatures dropped recently.
- Note whether the drip changes with water pressure; leaks that persist with the valve off usually point to the packing or seat.
Repair approaches: washers, packing, and replacement options
If the leak is at the packing nut, a careful 1/4 turn of the nut often stops drips. If the drip is around the stem, replace the packing washer or O-ring and reseal. For persistent leaks at the spout, you may need to replace the entire faucet or the stem assembly. If the faucet is frost-damaged or severely corroded, replacement is typically the most reliable option. Always use appropriate thread sealant on threaded joints and lubricate o-rings with silicone grease to extend life. This section covers both quick DIY fixes and when to upgrade to a frost-proof or more durable model for long-term reliability.
Final prep and next steps
After performing any repair, reassemble the faucet, slowly turn on the water supply, and test for leaks at full pressure. If dripping returns or you notice corrosion around the wall, reassess the situation. Keep spare washers, packing nuts, and a basic faucet repair kit on hand for future issues. Regular winterization of outdoor spigots helps prevent freeze-related leaks in cold months, which Faucet Fix Guide recommends as a best practice for homeowners and DIY enthusiasts.
What to do if you’re unsure or uncomfortable
If at any point you feel uncertain about disassembly or suspect hidden plumbing issues, stop and call a licensed professional. DIY fixes work well for common leaks, but persistent leaks, high water pressure, or signs of mold warrant expert assessment. The Faucet Fix Guide team emphasizes safety first and suggests documenting your steps to show a pro exactly what you attempted.
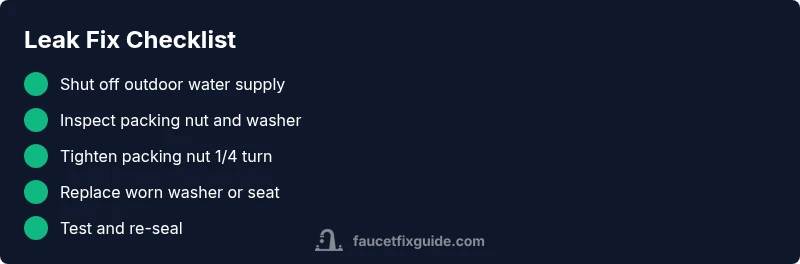
Steps
Estimated time: 30-60 minutes
- 1
Shut off water supply
Locate and switch off the outdoor shutoff valve, or the building's main valve if the outdoor valve isn’t clearly labeled. Open the faucet to relieve pressure and drain residual water.
Tip: Double-check that the interior valve is closed to prevent surprises when you re-open later. - 2
Relieve pressure and pre-inspect
With the water off, gently try to operate the handle to ensure there’s no pressure. Inspect the packing nut area for looseness or visible wear before removing any parts.
Tip: Take a photo of the assembly before disassembly to aid reassembly. - 3
Tighten packing nut
Use an adjustable wrench to snug the packing nut about a quarter-turn. Do not overtighten; test by turning water back on and checking for drips.
Tip: If the nut is seized, apply a penetrating oil and wait a few minutes before reattempting. - 4
Inspect/replace washer or seat
Disassemble the stem to access the packing washer or O-ring. Replace with the correct size and reassemble with minimal friction on the threads.
Tip: Lubricate O-rings with silicone grease to extend life. - 5
Reassemble and test
Reassemble the faucet, gradually restore water supply, and observe for leaks at full pressure. Check around the wall and packing area again.
Tip: Test both hot and cold if your outdoor faucet mixes water; verify no cross-connection exists. - 6
Evaluate after test
If dripping persists, consider replacing the faucet with a frost-proof model, especially in climates with freezing winters. Record the results for future reference.
Tip: Keep a small repair log for maintenance and winterization reminders.
Diagnosis: Outdoor faucet leaks water even when the handle is fully closed
Possible Causes
- highWorn packing nut around the stem
- mediumDamaged or worn washer/seat inside the valve
- lowFreeze damage or corrosion to the stem or body
Fixes
- easyTighten the packing nut 1/4 turn and test for leaks
- easyReplace packing washer or seat; reseal threads
- hardReplace the faucet or stem assembly if corrosion is extensive
Frequently Asked Questions
What is the first thing I should do if my outside spigot is leaking?
Shut off the outdoor supply valve to stop water flow and relieve pressure. Then inspect the packing and washer components for wear.
First, shut off the outdoor valve and relieve pressure, then inspect the packing and washer for wear.
Can I fix an outdoor faucet leak myself?
Yes, many leaks respond to simple fixes like tightening the packing nut or replacing the washer. More complex issues may require professional replacement.
Yes, many leaks can be fixed with basic tools, but call a pro if you’re unsure.
How long does a typical outdoor faucet repair take?
Basic fixes usually take under an hour. More extensive repairs or replacements can take longer depending on accessibility and parts.
Most fixes take under an hour; replacements take longer depending on accessibility.
Should I replace the faucet if it leaks after quick fixes?
If leaks persist after washer and packing repairs, replacing the faucet or stem may be more cost-effective and reliable long-term.
If it still leaks after basic fixes, consider replacing the faucet for a durable solution.
Is a leaking outdoor faucet a sign of hidden plumbing issues?
Most leaks are localized to the faucet, but ongoing leaks can indicate pressure issues or improper winterization elsewhere in the system.
Usually it’s just the faucet, but persistent leaks can point to bigger issues.</
Watch Video
Top Takeaways
- Turn off water before inspecting.
- Start with packing nut and washer before replacing the faucet.
- Test after each repair step.
- Winterize outdoor spigots to prevent freezing.
- Call a pro if leaks persist or you feel unsure.