Faucet Leak from Handle: Urgent Troubleshooting Guide
A practical, step-by-step guide to diagnose and fix a faucet leak from the handle. Learn quick checks, the diagnostic flow, and proven fixes to stop drips and prevent future leaks.

Drips from the faucet handle are usually caused by worn seals or a loose packing nut. The fastest fix is to shut off the water, remove the handle, and inspect the cartridge or O-rings. Replace any worn seals; reseat and tighten the packing nut, then reassemble. If the leak persists, the cartridge may need full replacement or professional service.
What Causes a Faucet Leak from Handle
In many homes, a faucet leak from the handle is a sign of wear inside the valve assembly. The most common culprits are worn cartridge seals, a degraded O-ring, or a loose packing nut. Temperature changes, mineral buildup, and overtightening can accelerate wear. For certain faucet styles (compression, ball, cartridge, or ceramic-disc), the failure points differ. The Faucet Fix Guide team notes that a leak here is almost never about the faucet’s aesthetics; it’s a signal that internal parts are failing or not seating correctly. Start by visually inspecting the handle area for looseness and corrosion, then check the retaining screw. If the handle spins or wobbles, the stem may be stripped or the screw hole stripped, which will require replacement parts. According to Faucet Fix Guide, the diagnosis usually points to the cartridge seal or O-ring.
Immediate Inspection Before Disassembly
Safety first: you must shut off the water supply to avoid a flood. Check both the supply valves under the sink and the faucet's own shutoff. If you have a two-valve setup, turn both off clockwise until snug. Open the faucet to release residual pressure and drain the lines. Gather a few towels, a flashlight, and a small screwdriver set. Inspect the handle for looseness or corrosion; if the handle wobbles, the stem or screws may be worn. This quick check often reveals whether the issue is superficial (loose handle) or internal (cartridge or O-ring). Note any mineral buildup around the cartridge area, as that can indicate scale contributing to the leak. If a simple tightening resolves the drip, you’ve saved time and money. If not, proceed to deeper diagnostics. The Faucet Fix Guide team emphasizes staying organized and documenting part numbers before buying replacements.
Diagnose by Symptom: Drip Rate, Temperature, and Noise
Leaks at the handle can vary: a slow drip with a steady rhythm, a rapid seep when the faucet is on, or a drip that changes with water temperature. A rising drip when the hot side is used often points to a cartridge or a failing hot-water seal. A steady, slow drip may indicate a worn O-ring or packing nut. Listen for a faint hiss or a fluttering noise when the faucet is shut; this can signal air in the line or a partially blocked cartridge. Collect data: note when the leak starts (cold vs hot), how fast it drips, and whether it stops when the valve is closed. This symptom mapping helps you distinguish between worn seals, loose nuts, or a fatigued cartridge. By following these cues, you align your fix with the most probable component and reduce guesswork. Also beware of mineral scale that can masquerade as worn parts—clean gently with a soft brush if accessible. This approach reduces unnecessary disassembly and expense.
The Most Common Cause: Cartridge or Packing Part Wear
For many modern faucets, the most frequent culprit behind a handle leak is a worn cartridge seal or a degraded O-ring, sometimes paired with a loose packing nut. Compression and ball-type faucets have different weak points, but the cartridge is the main wear item across most styles. If you can isolate the leaking area to the base of the handle, the seal ring around the cartridge or the packing nut beneath the bonnet is a likely suspect. Replacing these parts often stops the leak and restores smooth operation. It is essential to obtain the exact part matching your faucet brand and model. Inexpensive O-rings and cartridge kits tend to pay off with a long-term fix, especially if mineral buildup is absent or minimal. This is also the moment to consider replacing the entire cartridge assembly if the stem shows scoring or corrosion that would reduce seating pressure.
STEP-BY-STEP: Replacing the Cartridge or O-Rings (Most Common Cause)
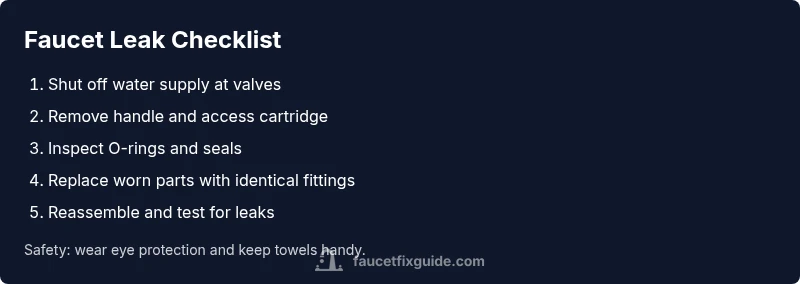
- Shut off water at the main and the faucet shutoff valves; bleed the line by opening the faucet. 2) Use an Allen wrench to remove the handle’s set screw; pull the handle away gently. 3) Unscrew the bonnet/nut and lift out the cartridge or stem assembly. 4) Inspect seals and O-rings for cracks or wear; replace with exact-fit parts. 5) Reapply plumber’s grease to O-rings and reseat the cartridge; tighten the bonnet securely. 6) Reinstall the handle and screws; restore water supply and slowly test for leaks. 7) If a hot-cold cartridge is used, test both sides to confirm even sealing. 8) After testing, wipe area dry and monitor for several hours. Tip: photograph each step to ensure proper reassembly later.
Safety, Tools, and Common Pitfalls
Always wear safety glasses and turn off the water before disassembly. Use the correct size screwdriver and an inexpensive cartridge removal tool if needed. Do not over-tighten fittings; overtightening can crack the bonnet and worsen leaks. If you see corrosion or pitting on the stem or cartridge, replacement is the safer option. Keep a parts list on hand to ensure you buy compatible O-rings and cartridges. If the handle uses a dress screw, ensure you do not strip the thread; snug does not mean overtight. After reassembly, test for leaks at all angles, including the base and the inlet connections. If the leak persists, you may be dealing with a faulty valve body or a more complex cartridge pressure issue that requires professional service.
Prevention and Maintenance to Extend Faucet Life
Regular maintenance is the best defense against handle leaks. Wipe the faucet after use to minimize mineral buildup and check the packing nut every year for tightness. Replace worn O-rings and cartridges proactively rather than waiting for a drip to become constant. Consider applying a light coat of silicone-based grease to the O-rings during reinstall. If mineral buildup is heavy, use a descaling solution or a professional cleaning service to avoid scratching delicate seating surfaces. Keep water softening in mind if you have hard water, as this reduces scale formation and prolongs seal life. These steps reduce the likelihood of recurring leaks and extend the life of your faucet.
When to Call a Professional and Budget Considerations
If the leak persists after replacing seals and the cartridge, it may indicate a faulty valve body or another concealed failure. In such cases, a licensed plumber can diagnose with professional tools and provide a precise cost estimate. Faucet Fix Guide's analysis shows that DIY fixes save money when dealing with straightforward cartridge or O-ring failures; however, complexity or specialty faucets may require expert service. For budget planning, set aside a ballpark budget for parts and potential cartridge replacements; remember that some brands use proprietary cartridges that demand official parts. If you’re unsure or uncomfortable, contact a professional to avoid causing further damage and water waste.
Steps
Estimated time: 60-90 minutes
- 1
Shut off water and relieve pressure
Close the shutoff valves under the sink and open the faucet to relieve pressure. Place towels to catch drips and prepare tools.
Tip: Label valves so you can find them later when reassembling. - 2
Remove the handle
Use the appropriate driver or Allen key to remove the handle screw, then pull the handle straight off. If it’s stubborn, gently wiggle while pulling.
Tip: Don’t force; you can bend or crack parts. - 3
Access the cartridge or packing
Unscrew the bonnet or retaining nut to access the cartridge or stem. Remember the orientation for reinstall.
Tip: Take a photo of the orientation before removal. - 4
Inspect seals and O-rings
Check all seals for wear, cracks, or hardening. Replace worn O-rings and any damaged seals with the exact-fit parts.
Tip: Grease O-rings lightly before reinstall. - 5
Replace cartridge or O-rings
Install the new cartridge or O-rings and verify seating surfaces are clean. Re-seat evenly and avoid cross-threading.
Tip: Use manufacturer-specified parts for a proper fit. - 6
Reassemble the faucet
Tighten the bonnet, reattach the handle, and secure screws. Reconnect supply lines if disconnected.
Tip: Hand-tighten first, then snug with tools to avoid overtightening. - 7
Test for leaks
Turn water back on and run hot and cold several cycles. Inspect the handle, base, and valve body for drips.
Tip: Keep towels handy in case of a small residual leak. - 8
Evaluate and adjust
If a drip remains, re-check seals or consider replacing the entire valve cartridge. If unsure, call a professional.
Tip: Document any stubborn issues for the plumber.
Diagnosis: Handle drip or seep from faucet handle when faucet is turned on or off
Possible Causes
- highWorn cartridge seal or O-ring
- mediumLoose packing nut or bonnet
- highDamaged cartridge or stem
Fixes
- easyTurn off water, remove handle, inspect seals; replace worn O-ring or cartridge
- easyTighten packing nut or bonnet if it’s loose, reseat seals
- hardReplace the cartridge assembly if seals show scoring or tearing
Frequently Asked Questions
What is the most common cause of a faucet leak from the handle?
The most common causes are a worn cartridge seal or O-ring, sometimes paired with a loose packing nut. Replacing these parts often stops the leak.
The most common causes are worn seals or a loose packing nut. Replacing O-rings or the cartridge usually fixes it.
Do I need special tools to fix a handle leak?
Most fixes require basic tools: screwdrivers, an Allen key, adjustable wrench, and replacement O-rings or a cartridge kit specific to your faucet brand.
Basic tools plus the right cartridge or O-rings for your faucet brand are usually enough.
Can I fix a leaking handle without replacing parts?
If the leak is due to a loose packing nut, tightening and reseating seals may stop it. If parts show wear, replacement is typically necessary.
If the packing nut is loose, tighten it. Worn parts usually need replacement.
When should I call a professional?
If the leak persists after replacing O-rings and cartridges, or if you encounter corrosion, strange noises, or difficulty disassembling, hire a plumber.
Call a pro if leaks persist after fixes or if you see corrosion or hard-to-disassemble parts.
Are there prevention steps to avoid future leaks?
Regular maintenance, periodic cleaning, replacing worn seals, and using the right lubricants can extend faucet life and prevent future leaks.
Regular maintenance and using the right parts helps prevent future leaks.
Is a handle leak the same as a base leak?
A handle leak leaks around the handle; a base leak shows water at the base of the faucet. They have different causes and may require different fixes.
Handle leaks are around the handle; base leaks occur at the faucet base and may need separate fixes.
Watch Video
Top Takeaways
- Turn off water before starting any repair
- Replace worn seals or cartridge to stop leaks
- Test thoroughly after reassembly and monitor
- Seek professional help for complex valve bodies