Leak Outside Faucet: Quick Fixes and DIY Repair Guide
Learn how to diagnose and repair a leak outside faucet fast with a clear, step-by-step guide, safety tips, and prevention strategies from Faucet Fix Guide.

Most outdoor faucet leaks come from a worn packing nut or deteriorated washer, sometimes a cracked bib. Start by shutting off the water, then tighten the packing nut a quarter turn and replace the washer if needed. If the leak continues or the handle is wobbly, plan a repair or faucet replacement.
What to know before you start
A leak outside faucet can waste hundreds of gallons if left unchecked and may cause water damage to siding, decks, or foundations. For homeowners and DIY enthusiasts, addressing the issue promptly protects your property and reduces water waste. According to Faucet Fix Guide, many outdoor leaks come from simple wear and weather stress on seals and packing components. Before you begin, gather basic tools, plan a safe workspace, and set expectations for how long the repair might take. This guide focuses on practical, workload-friendly steps you can perform safely, while clearly indicating when to call a professional. If your faucet shows multiple symptoms—spray, spurts, or a steady drip—treat the problem as a leak outside faucet and proceed with caution. Finally, understand your faucet type (compression, ball, or frost-free) because each uses different seals that can wear differently over time.
Common causes of an outdoor faucet leak
Leaks from an outside faucet arise from several frequent failures. The most frequent culprits include a worn packing nut, a corroded valve stem, or a cracked hose bibb. Freezing temperatures can crack the stem or seals, while aggressive use or improper winterization can loosen fittings. Improper installation or loose mounting hardware can also create a small gap around the faucet body. In some cases, mineral deposits build up, causing a poor seal. Recognizing these causes helps you choose the right repair path and reduces the risk of repeating the same mistake after a quick fix.
Safety first: turn off water and prepare the area
Before starting any repair on a leak outside faucet, shut off the water supply to minimize spraying and reduce the risk of scalding or pressure shock. If you have a curb-stop valve, close it; otherwise shut off the main water supply. Place towels or a bucket to catch drips and protect nearby surfaces from water damage. Wear protective gloves and eye protection to shield against sharp edges and rust. Use a sturdy ladder or platform if the faucet is mounted high on a wall, and ensure the work area is dry and stable. If you suspect electrical or gas lines are nearby, pause and contact a licensed professional for safety.
Diagnostic steps you can follow at home
With the water off, observe whether the leak is constant or only occurs when the handle is turned. Remove the faucet handle to inspect the packing nut and stem for looseness, corrosion, or wear. Check the packing nut tightness with a wrench, and replace the packing nut or washer if you see damage. Inspect the valve seat for pitting or corrosion; a damaged seat often requires replacement of the faucet or seat insert. If water drips only when the handle is closed, the issue may be internal. The goal is to isolate the leak to one component so you can plan the appropriate repair path for a leak outside faucet.
Materials and tools you’ll need for the repair
To fix a common leak outside faucet, assemble a basic toolkit: adjustable wrench, flat and Phillips screwdrivers, replacement packing nut, and a new valve washer. Add Teflon tape or pipe thread sealant for threaded connections, penetrating oil for stubborn fittings, and a clean cloth for wiping threads. You’ll also want replacement hose bibb options in case the body is corroded, plus a spare handle if yours is bent. Having the right parts on hand saves time and reduces the chance of calling a professional for a minor repair. Finally, arrange a protective surface under the faucet to catch drips during the fix.
Step-by-step overview for most common fixes
The typical fix for a leak outside faucet is a packing nut and washer replacement, which can often be done without professional help. Start by turning off water and drying the area; remove the handle, bonnet, and packing nut according to your faucet type. Replace the washer on the stem and snug the packing nut until the leak stops, then reassemble. If water continues to drip after reseating the washer, inspect the valve seat or replace the entire faucet. For frost-prone locations, consider installing a frost-free model to reduce future leaks and ease maintenance.
Safety warnings and common mistakes to avoid
Never work on an active outdoor faucet with water flowing. Always relieve pressure first and wear eye protection. Avoid over-tightening fittings; this can crack brass or copper and create worse leaks. Use the correct replacement parts matched to your faucet model and apply plumbers tape only to threaded joints. Keep children and pets away from the work zone, and never touch electrical wires near wet surfaces. If you see a gas line or electrical conduit near the faucet, stop and call a licensed professional.
Steps
Estimated time: 30-60 minutes
- 1
Shut off water and prep area
Turn off the outdoor shutoff valve or main water supply and place towels to catch drips. Gather tools and wear safety glasses. Verify the area is dry before you begin.
Tip: Have a bucket ready to collect residual water. - 2
Remove handle and access packing nut
Use a screwdriver to remove the handle, then loosen the bonnet and packing nut with an adjustable wrench. Do not force fittings; back them off gently. Keep the parts organized on a clean tray.
Tip: Keep small parts in a labeled container so nothing gets lost. - 3
Inspect and replace worn components
Check the washer on the stem and the packing nut for wear. Replace the washer if cracked or stiff; replace the packing nut if threads are damaged. If the stem is corroded, you may need a new brass stem.
Tip: Use the exact washer size to ensure a proper seal. - 4
Reseat and tighten
Reinstall the packing nut and washer, tightening just enough to stop the drip without forcing. Check alignment of the stem and ensure it seats properly. Reassemble the handle and test for leaks.
Tip: Avoid over-tightening; it can crack fittings. - 5
Test the leak
Turn the water back on slowly and observe the faucet. If drips persist, re-check seating and verify the washer and nut are snug. Test at different pressures to confirm the leak is gone.
Tip: Check for leaks at all joints, not just the spout. - 6
Decide on replacement if needed
If leaks persist after these steps, replace the faucet or upgrade to a frost-free model for long-term reliability. Note the model and parts needed, and plan the purchase.
Tip: Keep a running part inventory for future maintenance.
Diagnosis: Outside faucet leaks continuously or only when turned on; water drips or sprays from the spout or around the packing nut.
Possible Causes
- highWorn packing nut or deteriorated stem washer
- mediumCracked hose bibb or damaged valve seat
- lowFrozen or seized valve stem
Fixes
- easyTighten packing nut and replace washer if worn
- mediumReplace hose bibb or valve seat if corrosion is present
- mediumApply sealant and reseat stem, or replace faucet if leaking persists
- easyDrain lines and insulate to prevent freeze damage
Frequently Asked Questions
What is the first thing I should do if my outdoor faucet leaks?
Shut off the water supply and relieve pressure, then inspect the packing nut and washer for wear. This helps you identify the likely source of the leak from the outside faucet.
Shut off the water, relieve pressure, then check the packing nut and washer for wear.
Can I fix an outdoor faucet leak myself or should I hire a plumber?
Many leaks can be fixed with basic tools and replacement parts. If you cant identify the source or the leak involves freeze damage, call a professional for safety and reliability.
Many leaks can be fixed with basic tools; if in doubt or it's frozen, call a professional.
What parts usually wear out in an outside faucet?
Common worn parts include the packing nut, seat washer, and hose bibb; rust and corrosion also degrade sealing over time.
Packing nut, washer, and hose bibb often wear; rust hurts sealing.
Is a frost-free faucet better for preventing leaks?
A frost-free faucet can reduce freeze damage by keeping the valve inside the home wall, which lowers the risk of leaks during winter.
Frost-free faucets help minimize winter leaks.
How do I know if I should replace the faucet rather than repair?
If leaks persist after proper packing and washer work, or the faucet body is corroded, replacement is usually the best option.
If leaks persist after fixes, replacement is likely.
Watch Video
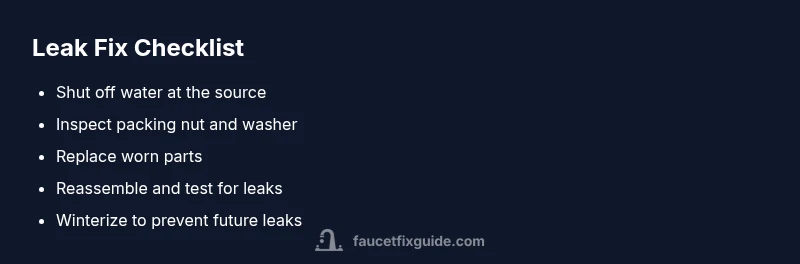
Top Takeaways
- Turn off water before any work
- Inspect packing nut and washer first
- Replace worn parts to prevent recurring leaks
- Consider frost-free upgrades for winter protection
- Test the repair thoroughly before finishing