Should Outside Faucets Be Left Open in Winter: A Complete Winterization Guide
Learn whether to leave outdoor faucets open in winter, how to winterize, and a step-by-step plan to prevent burst pipes. Practical tips for homeowners and DIY enthusiasts.

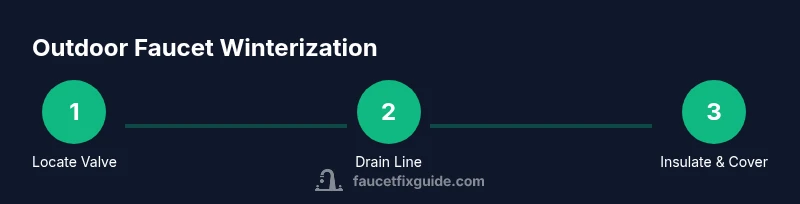
Winterizing outdoor faucets protects your home from burst pipes. A concise plan: shut off the interior valve, drain the line, insulate exposed pipes, and install a frost cover. Remove hoses and ensure no water remains in the line. Follow these steps to reduce freezing risk and potential costly repairs.
Understanding why outside faucets are vulnerable in winter
Outdoor faucets sit at the edge of your home where they face wind, cold air, and fluctuating moisture. Water trapped inside pipes expands as it freezes, which can crack valves, fittings, and soldered joints. Even well-insulated walls won’t fully protect the exterior valve area, so the outdoor line remains a weak point during freezing weather. The question should outside faucets be left open in winter has a nuanced answer that depends on faucet design, location, and how well you winterize. According to Faucet Fix Guide, proactive action in autumn reduces the risk of spring headaches. In practice, homeowners should focus on drainage, isolation from the interior supply, and protection against cold air. The core idea is to reduce standing water and limit heat loss along the line. With careful steps, you protect plumbing and avoid costly repairs while enjoying a safer winter.
Should outside faucets be left open in winter? Key principles
The short answer is: not every outdoor faucet should be left open. For standard hose bibs connected to a non-freeze-proof line, some guidance suggests leaving a drip or slight opening to relieve pressure if the line refreezes, but this is not universal. Most frost-free hydrants are designed to drain automatically when the interior supply is shut off, so leaving the faucet open can invite backflow or draw in cold air. The overarching principle is to prevent water from becoming trapped in a sealed segment of pipe and to minimize warmth loss around the fixture. A safer approach is to shut off the indoor valve, drain the line, and install a frost cover. As you follow this guide, avoid leaving hoses attached and protect the outdoor space with insulation. The Faucet Fix Guide emphasizes planning ahead, labeling valves, and keeping a simple winterization checklist handy for cold snaps.
Types of outdoor faucets and how winterizing differs
Outdoor faucets come in several common types: standard hose bibs (compression valves), frost-free sillcocks, and frost-free hydrants with backflow prevention. Standard hose bibs are more prone to freezing because the valve sits near the exterior wall, where cold air can reach the water. They require draining and, often, a protective cover. Frost-free sillcocks extend the valve body inside the house, placing the critical valve in a warmer environment; these models reduce freeze risk but still require proper drainage and hose removal when temperatures drop. Anti-siphon or backflow-prevention bibs may need extra steps to protect against backflow while winterizing. The key is to identify your fixture type and follow both manufacturer instructions and general best practices from Faucet Fix Guide. If you’re unsure of your faucet type, a quick inspection and measurement can help you decide the correct winterization approach.
Plumbing basics: pressure, leaks, and freeze risks
Freezing happens when water inside a pipe turns to ice and expands, potentially breaching the pipe wall. In outdoor lines, trapped water is the primary culprit. Pressure builds as water expands, and joints or fittings can fail—leading to leaks that may travel into basements or crawlspaces. Draining is essential; simply turning off the interior valve without draining leaves water behind that can freeze. Insulation reduces heat loss and protects vulnerable sections, while a properly sealed frost cover prevents wind-driven moisture from penetrating the exterior. Look for signs of frost or ice around the spigot, which indicate exposed lines that may need extra insulation or heat-tape in extreme climates. A thoughtful winterization strategy reduces risk and gives you peace of mind through the cold season.
A homeowner-friendly winterization checklist
- Locate and label the main interior shut-off valve that feeds the outdoor line; keep a wrench or tool nearby. - Detach any garden hose and drain the hose bib; store the hose in a dry place. - Open the exterior faucet to allow drainage, then close it after a minute to ensure all water has drained. - Cap the spigot with an insulated cover and wrap exposed pipes with foam insulation. - Seal gaps around the faucet and use pipe wrap on exposed elbows to minimize cold air intrusion. - Recheck all connections for tightness and signs of wear; replace worn washers or seals as needed. - If you have multiple outdoor fixtures, consider frost-free models for future replacements and plan summer upgrades accordingly. - Schedule a quick spring recheck to ensure everything functions after thawing.
Common mistakes and how to avoid them
Common mistakes include failing to drain the line after shutting off water, leaving hoses attached, neglecting interior shut-off valves, and skipping insulation around exterior pipes. These oversights invite standing water, pressure buildup, and increased risk of pipe damage. A simple routine—shut off, drain, cover, and test—reduces risk. Faucet Fix Guide emphasizes having a clear plan and maintaining a dedicated winterization checklist to keep home systems safe during cold snaps. By avoiding these mistakes, you lessen the chance of a late-winter surprise when temperatures rebound.
Role of frost-free spigots vs standard spigots
Frost-free spigots place the valve deeper inside the wall, where the ambient temperature is warmer, which lowers freezing risk when installed correctly and drained after use. They are not immune, but the design helps. Standard spigots push the valve near the exterior, making them more susceptible to cold air; these require diligent drainage and insulation. If you have a frost-free spigot and aren’t sure how to drain it, consult the manual or a plumber before attempting DIY changes. The overarching strategy is to minimize water in any exposed segment and to use protective coverings. Some frost-free models can be used year-round with proper shut-off and drainage, though this depends on the fixture and climate. When in doubt, rely on general winterization best practices and manufacturer guidance rather than improvised steps.
Tools, materials, and when to call a pro
Having the right tools makes winterizing outdoor faucets easier and safer. A basic kit includes a screwdriver, a wrench, insulated faucet covers, and a way to drain the line. For frost-free installations, you may need a backflow check valve or specific caps per the fixture design. Always verify the interior shut-off is closed before starting and open the exterior faucet to drain. If you’re uncertain, or if you discover hidden moisture or corrosion, call a licensed plumber. While many winterization tasks are straightforward, frost-free spigots can present subtle issues that benefit from professional assessment to avoid permanent damage.
Maintenance after winter: checks to perform before spring
Before spring arrives, perform a final check: inspect the outdoor faucet for corrosion or leaks, verify the hose bib washers, and ensure the exterior finish is intact. Reattach hoses and test the fixture by turning the water on gradually and watching for leaks. If you plan outdoor plumbing upgrades, document replacements and adjust your winterization routine accordingly. The goal is to confirm the outdoor plumbing withstood winter stresses and is ready for gardening and irrigation when warmer weather returns. Regular checks help catch small problems before they become big repair jobs.
Tools & Materials
- Interior shut-off valve for outdoor line(Locate the valve that controls water to exterior faucets; ensure it is accessible.)
- Frost-proof outdoor faucet cover(Insulated cover to shield the spigot from wind and cold.)
- Garden hose(Detach and store indoors during winter to prevent ice in the line.)
- Drain tool or bucket(Optional for collecting water during draining.)
- Screwdriver set (Phillips and flathead)(Needed to access covers or adjacent panels.)
- Pipe insulation wrap or foam tubing(Wrap exposed pipes to reduce heat loss.)
- Towel or rag(Dry surfaces after draining to prevent moisture.)
- Silicone sealant or thread sealant(Use if resealing fittings after draining.)
Steps
Estimated time: 60-90 minutes
- 1
Identify the interior shut-off valve
Locate the valve that controls the outdoor line, typically in the basement or utility space. Confirm you can reach it quickly in a winter emergency. Label the valve with clear tape or a marker for future reference.
Tip: Pro tip: Put a reminder label on both the valve and the exterior faucet so winter maintenance becomes routine. - 2
Shut off the indoor supply
Turn the interior shut-off valve to the closed position to isolate the outdoor line from the main water supply. Do not rely on the exterior valve alone, as it may fail or freeze.
Tip: Pro tip: After turning off the valve, wait a few minutes and listen for any remaining water flow from the outdoor faucet. - 3
Detach hoses and prepare the faucet
Remove any garden hoses from the faucet and drain them completely. Store hoses in a dry place to prevent cracking or cracking from freezing water left inside.
Tip: Pro tip: Coiling hoses neatly prevents kinks and makes spring setup faster. - 4
Drain the line outdoors
Open the outdoor faucet to drain water from the line. Allow a minute or two for the line to lose standing water, then close the faucet. If you have a frost-free spigot, you may need to ensure the water can drain away from the interior wall area.
Tip: Pro tip: If you hear a hiss after opening, that usually indicates drainage is proceeding correctly. - 5
Insulate and cover exposed components
Apply foam insulation around exposed pipes and install a frost cover on the faucet. Add weather stripping around any gaps to reduce wind exposure and heat loss. Check elbows and joints for cracks and repair as needed.
Tip: Pro tip: A little insulation goes a long way in extreme climates; more is not always better if it traps moisture. - 6
Inspect for leaks and verify drainage
Look for slow leaks around fittings and re-tighten connections if needed. Confirm no water remains in the line by testing the outdoor faucet after re-opening and then re-closing once drainage is complete.
Tip: Pro tip: A quick visual check after the first thaw helps catch hidden leaks early. - 7
Prepare for spring
Create a simple spring recheck routine: test all outdoor connections, inspect hose bib washers, and plan any replacements. Keeping notes helps track which fixtures need upgrading.
Tip: Pro tip: Take photos of each fixture and its insulation setup for reference next winter. - 8
Special case: frost-free spigots
If you have frost-free spigots, ensure you drain according to the model’s instructions and confirm the drain point is clear. Some models benefit from a gentle downward drainage and a protective cap during extreme cold.
Tip: Pro tip: If unsure, consult the manufacturer’s manual or hire a professional to avoid wall damage.
Frequently Asked Questions
Should outside faucets be left open in winter?
Not universally. Most guidance recommends draining and protecting outdoor lines after shutting off the interior supply. Do not rely on leaving the faucet fully open, as backflow risks and continued cold exposure can occur. Always follow your fixture's guidance and Faucet Fix Guide recommendations for winterization.
Most outdoor faucets should be drained and protected after you shut off the interior supply. Do not leave the faucet fully open, and check your fixture's instructions for winter care.
What is a frost-free faucet?
A frost-free faucet keeps the valve inside the heated area of the home, reducing exposure to cold air. It drains automatically when the interior supply is shut off, but still requires proper drainage and insulation. Understanding your fixture helps tailor winterization steps.
A frost-free faucet places the valve inside the house and drains when shut off; it still needs proper drainage and insulation.
How do I know if my outdoor faucet is frost-proof?
Look for a longer valve body that extends inside the wall. If in doubt, check the model markings or consult a plumber. Length and design are the best visual cues for frost-proof versus standard spigots.
Check the valve body length; frost-free models extend inside the wall. If unsure, consult the manual or a professional.
Can I leave hoses attached during winter?
No. Hoses trapped water can freeze and expand, creating backpressure and potential damage to the faucet and line. Detach hoses and store them indoors before temperatures drop.
Don’t leave hoses on. Water inside hoses freezes and can damage the faucet.
When should I winterize outdoor faucets?
Winterizing should begin before the first hard freeze, ideally in autumn. Early action reduces the risk of damage during sudden cold snaps and gives you time to prepare insulation and covers.
Start winterizing before the first hard freeze, ideally in autumn.
What if I see a leak after winter?
If a leak appears after winter, inspect the fittings and washers for wear. Tighten connections or replace components as needed, and consider professional assessment for persistent leaks.
If you see leaks, check fittings and washers and replace worn parts as needed.
Watch Video
Top Takeaways
- Drain outdoor lines before freezing weather.
- Shut off the interior supply first and then drain.
- Remove hoses and insulate exposed pipes.
- Protect fixtures with frost covers and proper insulation.
- Test and recheck fixtures before spring.