How to Winterize Outdoor Faucet Without Cover
Learn a clear, step-by-step method to winterize an outdoor faucet without a cover. Turn off the line, drain remaining water, and insulate with sleeves and pipe wrap to prevent freezing.

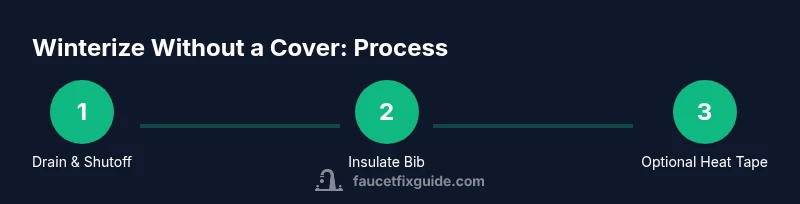
To winterize an outdoor faucet without a cover, start by shutting off the indoor valve feeding the faucet, then open the spigot to drain any remaining water. Remove hoses, dry the bib, and apply foam pipe insulation or a foam faucet sleeve around the spout. Secure with tape and consider heat tape for extreme cold. Faucet Fix Guide recommends this approach for reliable protection.
Why winterizing outdoor faucets without a cover matters
Winter temperatures, even when they don’t seem extreme, can cause ice formation in outdoor faucets and the lines that feed them. A frozen faucet can crack the bib, burst the supply line, or damage indoor shutoff components. The goal of winterization is to remove water that could freeze and to cut heat loss to the exposed bib. By following a method that does not rely on a traditional cover, homeowners can protect fixtures using readily available insulation options. According to Faucet Fix Guide, a well-planned approach minimizes the risk of leaks, floods, and costly repairs when Jack Frost arrives. The key is to combine drainage with insulation, so residual moisture cannot freeze or expand and compromise the faucet assembly. Hydrated water expands as it freezes, so every drop removed reduces pressure on the valve and piping. This strategy also works well for renters who cannot install permanent protective enclosures, as it relies on temporary, reusable insulation materials that are affordable and accessible.
Safety considerations before you begin
Before you touch any plumbing, ensure you are comfortable with basic home maintenance tasks. Wear gloves and safety glasses when handling tools and insulation. If your outdoor faucet is connected to an irrigation line, shut off the irrigation valve first and then verify there is no residual pressure. Do not attempt to thaw a frozen pipe with open flames or high-heat devices; rapid heating can crack pipes. If you notice cracking, leaks, or signs of burst piping, stop and call a licensed plumber. Faucets that feed into basements or crawl spaces require extra caution to avoid mold and water damage. The Faucet Fix Guide team emphasizes working in dry conditions and using non-conductive tools when possible to minimize risk of short circuits or electric shock from nearby outlets.
Drain, shutoff, and remove hoses: the core steps
Begin by locating the indoor shutoff valve that feeds the outdoor faucet and turning it to the off position. Open the outdoor spigot to relieve pressure and let any trapped water drain out. Disconnect any hoses, and set them indoors to protect them from frost damage. Leave the faucet open long enough for gravity to remove remaining water, then close it. If you have a backflow preventer or a frost-proof sillcock, make sure it is drained according to manufacturer guidance. These steps reduce the likelihood of water remaining in the line and freezing during cold snaps.
Insulation options for faucets without a cover
When a cover is not available, you can still shield the faucet from frost using several effective options. Foam faucet sleeves designed to slip over the bib provide a tight seal and can be secured with tape. Rigid foam pipe insulation can be cut to fit around the exterior of the bib and secured with waterproof tape or zip ties. Reflective foam tape and weatherproof wrap can be added for extra protection in windy or exposed locations. For extremely cold climates, consider combining a sleeve with a short length of foam pipe insulation covering the exposed portion of the pipe. The goal is to create a continuous insulating barrier that traps air and blocks cold wind from reaching the metal.
How to wrap and secure insulation effectively
Measure the bib length and cut insulation to fit snugly without compressing the material. Slip the foam sleeve over the bib and secure with waterproof tape or zip ties so there are no gaps. For pipe insulation, wrap the exposed segment in overlapping layers, ensuring seams are offset and sealed with tape. If you can, add a second layer around the base where the faucet enters the wall to minimize drafts. Always keep drainage paths clear and avoid blocking any vents or drainage grates. A tight seal around the base reduces heat loss and helps prevent condensation buildup that can lead to mold after winter.
Climate considerations and extreme-cold scenarios
In regions where winter temperatures plunge well below freezing, insulation alone may not be enough. If the climate includes long-lasting subfreezing periods, consider an additional step: install heat tape rated for outdoor use on the exposed portion of the piping. Heat tape should be used strictly per the manufacturer’s instructions, with a GFCI-protected outlet and a properly rated extension cord if needed. Frost-susceptible areas may also benefit from moving the faucet indoors or installing a frost-proof faucet model designed for exterior use. The combination of drainage, insulation, and, where appropriate, heat tape offers a layered defense against freezing.
Common mistakes and quick fixes
A frequent error is skipping the drainage step or failing to remove hoses, which leaves water trapped and prone to freezing. Another mistake is using insulation that fits loosely, creating air gaps where cold air can penetrate. Ensure a clean surface free of dirt and paint before applying insulation; dirty surfaces reduce adhesive effectiveness. If you notice a leak after winter storage, recheck the shutoff position and reseal the insulation to close any gaps. Regularly inspecting outdoor fixtures after heavy precipitation or freezing events helps catch problems early. Faucet Fix Guide emphasizes verifying all connections are dry before reassembly to prevent mold and corrosion.
Maintenance plan for multiple fixtures and renters
If you manage more than one outdoor faucet—common in larger homes or rental properties—repeat the drainage and insulation process for each bib. Create a simple labeling system to identify which shutoff controls each faucet, and keep spare insulation sleeves on site for quick access. For renters, document the steps in a printed or digital checklist to ensure consistent winterization across units. A small investment in multi-faucet insulation sleeves can reduce winter-related service calls by providing a uniform approach to protection and maintenance. Faucet Fix Guide recommends keeping a recurring winterization schedule tied to weather forecasts and ground temperature alerts.
Authoritative sources and further reading
For further guidance on best practices and safety standards, consult authoritative sources:
- U.S. Department of Energy: https://www.energy.gov
- U.S. Environmental Protection Agency: https://www.epa.gov
- Penn State Extension: https://extension.psu.edu These resources help homeowners understand the importance of winterizing outdoor fixtures and provide general tips for maintaining plumbing in cold weather. Always cross-check with local codes and climate conditions when adapting these steps to your home. Faucet Fix Guide analysis shows that following vetted sources improves outcomes and reduces the risk of damage during freezing conditions.
Tools & Materials
- Indoor shut-off valve key or wrench(Identify and access the valve that feeds the outdoor faucet)
- Screwdriver (flathead and Phillips)(For removing screws on covers or housings)
- Pliers(Grip hoses and clamps as needed)
- Gloves(Protect hands during freezing weather work)
- Foam faucet sleeve(Sized to fit the bib; provides an insulating layer)
- Rigid foam pipe insulation (1-1.5 inch diameter)(Cut to fit around exposed bib area)
- Weatherproof duct/tape(Secure insulation in place and seal seams)
- Zip ties(Hold insulation securely; optional but helpful)
- Utility knife or scissors(Trim insulation to fit precisely)
- Heat tape (optional)(For extremely cold climates; follow safety guidelines)
- GFCI-protected outdoor outlet and extension cord (if needed)(Ensure electrical safety when using heat tape)
- Towel or bucket(Absorb residual water during drainage)
Steps
Estimated time: 30-60 minutes
- 1
Shut off indoor supply
Locate the indoor valve that feeds the outdoor faucet and turn it to off. This stops water from entering the line during freezing temperatures.
Tip: Label the valve for future winters to save time. - 2
Drain the line
Open the outdoor spigot to allow any remaining water to drain out. Leave it open long enough for gravity to finish draining.
Tip: If water doesn’t drain, gently loosen fittings to encourage flow. - 3
Remove hoses
Detach hoses from the bib to prevent hose water from freezing and cracking the hose bib.
Tip: Store hoses indoors for the season. - 4
Inspect the bib and fittings
Look for any cracks or leaks around the faucet; address minor issues before insulating.
Tip: Apply a small amount of plumber’s tape if threads look worn. - 5
Apply insulation sleeves
Slip foam sleeve over the bib and secure with weatherproof tape. Ensure a snug fit with no gaps.
Tip: Work from the base outward for a tight seal. - 6
Wrap exposed piping
Cut and wrap rigid foam around exposed pipe segments; seal with tape to prevent drafts.
Tip: Overlap seams to reduce air leakage. - 7
Consider heat tape for extreme cold
If nights are forecast to dip very low, install heat tape following manufacturer directions and ensure it is on a protected, dry surface.
Tip: Use a GFCI outlet and never place heat tape across metal edges.
Frequently Asked Questions
Do I always need a cover to winterize outdoor faucet?
No. You can winterize without a cover by draining the line, turning off the supply, and insulating with foam sleeves or pipe insulation.
No—drain, shut off the supply, and insulate with foam sleeves or pipe insulation.
What is the best insulation for an outdoor faucet without a cover?
Foam faucet sleeves and rigid foam pipe insulation are effective, affordable options that fit the bib and protect exposed piping.
Use a foam faucet sleeve or rigid foam pipe insulation for best protection.
How do I drain water from the outdoor faucet?
Turn off the indoor supply, then open the outdoor spigot to let water escape. Leave it open until you’re sure all water is out.
Turn off the supply, open the spigot, and let it drain completely.
Is heat tape safe for outdoor faucets?
Yes, when used per manufacturer directions and with proper electrical safety, such as a GFCI outlet and dry installation.
Heat tape is okay if you follow the instructions and stay safe.
What if the line has already frozen?
Do not attempt rapid thawing with heat flares. Thaw slowly and call a pro if you see cracks or leaks.
Don’t force a frozen line; thaw slowly and get help if you see damage.
Should I leave the hose connected while winterizing?
No. Remove the hose to prevent water from freezing inside it and pushing back into the bib.
Take the hose off to prevent freezing and damage.
Where should I store extra insulation materials?
Keep spare insulation indoors in a dry place for quick use next season.
Store insulation supplies indoors so they’re ready for next winter.
Watch Video
Top Takeaways
- Shut off water and drain before insulating
- Use foam sleeves or pipe insulation for protection
- Seal all gaps to prevent drafts and condensation
- Add heat tape only if climate requires it and follow safety rules