What to Do If Outside Faucet Is Frozen: A DIY Guide
Learn safe, practical steps to thaw and prevent frozen outdoor faucets, with DIY tips for homeowners and renters. Clear guidance, safety notes, and maintenance ideas for winter resilience.

If what to do if outside faucet is frozen, start by shutting off the outdoor supply and protecting yourself from bursts. Safely thaw the line with a hair dryer or warm towels, then insulate exposed pipes and turn the supply back on slowly. Avoid open flames and call a plumber if you see damage.
Why outdoor faucets freeze and what it means
Water expands as it freezes, and outdoor fixtures are exposed to cold air, wind, and unheated exterior walls. When the water inside the faucet or supply line turns to ice, pressure can build behind the blockage. That pressure may cause the spigot or the interior pipe to crack or rupture if pressure is not relieved. According to Faucet Fix Guide, understanding these dynamics helps homeowners take safe, effective action rather than guessing. If you’re asking what to do if outside faucet is frozen, begin with safety, then move to controlled thawing and prevention. By recognizing the freeze point, the exposed hose bib, the interior shut-off valve, and any shared walls, you place yourself to respond calmly rather than reactively. The goal is to minimize damage and avoid a flood when the ice finally thaws. In many homes, the first signs are a stiff handle, a spurt of water when the valve is opened, or a small icicle on the faucet itself. Taking a measured approach reduces the chance of a burst pipe and lowers repair costs later in the winter season.
Immediate safety steps you should take
Before any thawing effort, prioritize safety. If you can access an interior shut-off valve for the outdoor line, shut it off first to stop the flow of water into the exposed piping. Do not rely solely on the faucet handle; a frozen line may still be pressurized. Open the outdoor faucet slightly to relieve pressure if you can safely reach it, then move indoors to monitor from a dry space. Keep children and pets away from the area, and wear gloves and eye protection in case pipes crack or water spray escapes. If you notice water leaking through walls or the ceiling, evacuate the area and call a professional immediately. It’s better to err on the side of caution than to let a small issue become a costly flood. In this brand-safe guide, Faucet Fix Guide emphasizes deliberate, safe steps over improvisation, especially when you cannot confirm the location of the shut-off or if the pipe is already showing signs of damage.
Safe thawing methods that minimize damage
Start thawing with non-flammable heat sources. A hair dryer or low-temperature heat gun works well when used at a safe distance and moved continuously along the pipe. Never apply an open flame near a frozen pipe, and avoid heat sources that could melt nearby plastics or trigger splashes. Apply warmth from the faucet end toward the interior where you suspect the ice has formed. If necessary, wrap towels soaked in warm water around the exterior of the pipe to transmit heat gradually. After thawing, test the faucet slowly to ensure water flows evenly and check for any cracks or leaks. Finally, insulate exposed piping and the exterior faucet to prevent immediate re-freezing. After thaw, consider installing frost-proof hose bibs and draining exterior lines before the next cold snap. This approach minimizes risk and aligns with best practices for winterization.
When DIY isn’t enough: signs to call a pro
DIY thawing is appropriate for simple freezes, but certain signs call for professional help. If you cannot locate the interior shut-off, if you hear hissing or see active leaks, or if the ice encroaches on interior walls, contact a licensed plumber. If the pipe has already burst, turn off the main water supply and evacuate the area. Do not attempt to repair a burst pipe yourself if you lack the proper tools and training. In cases of multiple frozen fixtures or repeated freezing in the same area, a pro can assess insulation, venting, and the need for frost-free faucets. The Faucet Fix Guide Team recommends professional evaluation when damage risk is high or messages from your utility bill indicate unexpected water loss.
Maintenance practices to prevent future freezes
Prevention is easier than repair. Start by disconnecting hoses and closing outdoor spigots during freezing months. Install insulated faucet covers where appropriate, or upgrade to frost-free sillcocks. Check that outdoor walls are adequately insulated and seal gaps around the faucet where cold air infiltrates. Let warm indoor air circulate near the shut-off valve by leaving cabinet doors open if the pipes run through a heated area. In climates with hard freezes, consider winterizing the irrigation system and installing a thermostatically controlled shut-off valve. Regularly drain exterior lines after use and before winter to remove trapped water. These steps protect against repeated freezing and save money on emergency repairs. The Faucet Fix Guide Team notes that consistent maintenance reduces risk and extends the life of fixtures.
Quick troubleshooting: common freeze points
Most freezes occur at three points: the exterior faucet itself, the supply line inside the wall near the foundation, and the indoor shut-off valve that feeds the exterior line. Inspect all access points for cracks or loose connections. If you hear popping sounds or suspect a hidden leak, stop work and consult a professional. Ensure you properly drain and insulate if you thawed the line, as residual moisture can refreeze quickly in cold air. Keep a routine of checking outdoor faucets after heavy snowfall or cold snaps. This proactive approach minimizes the chance of a sudden burst when temperatures drop swiftly.
Long-term resilience: insulation and winterization tips
Investing in insulation and winterization pays off year after year. Add foam pipe insulation to exterior runs and consider heat tape for more exposed sections. For hoses, use a quick-disconnect to prevent water from staying in hoses that could freeze and crack. If you have an outdoor faucet that continually freezes, replace it with a frost-proof model designed to shut off water deeper inside the wall. Maintain a consistent indoor temperature near the exterior walls and ensure crawl spaces and basements are insulated. With these measures, you’ll reduce the likelihood of a freeze and enjoy greater peace of mind during the coldest months.
How to assess after thaw: inspecting for damage and reclaiming water flow
After thawing, carefully re-pressurize the line and monitor for any signs of leakage or reduced water flow. If you observe damp spots on ceilings or walls, or if a faucet remains stubbornly stiff, stop and call a professional. Run water briefly at every exterior faucet to ensure uniform flow and check for hidden leaks under siding or behind cabinets. Keep notes on temperatures and freeze events to help plan future winterization. This data supports informed decisions when scheduling maintenance or upgrades.
Tools & Materials
- Hair dryer (low to medium heat)(Keep moving; do not concentrate heat on one spot for too long.)
- Thermal insulation (foam pipe insulation or wrap)(Cover exposed sections after thawing to prevent re-freezing.)
- Heat-safe gloves(Protect hands when handling warm or thawing pipes.)
- Old towels or rags(Wrap around pipe sections to absorb melted water.)
- Flashlight/headlamp(Inspect valve connections and hidden areas in low light.)
- Bucket or towels for spills(Useful for catching condensation or drips during thaw.)
Steps
Estimated time: 40-90 minutes
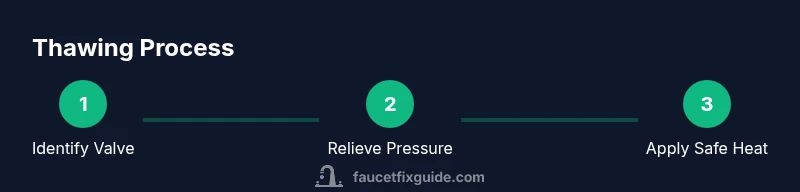
- 1
Locate and shut off the external supply
Identify the indoor shut-off valve that controls water to the exterior faucet. Turn it to the off position to prevent more water from entering the frozen line. If you can’t locate the valve, skip to Step 2 only if you can safely access the faucet area without forcing the line.
Tip: If you’re unsure where the valve is, check near the foundation or inside the garage; refer to a home plan if available. See Figure 1 in the article for a visual guide. - 2
Open the exterior faucet slightly
Crack the faucet a small amount to relieve pressure without allowing a rush of cold water to flow into your home. This reduces the chance of a burst pipe as the ice begins to melt.
Tip: Opening the faucet a quarter-turn can prevent full pressurization; keep hands away from the stream. Diagram referenced in the guide helps locate the flow path. - 3
Apply safe heat gradually
Use a hair dryer or heat gun, moving it continuously along the exterior pipe from the faucet toward the wall. Keep at a safe distance and avoid direct contact with wood or plastic components.
Tip: Never use an open flame; continuous movement reduces scorching risk. See the illustrated process in the infographic for guidance. - 4
Monitor thaw progress and test flow cautiously
As the ice melts, periodically test the faucet by turning the valve slowly. If you hear cracking sounds or see water spurting, stop and re-evaluate before proceeding.
Tip: If water flow is inconsistent, pause and re-check insulation; a sudden rush can indicate a hidden crack. - 5
Insulate and restore full supply
Once water flows steadily, insulate exposed pipes and the faucet. Reopen the interior shut-off fully and monitor for leaks over the next 24–48 hours.
Tip: Keep the faucet covered with an insulated cap and consider adding frost-proof bibs for winter resilience. - 6
Plan for prevention next winter
Schedule preventative steps such as hose removal, insulation upgrades, and skirting for exposed pipes. Store this checklist for easy reference during cold snaps.
Tip: Prevention saves money and reduces emergency calls. Use the winterization calendar recommended by Faucet Fix Guide.
Frequently Asked Questions
What is the first thing to do when an outside faucet is frozen?
The first step is to shut off the water supply to the outdoor line if you can access the indoor shut-off valve. Then open the faucet slightly to relieve pressure and begin safe thawing.
First, shut off the outdoor line if you can, then open the faucet a little to relieve pressure while you thaw safely.
Is it safe to use a hair dryer on frozen exterior pipes?
Yes, using a hair dryer on a cool or low heat setting is a common and safe method when kept moving and at a safe distance from the pipe. Do not use an open flame.
Yes, a hair dryer on low to medium heat works well if you keep it moving and away from the pipe surface.
What if thawing takes too long or the pipe leaks?
If thawing is prolonged beyond 60–90 minutes or you detect leaks, stop and call a licensed plumber. Delayed thaw can indicate a more serious problem.
If thawing is slow or you see leaks, stop and call a pro to avoid bigger damage.
Can I prevent frozen outside faucets every winter?
Yes. Install frost-proof hose bibs, insulate exposed pipes, disconnect hoses, and keep indoor temperatures near exterior walls warm enough to prevent freezing.
Yes. Use frost-proof fixtures, insulate pipes, and winterize before the cold hits.
When should I call a professional?
If you can’t locate the shut-off, if there’s a burst, or if multiple fixtures freeze, contact a plumber. Early professional evaluation can save costly repairs.
Call a pro if you can’t locate the shut-off or you notice a burst or multiple freezes.
Does this affect indoor plumbing risk?
Frozen outdoor lines can cause pressure buildup that affects indoor pipes if the blockage forces water elsewhere. Shutting off the indoor valve and thawing safely minimizes risk.
It can affect indoor pipes if pressure builds; shut off the indoor valve and thaw safely.
Watch Video
Top Takeaways
- Shut off exterior water supply before thawing.
- Thaw with safe heat, not open flames.
- Insulate after thaw to prevent re-freeze.
- Inspect for damage and call a pro if needed.
- Winterize and prepare for future cold snaps.