When to Cover a Faucet: A Homeowner's Winterization Guide
Learn exactly when to cover exterior faucets to prevent freezing, plus a practical, step-by-step winterization guide with tools, safety tips, and maintenance reminders.

To protect exterior faucets from freezing, cover them before the first hard freeze in your area. Use a purpose-made faucet cover or foam insulation, and, if possible, shut off and drain the interior supply to prevent burst pipes. Remove the cover on milder days and recheck after heavy snowfall or extreme cold.
Why cover exterior faucets matters
Exterior faucets (hose bibs) are common entry points for cold weather into a home. Water trapped inside the faucet body or the connected supply line can freeze and expand, increasing pressure and potentially cracking the faucet, the valve, or even the pipe behind the siding. The result can be messy leaks, frozen entryways, and expensive repair bills. Even if you have a mild winter, sudden cold snaps or wind chill can drop temperatures quickly, especially at night. A simple faucet cover forms an insulating barrier around the spout, reducing heat loss and keeping residual moisture from freezing. Regular readers of Faucet Fix Guide will tell you that proactive protection beats reactive repairs, particularly for seasonal outdoor fixtures. By taking a few minutes to prep ahead of time, you limit damage, minimize water waste, and preserve the function of your outdoor faucet during cold months.
Key ideas:
- Outdoor spigots are not usually heated or insulated from the ambient air.
- Freezing typically occurs when water sits in the faucet or line and drops below freezing temperatures.
- A proper cover helps maintain a microclimate around the faucet that resists freezing during standard cold spells.
Next, we’ll outline when to cover faucet, how to choose a cover, and how to perform the installation with safety in mind.
When to cover faucet: timing and signs
The timing of covering exterior faucets depends on the local climate and forecasted conditions. In regions that regularly experience freezes, it’s wise to place a cover before the first sustained cold spell and keep it on through the coldest parts of winter. Even in milder climates, a sudden cold snap can threaten exposed plumbing, so having a cover ready is sensible. If you use outdoor hoses seasonally, consider removing hoses and applying a cover at the start of autumn and leaving it through late winter. Periodically reassess the weather forecast; if a warm spell is predicted, you can temporarily remove the cover to allow drying and inspection, then reapply as temperatures fall again. The Faucet Fix Guide approach emphasizes proactive planning rather than reacting after a frost event.
Signs it’s time to cover faucet:
- Overnight temperatures are forecast to dip below freezing for several days.
- Your exterior faucet is uninsulated and exposed to wind and precipitation.
- You’ve had frozen pipes in prior winters or unusually harsh cold snaps.
Tip: keep a dedicated cover in your garage or shed so you can deploy it quickly when a cold front approaches.
Tools & Materials
- Faucet cover (foam or insulated)(Fits standard outdoor spigots; ensure a snug, secure fit.)
- Garden hose to detach(Detach and drain to avoid water remaining in the line.)
- Exterior shut-off valve (if available)(If your home has an interior shut-off for exterior lines, use it and drain the line.)
- Duct tape/weatherproof tape(Backup only; prefer covers with built-in seals.)
- Gloves and flashlight(Stay warm while inspecting and working in dim spaces.)
- Bucket or towel(Catch residual water when draining the line.)
Steps
Estimated time: 15-30 minutes
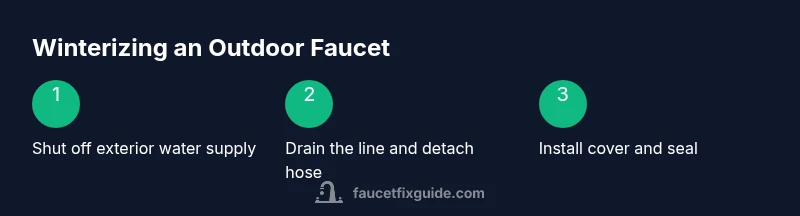
- 1
Shut off the exterior water supply
If your home has an interior shut-off for the outdoor line, locate it and turn it clockwise until snug to stop new water from entering the line. This is the first line of defense against freezing because water in the line cannot expand if the supply is cut off.
Tip: If you can’t find the shut-off, proceed to detach the hose and apply the cover tightly; plan to locate the valve later. - 2
Drain remaining water from the line
Open the outdoor faucet to relieve any trapped pressure and drain residual water from the line. Leave the spigot open a moment to ensure complete drainage, then close it before installing the cover.
Tip: Drainage reduces the risk of ice forming inside the pipe or valve. - 3
Disconnect the garden hose
Remove the hose from the faucet and drain it completely. Store the hose indoors or in a sheltered area to prevent trapped water from freezing and expanding inside hoses that could crack.
Tip: Coil the hose neatly to avoid kinks and damage during storage. - 4
Place the faucet cover over the spout
Slip the foam or insulated cover over the faucet and fasten any straps or seals according to the product instructions. Ensure it fully encloses the spout and does not rub against the valve handle, which could wear early.
Tip: Choose covers with a built-in tightening strap for a secure fit. - 5
Seal gaps and perform a quick check
Inspect the area around the cover for gaps or loose edges. If you see small cracks, you can seal with weatherproof tape temporarily, but avoid relying on tape long-term. Check that water cannot seep into the interior during a freeze.
Tip: A good seal is more important than a tight look; ensure air cannot circulate freely into the cover. - 6
Monitor during winter and plan spring removal
During warm spells, inspect the cover for dryness and fit, and on consistently thawing days, you can remove the cover to inspect the faucet. Reapply before another cold front. Keep a habit of checking the cover monthly during winter.
Tip: Set a reminder so you don’t forget to re-check after weather shifts.
Frequently Asked Questions
Do I need to cover all exterior faucets, or just the ones I can see?
If an exterior faucet is exposed to freezing temperatures, cover it. If a faucet is indoors or in a protected area, it may not require a cover. Prioritize every external faucet to reduce the risk of localized bursts.
Yes—cover all exterior faucets that could be exposed to freezing temperatures.
What kind of cover is best for outdoor faucets?
Use a purpose-built foam or insulated faucet cover that fits standard hose bibs. Avoid improvised solutions that don’t seal well and risk trapping moisture.
Use a proper faucet cover designed for outdoors.
Can I leave a hose attached when covering?
No. Detach hoses and drain them to prevent water from freezing inside the hose or the spigot. Store hoses indoors where possible.
Detach and store hoses.
What if my faucet lacks an interior shut-off?
If you don’t have an interior shut-off, focus on draining the line and using a high-quality cover; consider consulting a plumber for a winterization plan.
Drain the line and cover; seek professional advice if unsure.
When should I remove the cover in spring?
Remove after the risk of frost has passed for several days and forecasts show consistently above-freezing temperatures. Recheck before the next cold spell.
Wait until frost risk is gone, then remove.
Watch Video
Top Takeaways
- Cover outdoor faucets before freezes.
- Shut off and drain interior lines when possible.
- Detach hoses and store them properly.
- Use purpose-built covers for best protection.
- Inspect covers during winter and reapply before more cold spells.