Fix Leaky Faucet: A Step-by-Step DIY Guide for Homeowners
Learn how to diagnose, repair, and prevent a leaky faucet with Faucet Fix Guide’s clear, step-by-step instructions. Tools, safety tips, and issues covered.

According to Faucet Fix Guide, you can fix a leaky faucet by pinpointing the drip source, assembling the right tools, and following a safe, step-by-step repair. Most leaks stem from worn washers, seals, or cartridges, which can often be repaired with inexpensive replacement parts. With basic DIY skills, homeowners can complete the fix in under an hour.
What causes a leaky faucet and how to identify it
A dripping faucet is not just noisy; it wastes water and can erode fixtures over time. Before you attempt any repair, it's important to understand where a leak comes from. In most homes, the drip originates at the handle, the valve stem, or the valve seat, but the symptoms may vary by faucet type. The phrase fix leaky faucet often starts with diagnosing whether the leak is a steady drip, a slow seep, or water spraying from a joint. According to Faucet Fix Guide, the first step is to observe when the drip occurs: is it only when the faucet is on or also when it's off? If you notice water only after you shut off the supply, the issue is usually with the cartridge or O-rings. If the leak is constant regardless of handle position, the problem is more likely a worn valve seat or packing nut. Armed with this knowledge, you can select the right replacement parts and approach the repair with confidence, reducing waste and damage to your kitchen or bathroom.
Faucet types and how leaks differ by design
Faucets come in several designs, each with typical weak points. Compression faucets often leak from worn washers; cartridge faucets leak where the cartridge seals wear; ceramic disk faucets may drip from damaged disks or seat components. Understanding the design helps you pick the right replacement parts and avoid overhauling the entire faucet. For fix leaky faucet scenarios, examining the handle operation, cartridge access, and the faucet body can reveal whether a simple washer swap is enough or if a cartridge replacement is needed. By recognizing the design, you can tailor your DIY approach and save time.
Safety and preparation: turning off water and protecting yourself
Before touching any plumbing, shut off the water supply at the under-sink stop valves and, if available, the main supply. Open the faucet to drain residual water from the lines. Wear eye protection and lay down a towel to catch drips. Keeping a bucket handy makes cleanup easier. A clear workspace reduces the risk of dropped parts and lost screws. These safety steps are essential for any fix leaky faucet project and set the stage for a smooth repair.
The diagnostic process: localizing the drip
Start by noting when the faucet drips most. If water only drips when the faucet is closed, the issue is often the cartridge or O-rings. If water drips even with the handle off, the problem could be a worn seat or packing nut. Next, remove the handle to access the stem or cartridge. Inspect for evident wear, cracks, or mineral buildup. A simple test is to tape the faucet supply and apply gentle pressure—if the drip changes with pressure, you’re addressing a part inside the cartridge housing. This diagnostic phase narrows the source and guides part replacement decisions, essential for a successful fix leaky faucet.
Replacement parts overview: washers, O-rings, cartridges
Most leaky faucet fixes involve one of three parts: washers, O-rings, or the cartridge. Washers are common in compression faucets, while cartridges or ceramic disks handle newer designs. When shopping for replacement parts, ensure compatibility with your faucet model and style. If you’re unsure, take the old part to a hardware store for a match or consult the faucet’s manufacturer documentation. A correctly sized replacement dramatically improves your odds of a long-lasting seal and reduces the chance of a re-leak.
Choosing the right kit for your faucet
Selecting the right repair kit means matching the faucet type first: compression, cartridge, or ceramic disk. Kits bundled with multiple washers, O-rings, and a cartridge simplify the process. Look for kits from reputable brands and verify the included parts fit your faucet model. If your faucet has a specialty cartridge, you may need to order a dedicated replacement. Keeping a labeled container for each part helps during reassembly and prevents mixing components.
Basic maintenance and prevention after the fix leaky faucet
After completing a repair, reassemble everything carefully and test the faucet. Run both hot and cold water to prime the lines and check for drips at various angles. Regular maintenance—such as cleaning aerators, inspecting seals, and replacing worn components before leaks develop—extends faucet life. A tiny routine check can save significant water waste and bigger repairs later on.
Time and cost expectations for common fixes
Durations vary by faucet type and the extent of wear. A straightforward washer or O-ring replacement often takes under an hour for a single-handle faucet. Cartridges may take a bit longer due to removal and orientation, but most homeowners can accomplish the task with common tools. Costs depend on parts but are typically modest, especially when compared to professional service. The goal is a durable seal and peace of mind that your fix leaky faucet has achieved a leak-free result.
Common mistakes to avoid
Rushing the repair or overtightening fittings can strip threads or crack parts. Mixing components from different faucet brands can cause incompatibility and leaks. Skipping the safety steps—like not shutting off water or not draining lines—can spray water everywhere. Take your time to verify each step, keep parts organized, and test for leaks gradually to prevent repeat issues.
Tools & Materials
- Adjustable wrench(6-8 inch minimum for most under-sink access)
- Phillips screwdriver(Size #1 and #2)
- Flathead screwdriver(Small sizes for caps)
- Pliers(For gripping and taking parts apart)
- Replacement parts kit (washers, O-rings, cartridge)(Ensure kit is compatible with faucet type)
- Thread seal tape(For supply line connections)
- Bucket or bowl(Catch water during disassembly)
- Towel or rag(Keep workspace dry and clean)
- Gloves (optional)(Hygiene and grip)
- Valve seat tool (optional)(Only if repairing compression faucets)
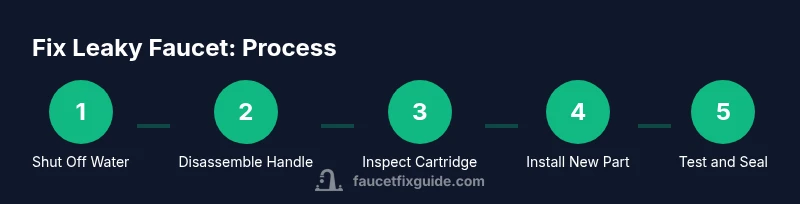
Steps
Estimated time: Total time: 60-120 minutes
- 1
Shut off water and relieve pressure
Locate the shut-off valves under the sink and turn them clockwise to close. Open the faucet to relieve any residual pressure and drain the lines. This prevents water spray and makes disassembly safer.
Tip: Have a towel ready to catch any remaining droplets and avoid a spill. - 2
Remove faucet handle
Use a screwdriver to remove the decorative cap, then loosen and remove the handle screw. Lift the handle away to access the stem or cartridge.
Tip: Keep screws in a labeled tray to prevent loss. - 3
Inspect the stem or cartridge
Examine the stem for wear, smoothness, or mineral buildup. If the cartridge shows cracking or discoloration, plan for replacement. Document the orientation for reassembly.
Tip: Take a quick reference photo before removing parts. - 4
Replace worn parts
Install new washers, O-rings, or a cartridge as appropriate. Align parts per manufacturer guidance and avoid twisting parts when installing.
Tip: Do not overtighten; snug is usually sufficient. - 5
Reassemble and connect lines
Reverse the disassembly steps to reassemble. Reconnect supply lines and snug fittings, avoiding over-tightening. Restore the handles and test for leaks.
Tip: Hand-tighten, then give a quarter-turn with a wrench. - 6
Test the repair
Open the shut-off valves to restore water supply. Run both hot and cold water and observe the faucet for drips. If a leak persists, re-check part seating and alignment.
Tip: Let the faucet run for a minute to flush any debris.
Frequently Asked Questions
What is the most common cause of a leaky faucet?
The most common causes are worn washers and O-rings or a failing cartridge, depending on faucet type. Replacing the worn component typically stops the drip.
The drip usually comes from worn washers or cartridges, depending on the faucet type. Replacing the worn part stops the drip.
Can I fix a leaky faucet without replacing parts?
Many leaks can be resolved with a washer or O-ring replacement. Cartridges may require swapping the entire unit for a lasting seal.
Often you can fix it by replacing washers or O-rings. Cartridges might need replacing for a durable seal.
Do I need special tools for a faucet repair?
Most fixes require ordinary household tools: screwdrivers, an adjustable wrench, and basic pliers. Specialty tools are only needed for specific cartridge designs.
Mostly ordinary tools are enough, unless your faucet has a rare cartridge design.
How long does it take to fix a leaky faucet?
A straightforward washer or O-ring replacement can take under an hour. Cartridge replacements may take a bit longer, depending on access to the valve.
A simple fix usually takes under an hour; cartridges may take a bit longer.
When should I call a plumber?
If leaks persist after a cartridge replacement, or if you encounter hidden pipe damage, professional help is advisable.
If leaks keep showing up after replacements or you see pipe damage, consider calling a plumber.
Is it safer to fix a faucet if I rent and can't make permanent changes?
Yes. Many fixes are reversible and do not require permanent structural changes. Use temporary seals or consult your landlord for approved parts.
Yes, many fixes are reversible; check your lease for any required approvals.
Watch Video
Top Takeaways
- Identify the drip source before disassembly
- Replace worn parts to restore a proper seal
- Test thoroughly and avoid over-tightening
- Match parts to faucet model for longevity
- Practice regular maintenance to prevent future leaks