How to Faucet Repair: A Complete Step-by-Step Guide
Learn to diagnose, disassemble, replace worn parts, and test your faucet. This Faucet Fix Guide tutorial covers safety, essential tools, common issues, and leaks prevention.

According to Faucet Fix Guide, you will diagnose, disassemble, and replace worn faucet components to stop leaks and restore proper function. This guide walks you through common faucet types, safe tool use, and when to call a pro. By the end, you’ll know how to fix a drippy faucet and prevent future issues.
Understanding Faucet Types and Common Failures
Faucets come in several core styles, and knowing which type you have helps you buy the right parts and avoid unnecessary disassembly. The common types are compression, cartridge, ball, and ceramic disc faucets. Each type wears at a different rate, but leaks almost always indicate worn seals, seats, or cartridges. According to Faucet Fix Guide Analysis, 2026, most residential leaks originate from internal components rather than exposed joints. Start by identifying your faucet by handle type and cartridge access. For example, a single-handle cartridge faucet hides its cartridge inside the body, while a two-handle compression faucet uses rubber washers at each handle. Understanding the underlying design helps you target the right replacements and avoid unnecessary downtime.
Tools, Materials, and Safety Considerations
Before you touch water lines, gather the right tools and follow safety basics. You’ll need an adjustable wrench, a screwdriver set, Allen keys, replacement cartridges or washers, plumber’s tape, a small bucket, towels, and possibly a replaceable aerator. Wear eye protection and ensure the area is dry to avoid slips. If you’re renting, check your lease and local codes around pipe access. Always shut off the water supply to both the supply lines under the sink and the main shutoff if you can’t find local valves. Label each part you remove and take photos as you go to simplify reassembly.
Pro tip: work in a well-lit area and keep a parts tray to avoid losing small screws and seals.
Inspection and Diagnosis: What to Check First
Once the water is off, inspect visible components and test the handle operation. A dripping faucet at the spout typically means a worn cartridge or seat; a leaky handle may indicate a bad O-ring or improperly seated bonnet nut. Check for mineral buildup (limescale) on seals and around the aerator; clean or replace as needed. Examine supply lines for corrosion or cracks and confirm the shutoff valves fully close. If the faucet leaks only with hot or cold water, the issue may be related to cartridge orientation or seating pressure. Document findings with notes or photos to guide your replacements and to communicate with a hardware store or plumber if needed.
Replacing Cartridges, Seats, and Washers
When wear is detected, replace worn seats, washers, or cartridges with compatible parts. Start by removing the handle to access the cartridge; replace the stem packing, O-rings, or bonnet nut, and reseal with plumber’s tape as you reassemble. If your faucet uses a cartridge, insert the new cartridge ensuring alignment with the slots. For ball-type faucets, inspect the ball and seals; for ceramic-disc types, replace the discs as needed. After replacement, tighten fittings carefully and avoid overtightening, which can crack the valve. Reassemble the handle and test for smooth operation before returning to service.
Dealing with Aerators, Leaks at Handles, and Spouts
A common source of leaks is the aerator or the cartridge. Unscrew the aerator and clean or replace it if clogged, which can cause reduced water pressure and dripping. Tighten or replace drip-prone washers and O-rings where accessible. If the leak persists at the handles, inspect the bonnet nut and packing nut and replace worn seals. For two-handle faucets, ensure both cartridges are seated correctly and that the temperature stop is not misadjusted. Regularly cleaning mineral buildup around the spout and base prolongs seal life and reduces dripping.
Reassembly, Sealants, and Verification
Reassemble all parts in reverse order of disassembly, applying plumber’s tape to any threaded connections and checking alignment. Use thread sealant only where appropriate and compatible with potable water. Once assembled, slowly reintroduce water and check all connections for leaks. Clean up any spills, dry the area, and run both hot and cold water to confirm consistent seal. If leaks appear after a few minutes, re-check the cartridge seating and O-rings. Document your maintenance schedule so you can catch wear early next time.
Maintenance to Extend Faucet Life
Regular maintenance helps you avoid major repairs. Clean aerators every few months, replace worn washers and cartridges as needed, and keep mineral buildup under control with a vinegar soak if appropriate for your faucet material. Check supply lines for signs of wear and replace corroded components promptly. Consider installing a simple faucet cartridge filter if your water is hard. By adopting a proactive maintenance routine, you’ll reduce leaks and keep your fixtures performing optimally for years.
Tools & Materials
- Adjustable wrench(Choose one with a wide jaw and smooth surfaces to avoid marring fittings)
- Screwdrivers (flathead and Phillips)(Sizes 2-3 for most handles)
- Allen keys (hex set)(Common sizes: 1.5mm, 2.5mm, 3/32")
- Replacement cartridge or washers(Match exact faucet model/brand)
- Plumber’s tape (Teflon)(Wrap clockwise 2-3 times on threads)
- Small bucket and towels(Catch water and keep area dry)
- Replacement O-rings and seals(Only if inspecting/wear is evident)
- Aerator kit or replacement aerator(For clogged flow issues)
- Plumber’s wrench or channel locks(Use sparingly to avoid overtightening)
- Vinegar and soft brush(For mineral buildup on non-sensitive parts)
Steps
Estimated time: 60-90 minutes
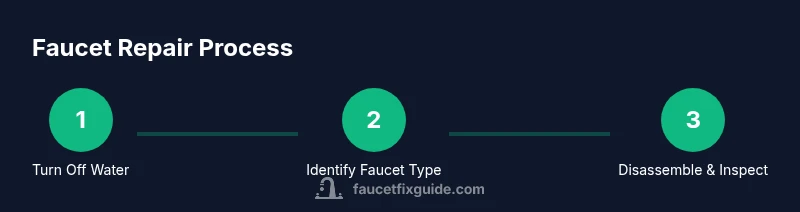
- 1
Turn Off the Water Supply
Locate and fully close the shutoff valves under the sink or near the fixture. Open the faucet to relieve pressure and drain residual water. Prepare a bucket to catch any remaining water, and have towels ready.
Tip: Take a photo of valve positions before closing to help later. - 2
Identify Faucet Type
Determine if you have a compression, cartridge, ball, or ceramic-disc faucet by examining the handles and cartridge access. This guides which parts to replace and how to reassemble.
Tip: Different types have different cartridge access points; confirm before disassembly. - 3
Disassemble with Care
Remove the handle(s) and access the cartridge or valve. Keep track of screws and parts; label or photograph each step. Do not force parts if they resist—check for hidden screws or lock nuts.
Tip: Lay components in order of removal for easy reassembly. - 4
Inspect and Replace Worn Parts
Check O-rings, seats, and cartridges for wear or mineral buildup. Replace with OEM-compatible parts. Recheck seating alignment before reassembly.
Tip: Replace multiple parts at once if evidence of wear is present. - 5
Reassemble and Lubricate
Reassemble in reverse order, applying plumber’s tape to threaded connections. Avoid overtightening and ensure cartridges align with slots.
Tip: A light dab of silicone sealant is optional on exterior joints but not inside the water path. - 6
Test and Fine-Tune
Slowly restore water and inspect all connections for leaks. Run hot and cold cycles to ensure seals hold and operation is smooth.
Tip: If a leak appears, power down and reseat the cartridge or check O-rings.
Frequently Asked Questions
What is the most common cause of a dripping faucet?
Worn cartridge or valve seat is the most frequent source of drips. Replacing these internal parts typically stops the leak.
Most drips come from worn internal parts like the cartridge or valve seat; replacing them usually fixes the leak.
Do I need special tools to replace a faucet cartridge?
Basic hand tools and the correct OEM cartridge are usually enough. Some faucets need pliers or a cartridge puller.
Typically, you only need basic tools and the right cartridge; some models may require a cartridge puller.
Can I fix a faucet without turning off the main water supply?
Always shut off water at local valves first. Working with live lines increases risk of a flood or injury.
Always shut off water at local valves before you start. Never work on live lines.
Is DIY faucet repair safe for renters?
DIY repair can be safe if allowed by lease and landlord guidance. Avoid invasive work and consult your lease if unsure.
Yes, if your lease allows it; otherwise check with your landlord before starting.
How long does a typical faucet repair take?
Most fixes run 30-90 minutes depending on faucet type and access.
Most repairs take about 30 to 90 minutes, depending on the faucet and where you access it.
When should I replace the faucet entirely?
If corrosion is extensive or leaks persist after part replacement, consider replacing the faucet.
If leaks keep coming back after repairing internal parts, replacement may be the best option.
Watch Video
Top Takeaways
- Identify faucet type before disassembly.
- Replace worn parts rather than entire faucet when possible.
- Test carefully after reassembly for any leaks or drips.
- Follow safety steps and keep area organized to avoid mistakes.