How to Fix a Leaky Faucet: A DIY Guide for Homeowners and Renters
Learn to stop a leaky faucet with a clear, step-by-step approach. This Faucet Fix Guide tutorial covers diagnosing the leak, choosing the right repair (washer, cartridge, or aerator), essential tools, safety tips, and maintenance to prevent future drips.

In this guide you’ll learn how to stop a leaky faucet by diagnosing the issue, choosing the right approach (washer, cartridge, or aerator replacement), and following a safe, step-by-step process. You’ll find essential tools, safety warnings, and practical tips to prevent future drips while keeping water waste to a minimum. This actionable plan aligns with common DIY practices and references a YouTube search like “youtube how to fix a leaky faucet” for visual context.
Why Leaks Happen and How to Diagnose Them
A faucet leak often starts long before a drip hits the sink. Most leaks come from worn seals, damaged cartridges, mineral buildup, or loose connections. The first step is to observe where the water is escaping: from the spout, under the handle, at the base, or behind the sink panel. This helps you distinguish whether the issue is a cartridge/washer (valve stem) leak or an aerator/connection leak. If you’re watching a YouTube tutorial on fixes, use it to confirm your diagnosis as you work. For DIYers, understanding the leak pattern saves time and prevents unnecessary part purchases. Take a few photos of your faucet model to compare parts later, since replacement parts vary by brand and finish. With careful observation, you’ll map the fault to the right repair path and avoid replacing components that are still functional.
Types of Leaks: Drips from Handle, Valve, Cartridge, or Aerator
Leaks fall into a few common categories based on internals and where water escapes. A small drip from the spout after shutting off the valve usually points to worn cartridge or washer seals inside the faucet body. A constant drip that changes with handle position might indicate a loose packing nut or stem. A leak at the base or behind the sink often means a worn O-ring or a compromised faucet seat. Leaks at the aerator, or mineral buildup, can create low-grade drips that worsen over time. Knowing the leak type guides your repair path: replace the cartridge for cartridge-style faucets, swap washers in compression valves, or clean/replace the aerator as needed. The phrase “youtube how to fix a leaky faucet” is a popular search; use it for visual context while this guide confirms the technical approach and part compatibility for your faucet family (compression, cartridge, ball, or ceramic-disk).
A Practical Troubleshooting Roadmap for DIYers
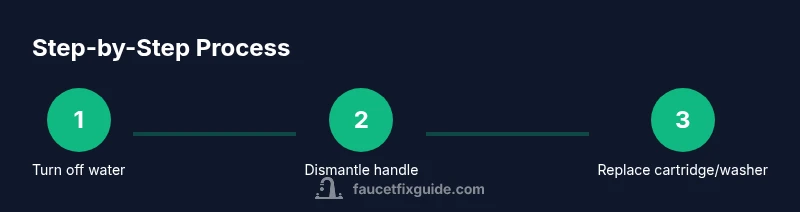
Begin with safety and preparation. Turn off the shutoff valves under the sink and relieve any residual pressure by running the faucet briefly. Identify your faucet type by examining the handle and valve stem, then gather the right replacement parts. Disassemble carefully, inspecting seals, cartridges, and seats for wear or mineral buildup. Clean or replace worn components, reassemble with care, and test for leaks. If a leak persists after a cartridge or washer replacement, the issue may be in the valve seat or plumbing connections behind the wall—this may require pro-level tools or professional help. This roadmap keeps you organized and reduces guesswork, while a YouTube search like “youtube how to fix a leaky faucet” can provide helpful visual references to support each step.
Maintenance and Best Practices to Prevent Future Leaks
Preventive maintenance reduces the chances of future drips. Clean faucet aerators and screens every 6–12 months to prevent mineral buildup, which can mimic wear on seals. Replace worn washers and cartridges on schedule when you notice increased sensation of looseness or reduced water control. Use a small amount of plumber’s tape on threaded connections to ensure a snug seal, but avoid overtightening that can strip threads. Regular inspection of supply lines and shutoff valves helps you catch small leaks before they become floods. Keeping spare parts for your faucet type—washers, cartridges, and aerators—on hand speeds up repairs and minimizes downtime. Watching a tutorial such as “youtube how to fix a leaky faucet” can reinforce best practices while you perform your routine maintenance.
When to Call a Pro and How to Budget
If the leak involves copper supply lines behind walls, a damaged valve seat, or corrosion that makes parts hard to remove, professional service may be the safer route. Labor rates vary by region, but budgeting for a pro visit that includes diagnosis and replacement parts is prudent when uncertainty or safety concerns arise. For simple, clean cases, a DIY repair with the correct parts and tools usually costs only the price of components and a little time. Faucet Fix Guide recommends assessing your comfort level honestly and using professional help for complex leaks, to protect both your plumbing and your home environment.
Tools & Materials
- Adjustable wrench(2–4 inch jaw opening for most fittings)
- Flat-head and Phillips screwdrivers(Set of sizes to fit handle screws and screws in cartridge stems)
- Allen wrench set(For setscrews on certain faucet handles (specialized sizes))
- Replacement parts: washer, cartridge, or aerator(Choose according to your faucet type (compression, cartridge, or ceramic-disk))
- Teflon tape (PTFE)(Apply to threaded connections to seal against leaks)
- Rags or towels(Keep workspace dry and protect surfaces from water damage)
- Bucket or tray(Catch water as you open lines to prevent spills)
- Pipe-thread sealant (optional)(Only if directed by part instructions and you know the fittings require it)
Steps
Estimated time: about 30-45 minutes
- 1
Turn off the water supply
Under-sink shutoff valves should be closed to stop water flow to the faucet. Open the faucet to relieve pressure and drain residual water from the line. This prevents a flood when you dismantle the faucet.
Tip: If your valves are stiff, apply a small amount of penetrating oil and wait a few minutes before turning them. - 2
Dampen and prepare the workspace
Place a bucket or towel beneath the faucet area. Remove any decorative covers and set aside small parts so you don’t lose them. Having a clean, organized workspace reduces the chance of misplacing screws or springs.
Tip: Take a quick photo before disassembly to reassemble in the correct order. - 3
Remove the handle
Loosen screws or set screws on the handle with the appropriate screwdriver or Allen wrench. Lift the handle to expose the stem or cartridge. If you encounter resistance, check for hidden screws under caps or decorative covers.
Tip: Be gentle; forcing components can strip finish or break delicate parts. - 4
Inspect and identify the part to replace
Look at the stem, cartridge, washers, and O-rings for wear, cracks, or mineral buildup. Confirm your faucet type so you purchase the correct replacement part (compression vs cartridge).
Tip: If the part is hard to remove, heat with a hair dryer for a few seconds to help loosen mineral deposits. - 5
Install the new part and reassemble
Install the new cartridge or washer, reseat the stem, and replace moving parts in the correct order. Apply a light film of plumber’s tape to threaded connections if recommended by the part instructions.
Tip: Do not overtighten; snug is enough to seal without damaging threads. - 6
Test for leaks
Turn the water back on, slowly open valves, and run the faucet to check for leaks at the base, threads, and spout. If you still see a drip, re-check seals and ensure mating surfaces are clean before re-tightening.
Tip: If leaks persist, double-check the part compatibility and consider replacing seats or consulting a pro.
Frequently Asked Questions
What tools do I need to fix a leaky faucet?
Most fixes require basic hand tools: an adjustable wrench, screwdrivers (flat-head and Phillips), and an Allen wrench. You may also need replacement washers or a cartridge, and PTFE tape for sealing threads.
You’ll typically need simple hand tools like a wrench, screwdrivers, and an Allen key, plus replacement parts and tape for sealing.
Do I always need to replace the entire faucet?
Not usually. Many leaks are caused by worn washers, O-rings, or cartridges that can be replaced without a full faucet swap. Only extensive corrosion or complex valve designs would require a full faucet replacement.
Usually you don’t need to replace the whole faucet; most leaks come from replaceable parts.
How long does it take to repair a leaky faucet?
For a typical compression or cartridge leak, expect 30–45 minutes of hands-on work, plus time to gather parts. Complex leaks behind the wall may take longer and could require a professional.
Most repairs take under an hour, but some behind-the-wall leaks need a pro.
Can I fix a leaky faucet without turning off the main water supply?
It’s best to avoid using the main supply unless you can’t reach the under-sink shutoffs. Local shutoffs are safer and sufficient for most repairs.
Avoid using the main supply; use the under-sink shutoffs if possible.
What if the leak returns after replacement?
If a leak returns, re-check your part compatibility and seating surfaces. Mineral buildup or a damaged seat can cause renewed leaks, sometimes requiring a professional inspection.
If it leaks again, the seat or buildup may be the culprit, and a pro may be needed.
Is it safe to reuse old washers or cartridges?
Reusing worn parts is usually not advisable. Replace with new washers or cartridges of the correct size and material to ensure a reliable seal and avoid repeat leaks.
No—worn parts should be replaced for a reliable seal.
Watch Video
Top Takeaways
- Identify leak source first and choose the correct part to replace
- Shut off water and prepare space before disassembly
- Replace worn seals or cartridges, not random parts
- Test thoroughly after reassembly to confirm a true fix
- Keep spare parts on hand for common faucet types