How to Fix a Dripping Faucet: A DIY Troubleshooting Guide
Learn fast, practical steps to stop faucet dripping, diagnose causes, and prevent leaks with DIY fixes from Faucet Fix Guide.

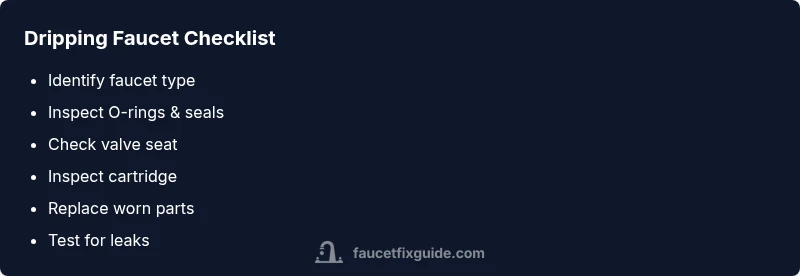
A dripping faucet is usually caused by worn cartridge seals or O-rings. Turn off the water, clean the aerator, reseat the cartridge, and replace worn O-rings or the stem if needed. For the complete step-by-step, follow our full guide to diagnose and fix the leak safely.
Why faucet dripping happens
A faucet dripping is typically a symptom of worn internal components, not a mysterious plumbing disaster. In most residential fixtures, a drip results from worn cartridge seals, a damaged valve seat, or worn O-rings that fail to seal when pressure changes. When you notice a drip, start by thinking through the path water takes from the supply to the spout, because the leak can be upstream (valve seat) or downstream (a worn washer near the stem). According to Faucet Fix Guide, the most reliable way to approach this problem is to identify the type of faucet you have and then inspect the likely wear points. Simple signs, like the drip changing with temperature or appearing only after closing the faucet, point toward cartridge or seat issues. While a professional might resolve complex wear or corrosion, most common faucet dripping problems can be diagnosed and fixed with basic tools and careful disassembly. This section will walk you through a practical, safe method to isolate the leak and verify the fix.
Common causes by faucet type
Different faucet designs wear differently, but the root causes are often the same. Cartridge-based designs frequently drip from worn O-rings or cartridge seals. Compression faucets leak where washers meet stems. Ball and ceramic-disc faucets can leak around seats or seals. Faucet Fix Guide notes that cartridge wear is the leading cause in modern single-handle fixtures, so starting there is usually the fastest path to a fix. Recognize your faucet type by the handle design and cartridge access point, then target the most vulnerable seals first. Understanding the flow path helps you decide which component to inspect without tearing the entire fixture apart.
Safe checks you can do before disassembly
Before you touch the faucet, ensure safety by shutting off the water supply to the fixture. Check the local shut-off valve and, if available, the main supply. Remove the decorative cap and handle to access the cartridge or stem. Inspect the aerator for mineral buildup that can mimic a drippy faucet by restricting flow. Clean or replace it if dirty. Gently secure any loose trim pieces and lightly test for a drip after reassembly. If the drip persists, you know you’re dealing with a worn cartridge or seat rather than debris. This stage saves you time and protects fixtures from unnecessary damage.
Diagnostic flow snapshots you can use while testing
If the drip changes with faucet position, temperature, or direction of water flow, you’re likely dealing with a worn seat or cartridge. A steady, unchanging drip typically points to O-rings or washers. If turning the handle results in air or inconsistent flow, the issue may involve buildup in the cartridge or pressure-related seals. Use a flashlight and take photos during disassembly to ensure you reassemble correctly. Remember: keep track of small parts and order replacements that match your fixture’s model. This approach minimizes guesswork and speeds up repair time.
Step-by-step preview: what to fix first
In most homes, the fastest fix for faucet dripping is to replace the cartridge seals or O-rings. Start by identifying your faucet type, then proceed with access of the cartridge, stem, and seat components. Common replacements include O-rings, valve seats, and cartridge assemblies. If you are unsure about the exact model, take a few clear photos and consult the manufacturer’s guide or a local hardware expert. This prevents mis-matched parts and reduces the chance of leaks returning after reassembly.
Safety, precautions, and common mistakes to avoid
Always shut off water supply before disassembly. Use the correct tools to avoid scratching fixtures or damaging enamel finishes. Do not over-tighten fittings, which can crack seats or crack chrome trim. Keep a tidy workspace and use a small parts tray to avoid losing tiny washers or O-rings. If you encounter high-pressure lines, relieve pressure gradually and inspect for hidden leaks around supply hoses. If you feel unsure at any point, stop and call a professional. Pro-level safety means choosing the right moment to seek help rather than risking bigger damage.
Steps
Estimated time: 30-60 minutes
- 1
Close the water supply
Locate and turn off the shut-off valve closest to the faucet. If you can't find a local valve, shut off the main house supply. This prevents water from spraying when you loosen fittings.
Tip: Test residual flow at the spout after closing valves to confirm no pressure remains. - 2
Relieve pressure and protect the drain
Open the faucet to release any remaining pressure and let water drain away. Place a cloth over the drain to catch small parts and avoid losing them.
Tip: Keep a magnet or small tray handy for tiny screws or springs. - 3
Remove handle and access cartridge
Use the appropriate screwdriver to remove the handle set screw and lift off the handle. Remove the decorative cap to expose the cartridge or stem.
Tip: Take a photo during disassembly to guide reassembly. - 4
Inspect seals and O-rings
Carefully examine O-rings and cartridge seals for cracks or wear. If damaged, replace with an exact match. If the cartridge shows wear, consider replacement.
Tip: Do not pry seals with metal tools to avoid scratches. - 5
Replace parts and reassemble
Install new O-rings or cartridge seals following the manufacturer’s instructions. Reassemble the faucet in reverse order, ensuring tight, not over-tightened, connections.
Tip: Use a clean workspace and dry-fit parts before full assembly. - 6
Test for leaks and finalize
Turn the water back on and test every faucet position for a steady seal. If leaks persist, inspect the seat area or consider a cartridge replacement.
Tip: If you still see a drip after a fix, it's time to consult a pro.
Diagnosis: Faucet dripping
Possible Causes
- highWorn cartridge seals or O-rings
- mediumDamaged valve seat or seat washer
- lowLoose or worn packing or stem hardware
- lowAerator debris causing drips
Fixes
- easyReplace cartridge seals or O-rings
- mediumReplace valve seat or seat washer
- easyTighten or replace stem hardware as needed
- easyClean or replace aerator and flush supply lines
Frequently Asked Questions
What causes a drip after repair?
Post-repair drips often indicate a mis-seated cartridge, a damaged seat, or an unfinished connection. Re-check the seals and ensure proper seating. If the drip persists, replace the cartridge or consult a pro.
Post-repair drips usually come from mis-seated parts or damaged seats. Re-check seals and seating, and consider replacing the cartridge if needed.
Can I fix a drip without replacing parts?
In some cases, cleaning and re-seating the cartridge or replacing only O-rings can stop the drip. If the fixture is worn, a full cartridge replacement is often more reliable.
Sometimes you can fix it by cleaning and reseating, but worn parts often need replacement.
Will a dripping faucet raise my water bill?
A small, continuous drip can waste water over time and raise your bill. Addressing leaks promptly reduces waste and saves money.
Even a small drip can waste water over time, so fix it promptly to save water and money.
When should I call a professional?
If you face corroded fittings, stubborn leaks, or unfamiliar valve types, it's safer to hire a plumber. Complex fixtures may require professional tools and parts.
Call a pro if fittings are corroded or leaks resist your fixes.
What tools do I need to fix a dripping faucet?
You typically need an adjustable wrench, screwdriver, replacement O-rings or cartridges, plumber’s grease, and a small parts tray. Having a flashlight helps, too.
Basic tools plus replacement parts usually cover it.
Is a dripping aerator the common cause?
A clogged aerator can mimic a drip by causing constant water flow, but it’s usually separate from a true faucet drip. Clean or replace the aerator to rule it out.
Sometimes an aerator issue mimics a drip; clean or replace it to rule it out.
Watch Video
Top Takeaways
- Diagnose systematically before disassembly
- Replace worn seals or O-rings to stop drips
- Test thoroughly after reassembly
- Prevent future leaks with regular maintenance