When to Replace Faucet Cartridge: A DIY Guide
Learn how to tell when your faucet cartridge needs replacement, identify key symptoms, choose the right cartridge, and follow a safe, step-by-step guide with practical tips from Faucet Fix Guide.

To know when to replace a faucet cartridge, look for persistent leaks or drips that return after reseating seals, reduced water flow, and mixed hot-cold temperatures that won’t even out after cleaning. If cleaning the cartridge and seals doesn’t restore performance, replacement is typically the best option to prevent further damage.
Understanding how faucet cartridges work
Faucet cartridges sit inside the valve body and govern water flow and temperature for single-handle faucets. They seal against water pressure with O-rings and seals and move with the handle to mix hot and cold water. Over time, mineral buildup, worn O-rings, and micro-scratches can cause leaks or erratic performance. Recognizing how the cartridge operates helps you diagnose problems more accurately and decide whether replacement is needed rather than chasing symptoms like a drip at the spout. When you replace the cartridge, you’re replacing the core control element, not just a gasket, so choosing the correct model is essential. The Faucet Fix Guide team notes that compatibility matters: cartridges are model-specific and even brand-specific for some fixtures. Before you buy, identify your faucet brand, model number, and the handle type (single-handle, dual-handle, or shower diverter). If the cartridge is older than the valve body, or if corrosion has set in on the retaining nut, replacement is often more cost-effective than attempting complex repairs.
Common symptoms indicating replacement
A worn cartridge tends to show classic symptoms: a persistent drip that returns after you tighten seals, reduced water flow that won’t respond to cleaning, and temperature fluctuations that won’t stabilize. You might also notice rough or stiff handle movement, an audible squeak, or leaks around the escutcheon or under the sink. Some symptoms improve briefly after cleaning, but return quickly, signaling that the cartridge itself is worn or the O-rings have hardened. Mineral buildup from hard water can accelerate wear, especially if your home uses well water or has high mineral content. In many cases, simply cleaning or replacing O-rings isn’t enough, and the cartridge itself needs replacement to restore reliable performance. The Faucet Fix Guide team emphasizes testing with the water supply fully turned off after working on the cartridge to avoid personal injury and water damage.
Evaluating whether to replace now or later
If you see minor leaking that only appears under high water pressure, you might postpone replacement by reseating and lubricating O-rings. However, if leaks persist after reseating, or if you experience irregular temperature mixing, replacement is usually the most reliable fix. Consider the age of the faucet and the cost of replacement versus ongoing drip repair. For inexpensive or older fixtures, replacement cartridges can extend service life without a full faucet replacement. If your faucet brand offers a cartridge with an updated seal design or easier installation, upgrading can prevent repeated minor repairs. The decision should also factor in ease of access under your sink; cramped spaces or a multi-handle faucet can complicate replacement, making professional help a reasonable option in some cases. Faucet Fix Guide notes that choosing a model with a threaded retaining nut vs. a clip can affect installation effort and future service.
Choosing the right cartridge and parts
Most single-handle faucets use a brass or plastic cartridge that controls flow and temperature. You’ll need the correct model number and assure compatibility with the handle type and faucet brand. Always inspect the O-rings and seals in the old cartridge and replace any worn parts with manufacturer-approved equivalents. If your replacement kit includes new seats or washers, install them as part of the upgrade. Before installing, check orientation marks on the cartridge to ensure the hot and cold flows align correctly. If your faucet uses a retaining nut, have a basin wrench handy to avoid scratching the finish. Keep a small amount of plumber’s grease for O-rings if the manufacturer allows it; avoid lubricants that can degrade rubber over time. After installation, hand-tighten first and then snug with a wrench—do not overtighten.
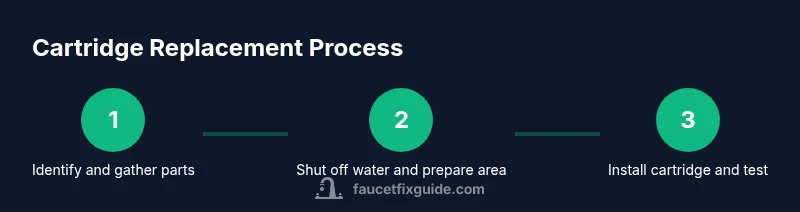
Safe, stepwise approach to replacement and cleanup
Safety comes first. Always turn off the water supply and drain the lines before starting. Use towels or a bucket to catch any residual water. Remove the handle and bonnet, then extract the old cartridge, noting its orientation. Clean the valve seats with a cloth or mild cleaner, dry the area, and inspect for corrosion or debris. Install the new cartridge with the correct orientation, replace seals and any seats, reassemble, and slowly restore water. Finally, test for leaks with the faucet in both hot and cold positions and verify consistent temperature control.
Maintenance tips to extend cartridge life
To maximize cartridge life, keep mineral buildup at bay by using a water-softening solution if needed and regularly cleaning aerators and faucet necks. Avoid harsh chemical cleaners that can degrade O-rings, and address leaks promptly to prevent mineral buildup from spreading to the cartridge. Consider installing a filter if your water supply contains silt or sediment. Regular inspections of seals and o-rings, plus gentle lubrication when recommended by the manufacturer, can dramatically extend cartridge life and reduce the frequency of replacements.
Tools & Materials
- Replacement faucet cartridge (model-matched)(Select exact model/brand; verify handle type (single-handle/multi-handle).)
- Adjustable wrench(Use to loosen retaining nut without damaging finish.)
- Screwdrivers (Phillips and flat-head)(For removing screws holding the handle and bonnet.)
- O-rings and seals (from kit)(Replace any worn seals; ensure compatibility with new cartridge.)
- Bucket and towels(Catch water and protect the area.)
- Plumber's grease or silicone lubricant(Lightly lubricate O-rings if manufacturer allows it.)
- Vinegar or mild cleaner(For cleaning deposits from the faucet body before reassembly.)
Steps
Estimated time: 30-45 minutes
- 1
Shut off water supply and protect the area
Under-sink shut-off valves should be turned clockwise to close. Open the faucet to relieve pressure and catch any remaining water with towels or a bucket. This prevents spills and reduces the risk of scalding or splashback during disassembly.
Tip: Take photos of hoses and screw placements to aid reassembly. - 2
Remove the faucet handle and bonnet
Use the appropriate screwdriver to remove set screws and lift off the handle. Remove the bonnet nut or retaining clip that holds the cartridge in place. Keep screws organized so you can reassemble exactly as you found it.
Tip: Note handle orientation marks to ensure correct reinstall. - 3
Extract the old cartridge
Carefully pull the cartridge straight out using pliers if needed. Inspect the cartridge and the valve body for signs of corrosion or debris. If a clip or nut is present, remove it without bending or damaging surrounding parts.
Tip: Do not yank; apply even pressure to avoid breaking the body. - 4
Compare and prepare the replacement cartridge
Match the new cartridge to the old one in size, shape, and label orientation. Confirm the model number and ensure seals and seats are included. If needed, transfer any adaptors or springs from the old cartridge to the new one as recommended by the manufacturer.
Tip: Take a photo for reference and orientation before removal. - 5
Install the new cartridge and seals
Gently press the new cartridge into the valve body, aligning orientation marks. Install new O-rings or seals and any seats from the kit. Reinsert the retaining nut or clip and ensure the cartridge sits flush without wobble.
Tip: Lubricate O-rings lightly if the manufacturer allows it; otherwise dry fit is best. - 6
Reassemble and test
Reattach the handle and bonnet, then slowly turn the water supply back on. Check for leaks at the base, around the handle, and under the sink. Run hot and cold several times to confirm smooth operation and correct mixing.
Tip: Begin with tiny valve openings to avoid a splashing start.
Frequently Asked Questions
What is a faucet cartridge?
A cartridge is the inner valve that controls water flow and temperature in many single-handle faucets.
A cartridge is the inner valve that mixes hot and cold water to control flow.
When should I replace a faucet cartridge?
When leaks persist after reseating, or temperature control remains inconsistent, replacement is recommended.
If leaks keep coming back after reseating or the temperature won’t stabilize, replace the cartridge.
Can I replace a cartridge myself?
Yes, with the right cartridge model and proper tools, you can swap it following manufacturer guidance.
Yes, you can replace it yourself if you have the right parts and shut-off valves.
What if I can't find the correct cartridge model?
Check brand and faucet family; contact customer support or take the cartridge to a plumbing supply for compatibility help.
If you can't find the exact model, bring the old cartridge to a supply store or contact the brand.
Is cartridge replacement dangerous?
The replacement process is generally safe if you shut off water and protect the area; use common-sense safety and wear goggles.
It’s safe if you shut off water and follow instructions.
Do I need professional help for multi-handle faucets?
Yes, multi-handle units can be more complex; consider hiring a professional if uncertain.
Multi-handle can be trickier; a pro can help.
Watch Video
Top Takeaways
- Identify signs of wear early to decide on replacement.
- Use model-matched cartridges to prevent leaks.
- Prepare tools and space before starting.
- Follow orientation marks for correct installation.
- Test thoroughly for leaks and temperature accuracy.
- Maintain cartridges regularly to extend life.