When to Leave a Faucet Dripping: A Homeowner's Winterization Guide
Learn when dripping a faucet prevents frozen pipes, how to decide the right times, and safe winterization steps for homeowners and DIY enthusiasts.

During freezing conditions, dripping a faucet can help prevent pipes from freezing in unheated areas. Drip only the faucet farthest from the main shutoff and along long, uninsulated runs, using a slow, steady drip rather than a heavy stream. Adjust the rate by temperature and pipe type, and shut off the drip when temperatures rise above freezing and pipes are protected.
Why Leaving Faucets Dripping Is a Practical Tactic
In cold climates, knowing when to leave faucet dripping can prevent frozen pipes. According to Faucet Fix Guide, timing and location matter. This section explains how to decide when to drip and how to do it safely, minimizing water waste while protecting your plumbing. The goal is to keep water moving enough to avoid freezing, not to waste water. When you install a drip strategy, you reduce the risk of burst pipes, which can cause extensive water damage and costly repairs. If you rely on a home heating system or have exposed pipes in garages or crawl spaces, dripping should be considered as a short-term precaution during deep freezes or sudden cold snaps. Always prioritize insulating pipes and sealing leaks as a long-term solution. The Faucet Fix Guide Team emphasizes using intelligent drip practices to balance safety and conservation, especially in homes with older plumbing or uninsulated exterior lines.
Which Faucets Are Most Likely to Benefit from Dripping
Not every faucet needs to drip, but certain locations are more vulnerable. Exterior hose bibs and interior pipes that run through unheated spaces (basements, attics, garages) are prime candidates for a controlled drip during freezing weather. Faucets connected to long runs or for irrigation lines can also benefit, particularly if those lines lie outside the heated envelope of the home. Dripping these lines creates a small amount of water movement that reduces the chance of standing water freezing in the pipe. If you have a basement with exposed copper or plastic piping, a drip may protect those sections better than relying on overall heat alone. Remember, drip only what is necessary, and use a slow flow to prevent waste. The Faucet Fix Guide Team recommends combining dripping with proper insulation to maximize safety and efficiency.
How to Decide When to Start Dripping
A practical rule of thumb is to drip when temperatures are forecast to fall below freezing for multiple hours and when pipes run through non-conditioned spaces. External faucets, pipes along exterior walls, and lines in unheated spaces deserve particular attention. Start with a minimal drip and observe for a few hours; if temperatures continue to dip and alarms or gauges show freezing risk, increase the drip slightly but avoid a full stream. If your area uses urban water restrictions or if your household has a high water bill, you may want to coordinate with a plumber or building manager to preserve water while protecting pipes. The goal is protection with minimal waste, not constant over-dripping.
Safety and Practicality: How to Drip Safely
Dripping should never create a puddle or waste water into the environment. Place a tray or towel under exposed connections to catch drips and prevent staining or slippery floors. Use a faucet that’s easy to reach and monitor, and avoid dripping from multiple fixtures unless you know they won’t flood or overtax the drainage system. If a drip becomes a stream, back off immediately and reassess insulation or heating. A steady, tiny stream is the safest approach for most homes. Remember to turn off the drip as soon as the risk of freezing subsides or when a more robust heating plan is in place. The Faucet Fix Guide Team highlights that drip strategy is a temporary safeguard, not a substitute for reliable heating and insulation.
How to Implement a Drip Plan: A Step-by-Step Narrative
Create a simple plan that identifies which fixtures are at risk and how to drip them safely. Start with exterior faucets and any long run on unheated walls. Choose a drip rate that maintains a tiny leak without a flush. Monitor weather updates and pipe temperature where possible, and adjust as conditions change. If you notice signs of freezing (stiff pipes, frost on exterior walls, or unusual pipes making crackling sounds), pause and reassess. The goal is a cautious, calculated drip that minimizes risk while conserving water. Faucet Fix Guide suggests pairing dripping with insulation and sealing gaps to address the root cause of frozen pipes.
Long-Term Prevention: Insulation, Sealing, and Maintenance
A drip should be viewed as a stopgap while you implement longer-term protections. Insulate exposed pipes with foam sleeves or heat tape, seal gaps around doors and windows that expose pipes to cold, and consider upgrading exterior hose bibs with insulated covers. For irrigation lines, winterize with compressed air or appropriate winterization methods rather than relying on a drip alone. Regular maintenance, such as inspecting pipe insulation and testing shutoffs, reduces the need for dripping in future winters. The Faucet Fix Guide Team emphasizes that combining insulation with a well-planned drip strategy offers better protection and reduces water waste over time.
Quick Troubleshooting Scenarios and Examples
Case studies and practical examples illustrate how and when to drip. For instance, a cold snap with uninsulated basement pipes might warrant a longer drip period for exterior faucets and long interior runs. In contrast, a well-insulated attic line may only require a brief drip at the onset of freezing conditions. These examples show why a one-size-fits-all approach isn’t ideal; homeowners should tailor dripping to their home’s layout, insulation, and local climate. The Faucet Fix Guide Team provides scenarios and step-by-step checks to help homeowners evaluate their unique situations.
Tools & Materials
- Adjustable wrench(For disconnecting supply lines if needed)
- Screwdrivers (flathead and Phillips)(For aerator and fixtures)
- Teflon tape (plumber's tape)(Seal threads on fittings)
- Pipe insulation (foam sleeves or heat tape)(Wrap exposed pipes to slow heat loss)
- Bucket(Catch drips during setup)
- Towels/rags(Protect floors and catch spills)
- Flashlight(Inspect dark crawl spaces)
- Exterior faucet covers/insulation(Protect hose bibs in cold weather)
Steps
Estimated time: 25-40 minutes
- 1
Identify vulnerable fixtures
Survey your home to locate all pipes and faucets in unheated areas (basements, garages, crawl spaces, exterior walls). Mark which runs are long and exposed to cold. This helps you prioritize where to drip and what type of insulation to add.
Tip: Start with exterior hose bibs and any pipes along exterior walls; prioritize those first. - 2
Decide which faucet to drip
Choose a faucet that is most at risk from freezing, usually the one farthest from the main shutoff or on a long run. Drip should be a slow, steady flow, not a flush. Avoid dripping interior fixtures that are shielded by heat or insulated panels when not necessary.
Tip: Drip only the minimum needed to keep the water moving; too much can waste water and create ice on surfaces. - 3
Set the drip rate
Open the faucet slowly until a light drip emerges. If you can hear the water moving or feel pipe vibration, you may have the rate right. If the drip slows during a cold spell, slightly increase it, but avoid a strong stream.
Tip: Use a single faucet as the drip source to avoid confusion and to simplify monitoring. - 4
Monitor and adjust
Check the drip every few hours during the cold period. If temperatures rise, or you notice moisture accumulation or frost on pipes, reassess the drip. Ensure the drip doesn’t create standing water around the foundation or entry points.
Tip: Put a towel or tray under the drip point to prevent water damage. - 5
Prepare for post-freeze action
As temperatures rise above freezing and insulation is effective, plan to stop dripping gradually. Re-insulate exposed pipes and close any temporary heat sources that were used during the freeze. The long-term goal is to reduce dependence on dripping.
Tip: Always verify that the main shutoff and other safety devices function properly after the drip phase.
Frequently Asked Questions
What is the recommended drip rate to prevent freezing?
A slow, steady drip is generally recommended for vulnerable pipes. Avoid a heavy stream, as it wastes water and can create other problems. Tailor the drip to the temperature and pipe type, and stop when conditions improve or insulation is in place.
Use a slow, steady drip on the faucet that’s most at risk. Don’t flood the pipe with too much water; adjust as temperatures change.
Should I drip interior and exterior faucets?
Dripping should be limited to pipes in unheated spaces or long exterior runs. Interior, well-insulated fixtures typically don’t need to drip, especially if your home is heated and well insulated.
Only drip pipes that are exposed to cold and not protected by insulation.
How can I tell if pipes are freezing?
Look for frost on exterior walls, unusual warmth loss, or visible frost near pipes. If you hear crackling or see bulging pipes, shut off the water and contact a professional. Prevention is easier than repair.
Frost on pipes or walls is a warning sign—act quickly to protect the plumbing.
Can dripping cause damage or waste water?
Dripping can waste water if used excessively. Use the minimum effective drip and monitor for changes in temperature. Combine with insulation to reduce the need for ongoing dripping.
A tiny drip helps but still watch your water use and fix insulation where possible.
What if there’s a power outage during a freeze?
If power is out, drip may still be possible if you can access a faucet and the line is in a heated area. Prioritize safe action and have a plan to resume dripping or to restore heat as soon as power returns.
In a power outage, drip only if it’s safe and you can monitor it; restore heat as soon as you can.
Watch Video
Top Takeaways
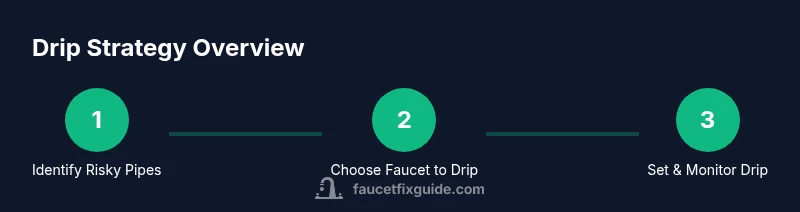
- Identify which pipes are at risk before freezing.
- Drip a single, slow faucet to move water and prevent freezing.
- Combine dripping with insulation for best protection.
- Monitor conditions and stop dripping when safe.