When Faucet Is Dripping: Urgent Troubleshooting Guide
Urgent, step-by-step troubleshooting for a dripping faucet. Learn common causes, safe fixes, and preventive tips to stop water waste and save money.

Most dripping faucets are caused by a worn washer or damaged O-ring in compression or ball faucets. Quick fix: 1) shut off the supply and remove the handle; 2) replace the washer or O-ring; 3) reassemble and test. If it still drips, inspect the cartridge or valve seat for wear or mineral buildup.
What happens when a faucet drips and why it matters
When faucet is dripping, it may seem like a minor annoyance, but even a slow drip wastes water and raises your utility bill over time. In residential fixtures, the drip typically comes from worn internal parts rather than a broken pipe. By understanding the basics—types of faucets (compression, ball, ceramic-disk) and where leaks originate—you can target the right part to replace. The Faucet Fix Guide team emphasizes that most drips stem from wear on seals and seats, which lets tiny amounts of water escape with every use. Tackling the leak quickly preserves water and prevents mineral buildup around the valve. In addition to reducing waste, addressing a drip helps improve indoor water pressure consistency and reduces the chance of more complex plumbing issues later. If you’re unsure about your faucet type, take a quick photo of the handle and stem before disassembly so you can compare parts later.
Common faucet types and why leaks happen
Understanding your faucet type helps you pick the right replacement parts. Compression faucets have a washer that seals against a valve seat; over time the washer wears down, causing a drip. Ball faucets use a movable ball and stem; O-rings and seals wear with use, leading to leaks. Ceramic-disk faucets rely on ceramic discs; when the discs wear or mineral buildup forms, they can drip or leak. Leaks can also arise from stripped threads, corroded valve seats, or improper installation. By knowing where the leak originates, you can decide whether a washer, O-ring, cartridge, or valve-seat service is needed. The key is to isolate the source: handle area, stem, seat, or cartridge.
Tools, safety, and prep for a drip repair
Before you start, gather a few essentials: an adjustable wrench, a screwdriver (flat and Phillips), replacement washers or O-rings in the correct size, a cartridge replacement if needed, plumber’s tape, a small bucket, and towels to catch any water. Safety first: turn off both hot and cold water supply under the sink, then open the faucet to relieve pressure and drain remaining water. If you’re renting or unsure about pipe conditions, consider using a shut-off valve tool to avoid damaging supply lines. Label screws and take photos during disassembly to ensure proper reassembly. Finally, wear eye protection if you expect water spray during testing.
Diagnostic flow: identify, verify, and select fixes for a drip
A systematic approach helps you avoid guessing. Start by observing the drip pattern—continuous or intermittent, slow or fast. Check the handle for looseness and remove it to inspect the stem and cartridge. If the leak stops when you tighten the packing nut, the issue is typically with the handle or stem packing. If water drips from the spout only when the faucet is off, the problem is likely a worn washer, O-ring, or cartridge at the valve. This flow lets you move from simple fixes (washer replacement) to more involved tasks (cartridge replacement or valve-seat reseating). Always test after each step and document what you replaced so you know what to order if the drip returns.
Safety notes and common mistakes to avoid
- Never force parts or over-tighten connections; this can strip threads and cause bigger leaks. - Don’t mix metal tools with copper piping unless you know how to prevent galvanic corrosion. - Avoid using harsh chemical cleaners on chrome finishes; they can degrade seals. - If you’re unsure about faucet type, consult the manufacturer’s guide or a professional. - Always replace worn seals with parts that match your faucet brand and model. Following a careful, methodical approach reduces the chance of a bigger leak during repair.
Prevention and maintenance: keep drips from starting again
Regular maintenance saves water and money. Clean aerators and faucet cartridges periodically to prevent mineral buildup that accelerates wear. Replace washers and O-rings at recommended intervals, especially in hard-water areas. Use a water-softening system if mineral content is high to extend seal life. Keep an eye on nut-tightness and seat condition; gentle tightening is enough—over-tightening can damage seats and lead to leaks. Finally, consider installing drip-free faucets or upgrading to ceramic-disk cartridges for improved long-term reliability. Consistent upkeep is cheaper than repeated repairs.
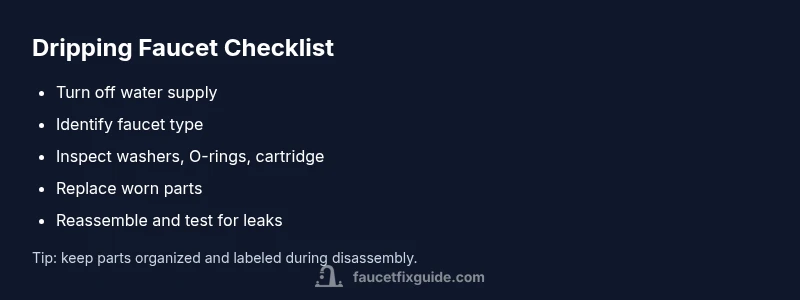
Steps
Estimated time: 30-60 minutes
- 1
Shut off water supply and prep
Under-sink valves shut off both hot and cold lines. Open the faucet to relieve pressure and drain water into a bucket. Place towels nearby to catch spills and gather replacement parts.
Tip: Label the hot and cold lines to avoid confusion during reassembly. - 2
Remove faucet handle
Use the appropriate screwdriver to remove the decorative cap and access screw. Gently lift the handle away from the faucet body to expose the stem.
Tip: Take a photo of how parts were assembled before disassembly. - 3
Inspect stem and seals
Check the washer, O-ring, or cartridge for wear, cracks, or mineral buildup. If you can’t see obvious damage, test with replacement parts from the kit.
Tip: If the stem is silver or brass, it’s often a washer/O-ring issue. - 4
Replace worn parts
Install a new washer or O-ring that matches the stem size. If you have a cartridge faucet, replace the cartridge with a compatible unit.
Tip: Handle gaskets and seals should be aligned; avoid twisting new parts into place. - 5
Reassemble faucet
Reinstall the stem, handle, and decorative cap in reverse order. Tighten screws snugly but not overly tight.
Tip: Use thread sealant or plumber’s tape only on threaded connections as needed. - 6
Test for leaks
Turn the water back on and let the faucet run for a few minutes. Check for drips at the stem and around connections. If leaks persist, repeat with a cartridge or valve-seat repair.
Tip: If the drip persists, you may need a professional inspection for the valve seat.
Diagnosis: Faucet drips continuously after closing the valve
Possible Causes
- highWorn washer (compression faucet)
- highDamaged O-ring (stem faucet)
- mediumWorn cartridge (cartridge faucet)
- lowValve seat corrosion/mineral buildup
Fixes
- easyReplace washer
- easyReplace O-ring
- mediumReplace cartridge
- hardReseat or replace valve seat
Frequently Asked Questions
What is the most common cause of a dripping faucet?
The most common cause is a worn washer or damaged O-ring in compression or stem-type faucets. Replacing these parts often stops the drip.
Most drips come from worn washers or O-rings; replacing them usually stops the drip.
Can a dripping faucet waste a lot of water?
Yes. A drip can add up over time, wasting water and increasing utility costs. Fixes are usually straightforward and cost-effective.
Yes, even a small drip wastes water over time and costs more on your bill.
Should I replace washers or cartridges?
Start with washers or O-rings for compression or stem faucets. If the leak continues, cartridge replacement is the next step for disk-type valves.
Begin with washers or O-rings; if it still leaks, consider the cartridge.
Is dripping a faucet a sign of a bigger issue?
Usually not. Most drips are localized to seals or cartridges. However, persistent leaks may indicate valve-seat corrosion requiring professional attention.
Not usually a big issue, but persistent leaks can signal valve-seat problems.
Can I fix a dripping faucet myself?
Yes, most drips are solvable with basic tools and replacement parts. If you’re uncomfortable with disassembly or the leak persists, call a plumber.
Yes, you can usually fix it yourself, but call a pro if you’re unsure.
How long does a faucet repair take?
Most fixes take 30-60 minutes, depending on faucet type and part availability. More complex cartridge or valve-seat work may take longer.
Typically about half an hour to an hour, depending on the faucet.
Watch Video
Top Takeaways
- Shut off water before inspection.
- Washer wear is the top cause of leaks.
- Cartridges may require replacement for disk-type valves.
- Test leaks after each repair before finalizing.