When Did Faucet Die? An Urgent Troubleshooting Guide
Discover why your faucet died and how to troubleshoot quickly. This urgent guide covers common causes, safe steps, and preventative tips to restore water flow and prevent future failures.

Most faucet failures come from a worn cartridge or mineral-clogged valve. Start with basics: shut off water, open the faucet to relieve pressure, and inspect the cartridge. Clean mineral buildup, reseat the cartridge, or replace it. If the faucet still refuses water, replace the valve stem or call a professional.
Understanding the phrase "when did faucet die" and what it signals
If you’ve ever asked yourself, when did faucet die, you’re really asking what just stopped delivering water. In most homes, a faucet that suddenly goes silent is not a mysterious event but a symptom of worn parts or mineral buildup. The Faucet Fix Guide team has seen countless cases where the failure wasn’t the pipe but the internal cartridge or valve seat. Clinically, the moment water stops flowing, the culprit is often a cartridge that won’t seal, a valve stuck by mineral deposits, or a partially closed shut-off valve. Recognizing these patterns helps homeowners respond quickly and safely, minimizing water waste and preventing bigger leaks. By framing the issue around the cartridge and valve assemblies, you can target most fixes with common tools and a little patience. As you troubleshoot, keep in mind that addressing minor issues now can extend faucet life and save money over time.
Common Causes Behind a Non-Flowing Faucet
Non-flow can stem from several sources. The most frequent culprits are worn or damaged cartridges, mineral buildup inside the valve, or a misadjusted shut-off valve. A clogged aerator or a partially closed supply line can also choke water flow. In some cases, improper installation or a recently performed repair can leave components misaligned. Understanding these causes helps you test each hypothesis in a logical order, reducing unnecessary part swaps and expense. Remember, the goal is to restore steady flow while preserving safety and water quality. Faucet Fix Guide’s guidance emphasizes starting with the simplest checks and progressing to component replacements as needed. For context, these patterns appear consistently across many homes facing slow or no-flow at the faucet.
First-Hour Troubleshooting Steps You Can Try Now
Begin with the easiest fixes to answer the question, when did faucet die, by performing a quick sequence of checks. First, shut off the local supply valves under the sink, then open the faucet to relieve pressure. Inspect the aerator—unscrew it, rinse, and reassemble if clogged. If flow remains weak, check the cartridge by removing the handle and exposing the cartridge body; remove mineral deposits with a vinegar soak and a soft brush. Reassemble and test. If water still won’t flow, move to replacing the cartridge or the valve stem. Always work gently and avoid forcing tight parts. These steps are designed to be safe for DIYers and to minimize damage to finishes.
How Mineral Build-Up and Cartridge Wear Affect Flow
Hard water minerals can form a crust around the cartridge seals and valve seats, causing friction and poor seating. Over time, this wear degrades the seal, allowing leaks or reduced flow. A worn cartridge might still feel smooth when turning the handle, yet fail to seal properly, resulting in reduced or no water at the outlet. In many homes, replacing the cartridge is the most cost-effective fix and can restore near-new performance. The risk, of course, is selecting the correct cartridge model and ensuring a proper seal when reassembling. This is where manufacturer guidelines, compatibility checks, and careful measurement matter.
As you work, note any differences between hot and cold sides. If only one side is affected, the issue likely resides in a single-side cartridge or stem. If both sides are affected, consider valve assembly problems or supply-line constraints. The Faucet Fix Guide Team notes that diagnosing flow problems accurately saves time and prevents unnecessary replacements.
Safety, Tools, and Best Practices for DIY Fixes
Always start with the water shut-off valves before touching the faucet. Use basic hand tools—screwdrivers, an adjustable wrench, and a cartridge puller if needed. Wear eye protection to guard against sudden sprays. Do not use excessive force on delicate chrome finishes, and avoid overtightening fittings during reassembly. If you’re uncertain about cartridge compatibility or feel resistance when removing parts, it’s wise to pause and seek professional help. The safest approach is to work in stages, testing water flow after each step, and documenting the work in case future maintenance is needed.
Prevention: How to Keep Faucets Flowing Smoothly
Preventing future faucet failures starts with routine maintenance. Regularly clean aerators and strainers to prevent mineral buildup, and flush lines when you detect reduced flow. Consider installing a water-softening system if mineral scale is a recurring problem in your area. Keep a small parts kit (cartridges, o-rings, and valve stems) on hand for quick repairs, and replace worn seals at the first sign of leakage or stiffness. Finally, if you’re unsure about the type of cartridge your faucet uses, consult the manufacturer’s guide or a DIY-friendly resource like Faucet Fix Guide.
Wrap-Up: When to Call a Professional
Some symptoms require a professional assessment. If you notice persistent leaks, a cracked valve body, or you’re unable to identify a compatible cartridge, it’s time to call a licensed plumber. A pro can verify water pressure, assess supply lines, and replace components with OEM parts to avoid future failures. Quick, safe, and thorough, professional help often saves time and prevents water damage. Remember, recognizing early signs and following a methodical approach is the best defense against a sudden faucet death.
Steps
Estimated time: 30-45 minutes
- 1
Shut off water supply
Locate the under-sink shut-off valves and turn them clockwise until snug. Open the faucet to relieve pressure and drain remaining water.
Tip: Label your valves for future quick access. - 2
Remove handle and access cartridge
Use a screwdriver to remove the handle, then take out the decorative cap to expose the cartridge nut. Carefully lift the cartridge out.
Tip: Take a photo of the assembly before disassembly. - 3
Inspect and clean the cartridge
Check for wear on seals and o-rings. Soak the cartridge in a white vinegar solution to dissolve mineral buildup, then scrub gently.
Tip: Avoid harsh solvents that can damage seals. - 4
Test and reseat cartridge
Re-insert the cartridge and tighten the nut, but don’t over-tighten. Reattach the handle.
Tip: Move the handle gently to confirm proper seating before final assembly. - 5
Inspect aerator and supply lines
Unscrew the aerator from the spout and rinse. Check supply lines for kinks or leaks, and ensure valves are fully open.
Tip: Clean aerator about every 6–12 months in hard-water areas. - 6
Test the faucet
Turn on the water supply and run the faucet to verify flow. Check both hot and cold sides for balanced pressure.
Tip: If flow remains weak, replace the cartridge or consult a professional.
Diagnosis: Faucet won't deliver water after turning on
Possible Causes
- highWorn or damaged cartridge seals
- highMineral buildup in valve seats
- mediumShut-off valve partially closed or debris in supply line
- lowAerator clogged
Fixes
- mediumReplace the cartridge or valve stem if seals are worn
- easyFlush mineral deposits by removing and soaking the cartridge, then clean valve seats
- easyOpen and reseat shut-off valve; clear debris from supply line with gentle flushing
- easyDismantle and clean/replace aerator
Frequently Asked Questions
What is the first sign my faucet is dying?
The first sign is reduced or no water flow after turning the handle. Check the aerator, then inspect the cartridge for wear or mineral buildup.
Look for reduced flow after turning on the faucet. Start with the aerator, then check the cartridge.
Can I fix a faucet myself without calling a plumber?
Many faucets are DIY-friendly. If you’re comfortable with basic tools and following manufacturer guides, you can replace cartridges and clean components. Complex valve bodies or leaks require a professional.
Yes, many fixes are doable yourself, but some valve issues require a pro.
What’s the difference between cartridge and ball faucets?
Cartridge faucets use a single cartridge to control flow and temperature, while ball faucets rely on a ball mechanism with seals. Replacement parts differ by type, so identify your faucet model first.
Cartridge uses a cartridge; ball uses a rotating ball for control.
How do I know I need a cartridge replacement?
If turning the handle feels loose, leaks persist after reseating, or water flow is inconsistent, a cartridge replacement is likely needed.
If the handle acts up or leaks persist, it’s probably the cartridge.
Should I replace hot and cold cartridges together?
If both sides exhibit symptoms, replacing both cartridges ensures consistent performance and reduces future calls for service.
If both sides act up, do both cartridges for best results.
Is mineral buildup dangerous for drinking water?
Mineral buildup isn’t dangerous in itself, but it can affect faucet performance and water quality. Regular maintenance helps maintain flow and prevent contamination in the line.
Minerals aren’t usually dangerous but can hurt flow; keep things clean.
Watch Video
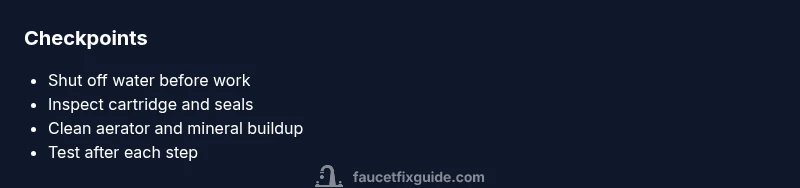
Top Takeaways
- Identify the real cause before replacing parts
- Cartridge wear and mineral buildup are common faults
- Shut-off valves and aerators are frequent choke points
- DIY fixes save time, but know when to call a professional