What If Tap Troubles Hit? A Practical Faucet Guide
Urgent faucet troubleshooting guidance for homeowners. Learn quick fixes, safe steps, and when to call a pro to handle what if tap problems escalate.

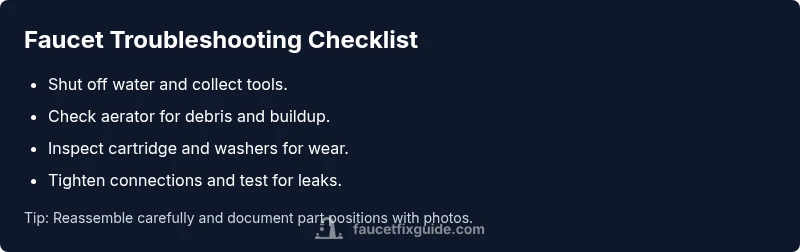
Most tap problems start with simple checks. First, shut off the water supply, remove the aerator, and inspect for debris or mineral buildup. If drips persist, test the cartridge and seals, then clean or replace as needed. If the issue continues, proceed with deeper diagnostics or call a professional. This quick path helps homeowners triage faucet problems quickly.
What to do when you hear what if tap problems
In many homes, tapping issues start with a misbehaving drip or a stubborn handle. The question "what if tap" often triggers a search for quick fixes. According to Faucet Fix Guide, most problems come from debris in the aerator, a worn cartridge, or a partially closed supply valve. This section covers the fastest, safety‑first checks you can perform to triage the issue and minimize water waste. Always start with the simplest steps: shut off the water at the main or under the sink, remove the aerator, and look for buildup or trapped particles. If you note mineral scale, use a vinegar soak and a soft brush. If the leak persists, you’ll be ready to proceed with deeper diagnostics.
Symptoms, quick interpretations, and initial fixes
Faucet problems present in several ways: a continuous drip, a stiff or loose handle, reduced water flow, or no water at all. A drip is usually a worn cartridge or valve seat; low flow often signals mineral buildup or a clogged aerator; no water can indicate a shutoff valve issue or supply line problem. For each symptom, start with the simplest remedy: clean the aerator, ensure the valve is fully open, and inspect for visible leaks around connections. Safety note: always wear eye protection when disassembling and use a towel to catch drips. If you see copper or braided line corrosion, stop and consult a professional.
Diagnostic flow you can perform at home (safe and practical)
This flow helps you determine the likely cause without pulling apart the entire faucet. Step 1: verify both hot and cold supply shut‑offs are fully open and that there is water pressure at the source. Step 2: remove and inspect the aerator; clean or replace if debris or scale is present. Step 3: disassemble the handle to access the cartridge or valve stem; inspect washers, O-rings, and seals for wear. Step 4: reassemble temporarily to test the faucet; observe if leaks persist. If leaks stop, reassemble fully; if not, you likely need replacement parts or a new faucet. If you are unsure, stop and contact a professional.
Most common fixes you can perform today
First, clean or replace the aerator to restore proper flow and seal. Next, inspect the cartridge or washers; replace any worn parts to stop drips. Tighten any loose supply lines and ensure valves are fully open. If leaks persist after these steps, a faucet replacement may be necessary, especially for older models with multiple worn components.
Prevention and routine maintenance tips
Regularly clean the aerator to prevent buildup, especially in hard water areas. Use a vinegar soak for mineral deposits and rinse thoroughly before reassembling. When installing replacements, use fresh O‑rings and avoid overtightening nuts or handles, which can damage seats. Finally, consider labeling shut‑offs and performing a quick check after any home maintenance to catch issues early.
Steps
Estimated time: 30-60 minutes
- 1
Gather tools and safety gear
Collect a screwdriver, adjustable wrench, replacement cartridge or washers, O‑rings, plumber's tape, towels, and a bucket. Put on eye protection. Lay out parts in the order you plan to reassemble to avoid confusion.
Tip: Take a quick photo of parts before disassembly to aid reassembly. - 2
Turn off water and relieve pressure
Shut off the under-sink valves or main supply. Open a nearby tap to release pressure and drain any remaining water. Place towels to catch drips and protect the sink surface.
Tip: Double-check both hot and cold valves are fully closed before proceeding. - 3
Remove handle and access cartridge
Remove the decorative cap, unscrew the handle screw, and lift the handle away. Use a wrench if necessary to detach the bonnet nut and expose the cartridge or valve stem. Be mindful of orientation for reassembly.
Tip: Label or photograph each step as you go to ensure correct orientation. - 4
Inspect parts for wear and buildup
Check washers, O‑rings, and seals for cracks, tears, or deformation. Inspect the cartridge for wear marks and smooth operation. Clean components with a cloth and vinegar solution if mineral deposits are present.
Tip: Avoid using metal tools that could scratch the cartridge. - 5
Clean or replace parts
Soak aerator parts in vinegar if mineral buildup is present, rinse well, and reinstall. If the cartridge or washers are worn, replace them with compatible parts. Lubricate O‑rings lightly if recommended by the faucet manufacturer.
Tip: Do not reuse damaged components; replace with correct parts. - 6
Reassemble and test the faucet
Reassemble components in the reverse order, ensuring housings are snug but not over-tightened. Turn the water back on and run both hot and cold to test for leaks and proper flow. Watch for drips at joints and adjust as needed.
Tip: If a leak appears at a joint after reassembly, reseat the connections and retest.
Diagnosis: Tap dripping, stiff handle, weak flow, or no water
Possible Causes
- highDebris or mineral buildup in aerator or cartridge
- highWorn cartridge/ washer or valve seal
- mediumPartially shutoff valve or loose supply line
Fixes
- easyDismantle faucet, clean or replace aerator and cartridge/washer
- easyTighten connections and ensure valve is fully open, test flow
- mediumReplace faulty cartridge or seals if wear is detected
- hardIf leaks persist, replace entire faucet
Frequently Asked Questions
Why does my tap drip even when turned off?
A dripping faucet is usually caused by a worn cartridge or faulty valve seat, sometimes compounded by debris. Replacing the cartridge or seat typically resolves the issue. If leaks persist, the faucet may be at the end of its life.
A worn cartridge or valve seat often causes a drip. Replacing those parts usually stops the leak.
What tools do I need for a DIY faucet repair?
You’ll want a screwdriver, adjustable wrench, replacement cartridge or washers, O‑rings, plumber’s tape, and towels. Having a camera or notes helps you reassemble components in the correct order.
Essential tools are a screwdriver, wrench, replacement parts, and towels. Take notes to reassemble correctly.
Can mineral buildup cause low water pressure at the tap?
Yes. Mineral deposits can clog the aerator or cartridge, reducing flow. Soaking parts in vinegar and cleaning them usually restores performance.
Minerals can clog the aerator or cartridge, limiting flow. Vinegar cleaning often fixes this.
When should I replace the entire faucet instead of repairing?
Consider replacement if multiple components wear out or the faucet is old and corroded beyond reliable repair. A new faucet often offers better reliability and efficiency.
If many parts wear or the faucet is old, replacement may be the best option.
Is DIY faucet repair safe for renters?
Renters can perform minor repairs that don’t involve altering plumbing. Always check your lease and consult the landlord before making changes to supply lines.
DIY is fine for simple fixes, but avoid altering plumbing without landlord approval.
Watch Video
Top Takeaways
- Diagnose with simple checks first to save time.
- Replace worn cartridges or washers to stop leaks.
- Always shut off water before working on a faucet.
- Document steps with photos to ease reassembly.