Why Would One Faucet Stop Working: An Urgent DIY Troubleshooting Guide
A comprehensive, urgent guide to diagnose and fix a faucet that suddenly stops delivering water. Step-by-step checks, safe fixes, and prevention tips from Faucet Fix Guide.

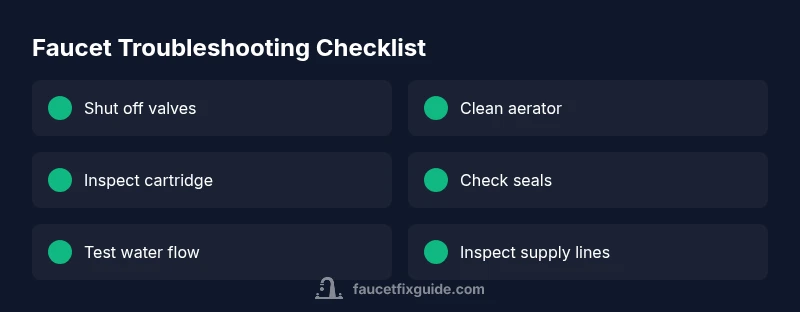
1) Shut off under-sink valves. 2) Remove and clean the aerator. 3) Inspect the cartridge and replace if worn. 4) Confirm supply valves are fully open. If water still won’t flow, check for hidden leaks or broken seals. This quick triage addresses the most common causes of why would one faucet stop working.
Common Causes of a Faucet That Seems to Stop Working
If you're asking why would one faucet stop working, the most common culprits are a blocked aerator, a worn cartridge, or a partially closed supply valve. Mineral deposits can build up over time, choking flow. A loose seal or worn O-rings can cause leaks or air gaps that sap pressure. A corroded stem or cartridge seat can stop movement entirely. In many homes, the simplest maintenance—cleaning the aerator, tightening fittings, and replacing a cartridge—restores full function quickly. According to Faucet Fix Guide, many failures start with the basics, and a thorough quick triage often reveals the fix. The Faucet Fix Guide team found that addressing the aerator, cartridge, and valves resolves the majority of residential faucet issues without costly parts or professional service. This section sets the stage for practical, actionable steps you can take now, with safety and efficiency in mind.
First Steps: Safety and Quick Checks
Always start with safety. Before poking around a faucet, locate and turn off the water supply at both the sink valves and, if possible, the main shut-off for your home. Dry the area to avoid slips and protect any exposed electrical outlets nearby. After securing water, check for obvious issues: a partially closed valve, a kinked supply line, or a loose handle. If you’re troubleshooting a kitchen faucet or a bathroom faucet, the approach is similar: verify hot and cold lines, inspect connections, and confirm that the aerator and cartridge aren’t blocked or worn. If you notice rust, a crack, or any leak that could worsen, set the project aside and plan for replacement parts. The goal is to regain control of the faucet without creating a bigger leak.
Diagnostic Flow: Symptom to Diagnosis
A structured diagnostic flow makes it easier to pinpoint the root cause. Start with the symptom: no water or irregular flow. If the aerator is clogged, cleaning or replacing it will restore flow without touching the cartridge. If removal of flow is due to a worn cartridge or seat, you’ll usually feel stiffness or a rough turn before water stops. A partially closed supply valve typically results in weak or no flow on one side (hot or cold) and is a frequent culprit when several fixtures share the same supply line. Document your observations as you go and re-test after each step. This approach minimizes needless part replacements and aligns with best practices from Faucet Fix Guide.
Step-by-Step Fix: Most Common Cause (Aerator/Cartridge)
The following steps address the two most frequent failure points: aerator blockages and cartridge wear. By following these steps in order, you can recover function without professional help in many cases. If you encounter persistent leaks, low pressure, or if the valve bodies feel stiff, stop and seek professional assistance to prevent damage to the water supply or your fixtures.
When to Call a Professional
If you notice persistent leaks behind walls, corroded plumbing fixtures, gas lines, or electrical components near the sink, or if you lack the tools to safely depressurize and disassemble the faucet, it’s time to call a licensed plumber. DIY attempts are appropriate for most aerator and cartridge tasks, but any work that involves the plumbing behind the wall or the main water supply should be escalated. The goal is safe repairs that last, not temporary fixes that cause bigger problems down the line.
Prevention Tips for a Long-Lasting Faucet
Regular maintenance reduces the odds of future failures. Clean aerators every 6–12 months, especially in areas with hard water. Replace cartridges when they begin to feel stiff or show signs of wear, and keep a small parts kit on hand for quick reseats and O-ring changes. Using a water-softening timer or filter can also reduce mineral buildup. By keeping fittings snug and shields intact, you prolong faucet life and minimize emergency repairs.
Steps
Estimated time: 25-45 minutes
- 1
Shut off water and prepare
Turn off both hot and cold valves under the sink. Hold a towel to catch any residual water. Gather a cup, bucket, and basic tools.
Tip: Take a quick photo of connections before removing parts. - 2
Remove faucet handle
Use the appropriate screwdriver to remove the set screw. Lift the handle off carefully to expose the cartridge.
Tip: Note handle orientation for reassembly. - 3
Inspect the cartridge and O-rings
Check for wear, cracks, or mineral buildup. If worn, replace the cartridge and any O-rings.
Tip: Do not force a stubborn cartridge; apply penetrating oil if needed. - 4
Clean or replace the cartridge
Clean seats with a soft brush. Install a new cartridge if the old one is worn or damaged.
Tip: Lubricate O-rings lightly with plumber's grease. - 5
Check the aerator
Unscrew the aerator from the spout. Rinse or soak to remove mineral deposits; replace if corroded.
Tip: Use a small brush to reach tight threads. - 6
Reassemble and test
Reinstall the cartridge, handle, and any caps. Turn on water slowly and observe for leaks or flow.
Tip: If the flow is inconsistent, re-check the seating of the cartridge. - 7
Inspect connections and lines
Check supply lines for kinks, leaks, or loose fittings. Tighten as needed and wipe dry.
Tip: Use thread sealant only where appropriate per manufacturer instruction. - 8
Final test and cleanup
Run both hot and cold to ensure stable flow and temperature. Clean up tools and replace any lost parts.
Tip: Log the replacement parts for future maintenance.
Diagnosis: Faucet stops delivering water or has very low flow
Possible Causes
- highPartially closed or faulty supply valve
- highClogged aerator or debris in the spout
- mediumWorn cartridge or seal in the faucet body
- lowDamaged supply line or loose connections
Fixes
- easyOpen the supply valves fully and re-test
- easyDuct off the aerator, clean, and reattach; replace if damaged
- mediumDisassemble the faucet to inspect/replace cartridge and O-rings
- easyInspect supply lines for kinks or leaks; tighten connections as needed
Frequently Asked Questions
What should I check first when a faucet stops delivering water?
Start with the shut-off valves under the sink and test by slowly opening them. Then inspect the aerator for blockages and test the cartridge for smooth movement. This order prevents unnecessary part replacements.
First, turn off the valves and check the aerator for blockages, then test the cartridge for smooth operation.
Why does my faucet leak after I turn it on?
Leaks after turning on usually indicate worn O-rings or a degraded cartridge. Replacing these parts generally stops the leak and restores function.
Leaks after turning on often mean worn seals or a worn cartridge; replace them to stop the leak.
Can I fix a faucet problem myself?
Many faucet issues, especially aerator and cartridge problems, can be fixed with basic hand tools. Follow a systematic diagnostic flow and stop if you encounter stubborn leaks.
Yes, many faucet problems can be fixed yourself with basic tools if you follow a careful diagnostic flow.
How often should I replace a faucet cartridge?
Cartridge replacement intervals depend on usage and water quality. If you notice stiffness or frequent leaks, plan for replacement rather than waiting for a failure.
Cartridge replacement depends on usage; replace when you notice stiffness or leaks.
What tools do I need for basic faucet repairs?
Keep a small screwdriver, an adjustable wrench, a replacement cartridge or O-rings, and an aerator wrench. A flashlight helps you see small parts clearly.
Gather a screwdriver, wrench, replacement cartridge and O-rings, plus an aerator tool.
When should I call a professional?
If you detect corrosion behind walls, a gas line, or electrical components near the work area, or if the shut-off valves are not safe to operate, hire a licensed plumber.
Call a professional if there’s wall corrosion, gas lines, or unsafe shut-off valves.
Is mineral buildup affecting faucet performance?
Yes. Hard water minerals can clog aerators and cartridges. Regular cleaning or a water-softening approach can prevent buildup.
Minerals can clog aerators and cartridges; regular cleaning helps a lot.
What’s the safest way to test fixes after repair?
Slowly reopen valves, run hot and cold water, and watch for leaks. If you hear a drip, stop and reseat the component or call a pro.
Test fixes slowly, check for leaks, and reseat parts if you hear a drip.
Watch Video
Top Takeaways
- Shut water off before inspecting any faucet parts
- Clean aerator and replace cartridge to restore flow
- Check shut-off valves and supply lines for issues
- Call a plumber if leaks persist or walls are involved