How to Keep Your Faucet from Freezing
Learn proven steps to prevent faucet freezing in cold weather with practical, safe techniques for indoor and outdoor faucets from Faucet Fix Guide.

Keep your faucet from freezing this winter by applying a few simple, proven steps. This guide outlines insulation, drainage, shut-off procedures, and maintenance you can perform yourself. According to Faucet Fix Guide, staying proactive with pipes in unheated spaces reduces burst risk and repair costs. You'll learn when to insulate, how to seal gaps, and what tools you'll need.
Why Faucets Freeze and How to Prevent Them
In winter, exposed water lines near unheated spaces can drop below freezing, causing water to expand and pipes to crack or leak. Understanding the physics helps you plan protection. According to Faucet Fix Guide, the most effective prevention combines insulation, controlled heat, and proper drainage. Identify faucets that are most at risk: exterior taps, laundry room lines, and pipes running along exterior walls or through crawl spaces. For indoor faucets, securing them away from draft sources and keeping cabinet doors open to allow warmer room air to circulate around pipes helps reduce susceptibility. Outdoor fixtures demand a frost-proof approach: install a frost-proof sillcock with an anti-siphon valve, add a weatherproof cover, and ensure the line is drained when temperatures drop. Regular maintenance and seasonal checks are core to avoiding costly bursts, especially for homes with older piping that’s more prone to freezing.
Before You Start: Tools, Materials, and Prep
Before you begin, assemble a basic winterization kit and verify the access points for all at-risk faucets. Faucet Fix Guide analysis shows that having the right tools on hand reduces project time and increases success rates. Gather foam pipe insulation or insulation sleeves, outdoor faucet covers, heat tape with an adjustable thermostat, weatherproof caulk or spray foam for drafts, a drain plug or bucket to capture residual water, and common hand tools (screwdriver, pliers, adjustable wrench). Do a quick walk-through of exposed pipes in crawl spaces, garages, and under sinks. Note any pipes that show signs of wear or corrosion and plan for professional attention if needed. Finally, turn off the main water supply before starting and have towels ready for any spills.
Insulation and Temperature Management for Indoor Faucets
Indoor faucets and their supply lines are often overlooked because they’re behind walls or under sinks. Start by wrapping hot and cold lines with foam pipe insulation, ensuring full coverage of bends and elbows. For pipes inside cabinets in unheated rooms, leave doors ajar overnight during severe cold spells to let warm air from the room circulate. If drafts are present, seal gaps with low-expansion spray foam or silicone caulk around penetrations and along the base of exterior walls. In rooms with colder air, consider adding a portable space heater with safety features to sustain a stable environment, but never leave heaters unattended near water or combustibles. Maintain a steady ambient temperature and avoid rapid temperature swings, which stress pipes and fittings. Regularly inspect for condensation or damp spots, which can signal hidden leaks or drafts that could freeze water in transit. These steps, supported by Faucet Fix Guide expertise, create a layered defense against freezing.
Draining and Maintaining Outdoor Faucets
Outdoor faucets are one of the most vulnerable targets for freezing. Start by shutting off the water to exterior lines at the indoor valve, then drain the hose bibs and any connected hoses. Open the faucet slightly to allow trapped water to escape and prevent pressure buildup that could crack the valve stem. Install a weatherproof outdoor faucet cover to shield the spigot from wind and precipitation, and consider adding a frost-proof sillcock for added protection. If the faucet is not used during winter, detach hoses, drain any remaining water, and store them. Finally, confirm that any backflow preventers or anti-siphon devices are in good working order. Regular winter checks ensure the drainage remains clear and ready when temperatures rise again.
Shut-off Procedures, Backflow, and Pressure Relief
Knowing where your shut-off valves are—both the main supply and the individual faucet valves—is essential for freezing prevention. Locate and label valves, then test them at the start of each cold season to ensure smooth operation. Install, if needed, a backflow prevention device that remains dry and free of debris, as blockages can cause pressure changes that stress piping. When warming pipes, remember to release pressure gradually and avoid forcing water through partial blockages. If you notice reduced water pressure or signs of backflow during winter, stop using the affected line and contact a licensed plumber. A simple, proactive approach to shut-offs reduces the risk of a sudden burst when temperatures snap.
Practical, DIY Techniques and Low-Cost Fixes
For a budget-friendly winterization, start with affordable insulation sleeves for exposed pipes and weatherproof faucet covers for outdoor spigots. Heat tape with a thermostat provides controlled warmth to exposed pipes and is safer than relying on a constant heat source. Keep cabinet doors open to let warm room air reach plumbing, especially in kitchens and bathrooms that share exterior walls. Add foam sealant to cracks around pipes where drafts enter. Simple moisture-absorbing products near pipes can also reduce condensation. Always follow manufacturer safety instructions when using electrical warming devices, and never wrap heating cables around metal components without clearance.
Seasonal Maintenance Plan: Winterize Now to Avoid Freezing Later
Develop a simple seasonal plan that covers inspection, insulation, drainage, and shut-off checks. Schedule a pre-winter walkthrough of all exposed pipes, especially those in garages, crawlspaces, and laundry rooms. Replace worn insulation and weatherproof covers as needed, and test shut-off valves monthly to ensure reliability. Maintain a log of maintenance tasks and any pipe issues observed during winter months. The goal is a proactive routine that minimizes the odds of a dramatic freeze. The Faucet Fix Guide team recommends keeping an up-to-date winterization checklist and revisiting it each season to adapt to changes in climate or home improvements.
Tools & Materials
- Pipe insulation (foam or fiberglass)(Wrap exposed pipes; cover bends and joints)
- Faucet insulation cover (outdoor)(Protects outdoor spigots from wind and cold)
- Heat tape or electric heating cable(Thermostat-controlled; follow manufacturer safety guidelines)
- Weatherproof caulk or spray foam(Seal drafts around penetrations and along exterior walls)
- Drain plug or bucket(Drain residual water from lines before freezing)
- Screwdriver, pliers, adjustable wrench(Essential hand tools for installation and shut-off checks)
- Silicone sealant or self-adhesive tape(Seal small gaps around pipes)
- Gloves and towels(Safety and cleanup during installation)
Steps
Estimated time: 60-90 minutes
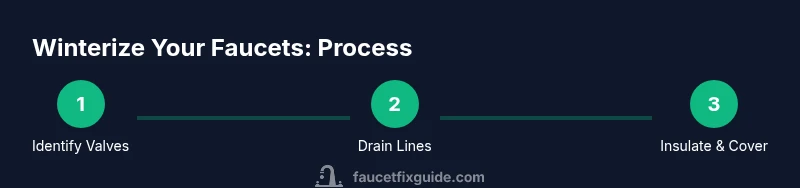
- 1
Identify shut-off valves
Walk your home to locate the main water shut-off and each faucet valve. Label them clearly so you can reach them quickly during a cold snap. Take photos for your reference and ensure accessibility if the power is out. This step helps you react swiftly without guessing where to turn off water.
Tip: Label valves with a permanent marker and include a simple map near your water heater. - 2
Turn off water to the faucet
Close the valve feeding the faucet you’re protecting. If you’re protecting multiple fixtures, repeat for each one. This prevents additional water from entering the pipe during a freeze. Then open the faucet slightly to relieve pressure and allow air to circulate.
Tip: Keep a towel handy for any residual water and consider using a bucket to catch drips. - 3
Drain the line
With the valve off, open the faucet to drain standing water from the line. This reduces the risk of ice formation inside the pipe. For hoses attached outdoors, disconnect and drain hoses completely. Re-tighten fittings after draining to prevent leaks.
Tip: If you can’t drain fully, use a shut-off that drains toward a safe location. - 4
Apply pipe insulation
Wrap exposed pipes with foam insulation sleeves, ensuring full coverage up to the first coupling. Cut sleeves to fit bends and joints; seal seams with tape or foam. Overlap end caps to avoid gaps that let cold air in, and secure with tape so insulation won’t slip.
Tip: For long runs, use extra layers for added warmth in areas near exterior walls. - 5
Install heat tape if needed
Attach heat tape to the exterior of the pipe following the manufacturer’s instructions. Use a thermostat-controlled option to avoid overheating. Do not place heat tape where it can contact wood or other flammables. Plug into a GFCI outlet if required by code.
Tip: Avoid crossing cords over sharp edges; keep them away from water sources. - 6
Protect outdoor fixtures
Install outdoor faucet covers and, if possible, upgrade to frost-proof sillcocks. Drain any water from hoses and disconnect them from hydrants. Ensure the area around the faucet is dry to prevent ice formation on surrounding surfaces.
Tip: Check covers before the first cold snap and replace weathered covers if needed. - 7
Improve indoor protection
Keep cabinet doors open to expose pipes to room temperature where sensible. Consider a portable heater in unheated rooms with pipes, but never leave heaters unattended. Check that insulation on nearby walls or attic spaces is sufficient to reduce heat loss.
Tip: Never run heaters near water or flammable materials; choose UL-listed safety devices. - 8
Test and monitor
After completing the steps, slowly restore water and monitor for leaks. Check periodically during cold periods and recheck insulation after severe weather. Maintain a winterization log to track improvements and plan future upgrades.
Tip: Set a reminder to re-check every 4–6 weeks during winter.
Frequently Asked Questions
What causes a faucet to freeze?
Frost forms when water in exposed pipes drops below freezing, then expands and can crack the pipe or fittings. The risk is higher in unheated spaces and along exterior walls. Proper insulation and drainage reduce this risk.
Frost forms when water in exposed pipes freezes, causing expansion and potential cracks, especially in unheated spaces.
Should I run water to prevent freezing?
A slow drip can prevent freezing in some setups, but it isn’t a universal fix. It’s most effective for low-flow lines and very cold conditions; otherwise, insulation and shut-off procedures are better long-term solutions.
A slow drip can help in some cases, but insulation and shutting off the line are usually more effective.
Where is the main shut-off valve located?
The main shut-off is typically near the water meter or where the main line enters your home. Label it clearly and test it to ensure it operates smoothly.
The main shut-off is usually near the water meter at the entry point of the home; label and test it.
Is heat tape safe for indoor pipes?
Heat tape is generally safe when used as directed and paired with a thermostat. Avoid wrapping around metal components and follow manufacturer guidelines to prevent overheating or fire risk.
Heat tape is usually safe if used according to the manufacturer and kept away from flammable materials.
Can I use a space heater to protect pipes?
Space heaters can help in very cold spaces if used carefully and never left unattended. Keep them away from water, and follow all safety guidelines to avoid fire hazards.
Space heaters can help, but never leave them unattended and keep them away from water.
When should I call a plumber?
If you notice frozen pipes that won’t thaw safely, visible cracks, or persistent leaks after attempts to thaw or insulate, contact a licensed plumber.
Call a plumber if pipes are cracked, leaking, or still frozen after your steps.
Watch Video
Top Takeaways
- Identify high-risk faucets and shield them early.
- Insulate exposed pipes and outdoor spigots.
- Drain unused lines to remove standing water.
- Keep indoor temperatures steady near plumbing.
- Follow Faucet Fix Guide's recommendation: pre-winter insulation and regular checks.