Run Faucet When Cold: A Homeowner’s Troubleshooting Guide
Learn how to safely run the faucet when cold, test temperatures, diagnose mixing issues, and perform basic fixes with clear steps from Faucet Fix Guide.

By following this guide, you will learn how to safely run the faucet when cold to test line temperatures, identify why hot water may be mixing in, and perform basic fixes. You’ll need simple tools and a calm approach. This quick plan sets you up to diagnose, test, and, if needed, replace worn components.
What it means to run faucet when cold in everyday use
In practical terms, running a faucet when cold means you are deliberately drawing water from the cold supply to observe its temperature, purge any stagnant water, and verify there is no unintended heat transfer from hot lines. According to Faucet Fix Guide, understanding how cold water should behave at the tap helps homeowners detect issues early rather than guessing. When a faucet behaves as if it's receiving warmer water, the most common culprits are a worn cartridge, a malfunctioning mixing valve, or a cross-connection between hot and cold lines. This block will help you diagnose the behavior calmly and safely, using simple checks you can perform with basic tools. The keyword run faucet when cold is a practical reminder that temperature testing in fixture plumbing is a standard maintenance step, not a dramatic repair. With patient testing and careful observation, you can determine whether a cold supply is delivering consistently cold water or if heat is slipping in through a shared shut-off or compromised cartridge. Faucet Fix Guide emphasizes calm, methodical testing over guesswork.
The temperature dance inside a faucet: hot vs cold
Fixtures regulate temperature through a small set of components: handles, cartridges or valves, the mixing chamber, and sometimes an anti-scald device. When you rotate toward cold, the valve should limit hot water flow and allow cold water to pass. If you still sense warmth, heat may be leaking in via a faulty cartridge, a misadjusted mixing valve, or mineral buildup that prevents a clean split between hot and cold streams. In some setups, hot and cold share a single cartridge; wear or debris can create partial crossovers, making the cold stream warmer than expected. Understanding these interactions helps you pursue targeted fixes rather than broad, risky changes. Listen to your faucet the way a pro would and note when temperature shifts occur during different handle positions—this is your map for diagnosis. The goal is a predictable, cold stream when you want it, with no unintended warmth creeping in.
Situations that call for cold-water testing in daily life
You may want to run faucet when cold during maintenance tasks such as cleaning aerators, flushing lines after a repair, or verifying anti-scald performance on a shared fixture. Cold-water testing is especially helpful when you notice inconsistent temperatures across hot and cold taps in the same fixture, or when a fixture seems to deliver tepid water even when the cold handle is fully engaged. These tests let you distinguish between a simple debris obstruction and a worn internal component. By documenting what you observe—temperature feel, flow rate, and response to handle position—families can determine whether a repair is anything more than a quick clean or if a cartridge replacement is warranted. This approach aligns with professional guidance from Faucet Fix Guide to reduce trial-and-error and protect your home from scalding risk.
Safe testing techniques: observe, measure, and compare
Safe temperature testing starts with basic precautions: turn off power to nearby appliances if there are any electrical components nearby, wear eye protection, and keep towels ready for any splashes. Use a digital thermometer to compare temperatures at the faucet mouth versus a known cold source, and note the moment you shift the handle from neutral toward cold. If the water remains warm beyond a brief purge, you likely have a cross-connection or a worn cartridge. Record your observations and compare them to your fixture’s expected behavior. Faucet Fix Guide recommends keeping measurements consistent—test multiple times, in the same pressure conditions, and with the same flow duration—to spot real patterns rather than fleeting variations.
Diagnosing common causes: cartridge wear, mixing valves, and cross-connections
Two of the most frequent culprits behind irregular cold tap temperature are a worn cartridge and a failing mixing valve. Debris or mineral buildup can also clog passages, altering flow paths and causing heat to couple into the cold line. A cross-connection—where hot water can re-enter the cold port due to valve or pipe alignment—produces a persistent warm or tepid stream even when the cold handle is engaged. In some installations, anti-scald devices may restrict cold-water flow unintentionally if damaged or misadjusted. Systematic inspection helps you separate symptoms from root causes. If you identify a damaged cartridge or valve, plan for a replacement; if debris blocks passages, a thorough cleaning can restore correct behavior. The key is to test, observe, and confirm before buying parts or applying forceful fixes.
Practical repair pathways: quick fixes vs. full replacement
For minor quirks, a careful cleaning of aerators and flow restrictors can restore the expected cold-water behavior without replacing parts. If debris is absent but the cartridge is worn or the valve is misadjusted, replacing the cartridge or reseating the valve is often the most reliable fix. In some cases, a complete faucet replacement is the most practical option when corrosion or internal damage is extensive. Always reference your fixture model to ensure you purchase the correct cartridge and seals. When in doubt, consider a professional inspection to avoid accidental damage. This guidance aligns with Faucet Fix Guide's approach: start with simple steps, escalate only as needed, and maintain safety as the top priority.
Maintenance practices to prevent future issues
Preventative care keeps cold water streams predictable. Regularly inspect and clean aerators, strainers, and supply lines to minimize mineral buildup. Replace worn cartridges on a recommended schedule, and test temperatures after any major plumbing work or line repairs. Use a water-softener if mineral scaling is persistent in your area, and ensure shut-off valves operate smoothly by exercising them every few months. Documenting dates of maintenance helps you track component lifespan and plan replacements before failures occur. By adopting a routine, homeowners can keep taps operating cleanly and predictably, reducing the chance of unexpected warm water from a cold tap.
Authoritative sources and safety resources
For further reading and verification, consider these trusted sources:
- EPA WaterSense: https://www.epa.gov/watersense
- Centers for Disease Control and Prevention: https://www.cdc.gov
- World Health Organization: https://www.who.int
Note: Always follow local plumbing codes and safety practices. If you notice persistent temperature inconsistencies, contact a licensed plumber. This content reflects general best practices and is intended for homeowners seeking safe, methodical approaches to faucet troubleshooting. For deeper technical details, consult the sources above and do not hesitate to reach out to a licensed professional when needed.
Tools & Materials
- Adjustable wrench(To loosen valve nuts on under-sink fixtures)
- Screwdriver set (Phillips and flat-head)(For removing handles and trim)
- Thermometer (digital or infrared)(To verify water temperature at the tap)
- Bucket or towels(Catch water and keep work area dry)
- Replacement cartridge (model-specific)(Only if wear is observed or as recommended by fixture manufacturer)
- Valve core tool / cartridge puller(If your faucet uses a cartridge retaining nut)
- Plumber's tape (Teflon)(Sealing threaded connections upon reassembly)
- Descaling solution or white vinegar(If mineral buildup blocks passages)
Steps
Estimated time: 45-75 minutes
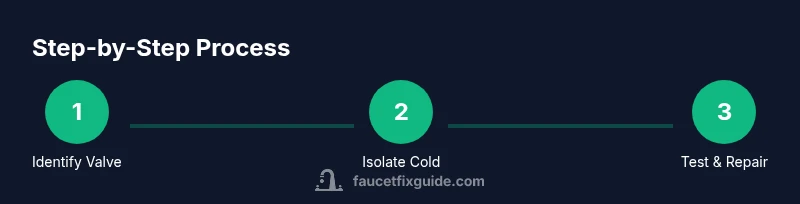
- 1
Identify faucet and locate shut-off valves
Begin by locating the hot and cold shut-off valves under the sink. Confirm which valve controls the cold supply and take photos or make a quick sketch of valve positions before you touch anything. This helps prevent mix-ups during reassembly and keeps you in control of the workflow.
Tip: Label hot and cold valves with tape for future reference. - 2
Close the hot water valve to isolate the cold line
Turn the hot water valve off slowly. This isolates the cold line so you can test it without hot water influencing the readings. After closing, open the faucet to relieve pressure and drain the line.
Tip: Do not slam the valve handle; a gentle turn avoids damaging seals. - 3
Purge air and check cold flow
With the cold valve still closed, open the cold faucet slightly and let water run into a bucket for a minute to purge air and stagnant water. Then measure the water temperature at the faucet mouth with your thermometer.
Tip: Compare the measured temperature to a known cold source to validate cold flow. - 4
Inspect cartridge and aerator for debris
Turn the faucet off again and remove the handle and escutcheon. Inspect the cartridge and aerator for mineral buildup or debris. Clean with vinegar solution or replace as needed.
Tip: Only handle components you can clearly identify; note their orientation for reassembly. - 5
Test with replacement parts if needed
If the cartridge shows wear or sealing surfaces are damaged, replace with the correct model cartridge. Reassemble the faucet and turn the water back on gradually to avoid a sudden surge.
Tip: Keep the old parts organized to confirm you replaced the right items. - 6
Run tests and verify warmth behavior
After restoration, run the faucet through several cycles from hot to cold to observe any persistent warmth in the cold stream. If warmth persists, you may have a cross-connection or a misadjusted mixing valve that requires professional service.
Tip: Document test results and seek professional help if heat intrudes into the cold stream consistently.
Frequently Asked Questions
Why would a faucet run cold be warmer than expected when the cold handle is on?
A warming cold stream usually indicates a fault in the cartridge, a misadjusted mixing valve, or a cross-connection allowing hot water to mix with the cold path. Start by inspecting the cartridge and valve assembly; clean or replace as needed.
A warm cold stream usually points to a faulty cartridge or a misadjusted valve, or a cross-connection letting hot water mix in. Check the cartridge and valve, then clean or replace as needed.
Is it safe to tweak the hot-water supply under the sink myself?
Tinkering with hot-water supply can lead to leaks, scald hazards, or excessive water pressure. If you’re not confident, stop and contact a licensed plumber. Start with isolating the cold line and testing temperatures before making any changes.
Modifying the hot-water supply can cause leaks or scalding. If you're not sure, it's safer to call a licensed plumber after performing basic cold-line tests.
Do I need to replace the entire faucet to fix cold-water issues?
Not always. Many cold-water issues stem from a worn cartridge or a dirty aerator. Replacing the cartridge or cleaning the aerator often resolves the problem. Reserve full faucet replacement for severe corrosion or irreparable parts.
Usually you can fix it by replacing the cartridge or cleaning the aerator. Full faucet replacement is only necessary for severe damage.
How long should I flush the lines after completing a repair?
Flush the lines with cold water for a couple of minutes, then recheck the temperature. If you still notice warmth in the cold stream after several cycles, there may be a cross-connection or valve misadjustment that needs further inspection.
Flush for a couple of minutes and recheck. If warmth continues, you may have a cross-connection or misadjusted valve.
What simple tools help diagnose temperature issues at a faucet?
A digital thermometer, a bucket, towels, and a basic screwdriver set are typically all you need for initial testing. They help you measure actual temperatures and safely access internal components for cleaning or replacement.
Use a thermometer and the basic toolkit to measure temperatures and access parts for cleaning or replacement.
Watch Video
Top Takeaways
- Test cold water flow before any hot-work adjustments.
- Isolate hot supply to identify cross-connections.
- Replace worn cartridges to restore proper mixing.
- Document observations for informed decisions.
- Consult a pro if the issue persists after basic fixes.