Dripping Faucet When Cold: Quick Fixes & Troubleshooting
Urgent guide to diagnosing and fixing a faucet that drips when cold. Learn common causes, safety steps, and step-by-step repairs from Faucet Fix Guide with practical tips and professional guidance.

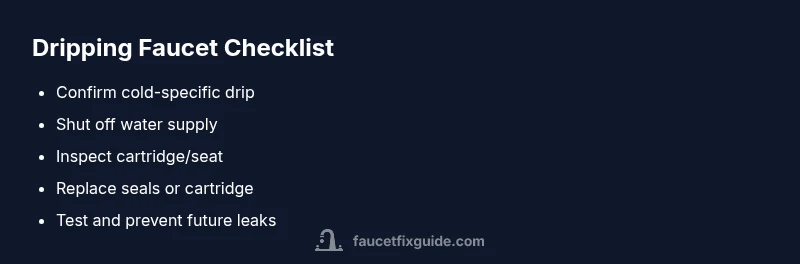
A dripping faucet when cold is most often caused by a worn valve seat or faulty cartridge that leaks as cold water pressure shifts. Start by closing the supply valves, drying the area, then try reseating or replacing the cartridge. If the issue persists, proceed with a full valve replacement.
Why a dripping faucet happens when cold
According to Faucet Fix Guide, a dripping faucet that happens only when cold often points to a worn valve seat or a faulty cartridge. The guide notes that aging cartridges and worn seats are common culprits. Temperature changes cause seals to contract or expand, exposing microscopic gaps that leak water. Even if you’ve just installed the faucet, the culprit could be an improper seal or a damaged cartridge. Recognize the symptoms: drips with cold water but not with hot, or an intermittent drip as the cold line is regulated. The goal is to isolate whether the leak is at the handle, the stem, or the seat. In general, cold-specific drips are not due to pipe freezing in a modern home, but the symptom can help narrow down the replacement part you’ll need. Regular maintenance reduces the probability of cold-induced leaks and saves water and money.
Common culprits behind cold-specific drips
The most common cause is a worn cartridge or valve seat. In cartridge faucets, cold water passes through a stem and seals worn over time, causing a drip. In compression valves, a deteriorated washer or O-rings can leak when the cold supply settles in after pressure changes. Some frost-free or anti-scald models have internal seals that shrink slightly in cold weather, exaggerating wear on cold stroke. If the dripping aligns with cold water usage, inspect for mineral buildup that chips at seals. Finally, check for improper installation or overtightening during maintenance, which can pinch seals and cause leaks when the water is cold.
Safety first: shutoff valves and water pressure basics
Before you touch anything, turn off the shutoff valves under the sink to isolate the faucet. If you can't reach the valves, shut off the main supply and relieve built-up pressure by opening the faucet until it stops. Then, wipe the area dry to spot where the water comes from. Check your home’s water pressure: excessively high pressure can accelerate wear on seals, especially in cold lines. If your pressure is above 80 psi, you may want to install a pressure regulator or adjust the existing one. Always wear eye protection and keep a towel handy.
Diagnostic flow: approach to identifying the problem
Start by confirming the drip occurs with cold water only. Next, inspect the handle hardware for seepage and looseness. Remove the cartridge or stem per your faucet type and inspect seals for wear, cracks, or mineral buildup. Reinstall with fresh O-rings or washers if needed, then test with cold water to see if the drip returns. If the drip persists, you’re likely dealing with a worn cartridge or valve seat that needs replacement. This flow helps you decide whether reseating is enough or a part replacement is required.
Step-by-step overview: quick checks you can perform
It’s often fastest to start with the easiest checks: ensure the water is shut off, remove the handle, and inspect the cartridge or stem. Clean mineral deposits with vinegar solution and gently reseat the cartridge. If the leak continues, replace O-rings or the cartridge itself, then reassemble and test. Remember to turn the water back on slowly to observe the results and avoid splashes.
Prevention tips to avoid future cold-dependent drips
Regular maintenance goes a long way: flush the lines periodically, replace worn cartridges on schedule, and use quality seals that resist temperature changes. If you live in an area with hard water, consider installing a filter or softener to reduce mineral buildup on internal seals. Keep a small bottle of plumber’s grease on hand for lubrication during routine servicing, and replace worn washers promptly to prevent recurring leaks when temperatures drop.
Quick maintenance routine for ongoing prevention
Establish a simple schedule to inspect faucet seals and cartridge status every year. Note any changes in how easily the handle moves or how quickly it returns to the closed position, as these can indicate wear. Use branded, compatible replacement parts and follow the manufacturer’s torque specs to avoid over-tightening. A proactive approach saves water and reduces emergency repairs.
Steps
Estimated time: 30-45 minutes
- 1
Shut off water supply
Locate the shutoff valves under the sink and turn them clockwise until snug. If the valves are stiff, use a wrench gently, then open the faucet to relieve pressure.
Tip: Wear eye protection and keep a towel handy. - 2
Remove faucet handle
Use a screwdriver to remove the handle cap, then unscrew the handle screw. Lift the handle away to expose the cartridge or stem.
Tip: Keep track of small screws or washers to avoid losing them. - 3
Inspect cartridge/seat
Carefully pull out the cartridge or stem and inspect seals for wear or cracks. Look for mineral deposits and signs of leaks around the seat.
Tip: If you see obvious wear, replace the component rather than attempting a patch. - 4
Replace seals or cartridge
Install new O-rings or washers if needed, or replace the cartridge according to the faucet type. Lightly lubricate with plumber's grease before reassembling.
Tip: Do not overtighten components. - 5
Reassemble and test
Reattach the cartridge/seat, reinstall the handle, and turn on the water supply slowly. Watch for drips, test with cold water first.
Tip: If leaks persist, stop and double-check seat alignment. - 6
Evaluate results
If the drip remains after replacement, the issue may be upstream or the faucet itself is failing. Consider professional service.
Tip: Note any changes in water pressure after repair.
Diagnosis: Drip occurs only when cold water is running
Possible Causes
- highWorn cartridge or valve seat
- mediumDamaged O-rings or washers
- lowMineral buildup affecting seals
Fixes
- mediumReplace worn cartridge or valve seat as appropriate
- easyReplace O-rings or washers
- easyClean seals and mineral buildup, reseat cartridge
Frequently Asked Questions
Why does my faucet drip only when cold?
A drip that only appears with cold water typically points to a worn cartridge or valve seat, or a damaged O-ring that fails to seal as the cold line expands or contracts. Inspect seals after isolating water supply.
A cold-only drip usually means the cartridge or seat is worn, or an O-ring is damaged; check those parts after shutting off the water.
Can I fix this myself?
Many cold-drip issues are DIY-friendly with basic tools. Start by turning off water, removing the handle, and inspecting the cartridge and seals for wear. Replacement parts are available from most hardware stores.
Yes, many fixes are doable at home with basic tools. Make sure to shut off the water first and follow the steps carefully.
What tools will I need?
You’ll typically need an adjustable wrench, a screwdriver, replacement O-rings or a cartridge, plumber’s grease, and a cloth to clean mineral buildup. Always check your faucet model for exact part compatibility.
Common tools are an adjustable wrench and screwdriver, plus replacement parts specific to your faucet model.
Should I replace the faucet entirely?
If the faucet is old, shows frequent leaks, or parts are no longer available, replacing the faucet can be more cost-effective than ongoing repairs. Compare replacement and repair costs plus installation considerations.
Replacement is a reasonable option if repairs keep failing or parts aren’t available.
Is there a safety risk with cold lines?
Cold lines aren’t inherently dangerous, but working under a sink involves electrical and water hazards. Wear eye protection, dry the area, and avoid contact with live electrical outlets.
Safety comes first—protect your eyes and keep the area dry.
How do I prevent future cold drips?
Regular maintenance, such as replacing worn cartridges, flushing lines, and using quality seals, reduces cold-related leaks. Consider a water treatment system if you have hard water.
Keep up with maintenance to prevent recurring drips.
Watch Video
Top Takeaways
- Identify cold-specific drip to isolate cause
- Cartridges or valve seats are the most common culprits
- Always shut off water and relieve pressure before work
- Replace worn components instead of patching
- Consult a pro for persistent leaks