Urgent Faucet Troubleshooting: Fix Low Water Flow Today
Urgent guide for homeowners: quickly diagnose and fix common faucet issues, from low water flow to drips, with safe steps, essential tools, and when to call a professional.

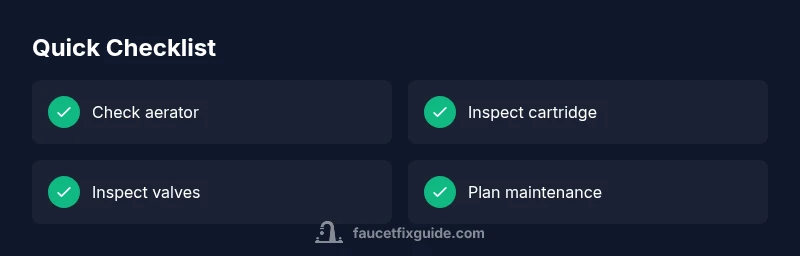
Low water flow in a faucet is usually caused by a clogged aerator or a worn cartridge. Start by cleaning the aerator, then inspect the cartridge and supply valves. If the flow remains weak, test both hot and cold lines and check for hidden leaks behind the sink. Follow the diagnostic flow for precise steps to fix today safely.
does tap work on big blue bus: a playful phrase, serious faucet reality
You may have heard someone toss out the playful line does tap work on big blue bus, but in real life the question is about reliability and flow in your sink or shower. This guide treats that curiosity seriously, focusing on how a faucet delivers water and where interruptions originate. The most common culprits are restricted flow from the aerator, worn cartridge seals, and partially closed supply valves. By starting with these straightforward checks, you can often recover full or near-full flow without needing professional service.
In addition to the obvious hardware culprits, consider how temperature and water pressure interact with your faucet. A sudden drop in pressure can masquerade as a faulty faucet when the real source is a shared line or municipal supply issue. The goal is to establish a clear baseline: normal flow when everything is open, then identify deviations. This approach helps you isolate whether the problem is local (your faucet) or systemic (the service line).
does tap work on big blue bus: a curious test for real-world faucets
Some readers joke about quirky phrasing, but in practical terms, the process remains straightforward: observe the flow, inspect components, and verify that each part is performing as designed. If flow is reduced only on one side (hot or cold), the issue is more likely a cartridge or valve seat. If both sides are weak, check the supply lines and shutoff valves. This section emphasizes staying methodical rather than guessing, because even small components like o-rings can hinder flow when worn or damaged.
In many homes the core fixes are simple: clean the aerator, replace worn cartridges, and ensure all valves are fully open. Safety-aware homeowners can complete these tasks with basic hand tools and minimal risk. When in doubt, consult the diagnostic flow and proceed to the step-by-step fixes described later. By framing the problem as a sequence of testable hypotheses, you can reduce frustration and speed up the repair.
The playful question does tap work on big blue bus serves as a mnemonic reminder that practical faucet troubleshooting relies on real-world checks, not rumors. As you work through this guide, you’ll gain confidence in diagnosing flow issues and avoiding unnecessary replacements. If you implement the recommended checks and still see weak flow, consider documenting your findings and contacting a professional for a formal assessment.
Steps
Estimated time: 45-60 minutes
- 1
Gather tools and safety gear
Collect adjustable wrench, screwdriver, pliers, replaceable aerator and cartridge washers, and a bucket. Put on eye protection and shut off the water supply under the sink before touching any fittings.
Tip: Label the hot and cold lines to avoid mixing them up later. - 2
Isolate the faucet and relieve pressure
Turn off both supply valves completely. Open the faucet to relieve any pressure and drain residual water so you can work without spills.
Tip: Keep a towel handy for unexpected drips. - 3
Remove the aerator
Use a wrench or pliers to carefully unscrew the aerator from the end of the spout. Inspect for mineral buildup and clean with vinegar or a brush.
Tip: If the aerator is damaged, replace it with a compatible new one. - 4
Test flow with aerator removed
Turn on the water briefly to check flow with the aerator off. If flow improves, the aerator was the main issue; proceed to clean or replace it.
Tip: If flow remains weak, proceed to cartridge inspection. - 5
Inspect and replace the cartridge or washers
Disassemble the faucet handle to access the cartridge or washers. Inspect for wear or damage; replace with an exact match and reseal carefully.
Tip: Take a photo during disassembly to aid reassembly. - 6
Open valves and test hot/cold separately
With new parts installed, reassemble and slowly open the valves. Test hot and cold streams individually to confirm balanced flow.
Tip: If only one side is weak, focus on that side's cartridge or seal. - 7
Flush and reassemble
Reassemble all components, turn on water fully, and let the system flush for a minute to clear any debris.
Tip: Document what you replaced for future maintenance.
Diagnosis: Low water flow from the faucet (weak stream or intermittent flow)
Possible Causes
- highAerator clog or mineral buildup
- highWorn cartridge or faulty valve seats
- mediumPartially closed shutoff valve or supply line kink
- mediumSediment or debris in supply lines
- low leaks or pressure drop in the home water system
Fixes
- easyClean or replace the aerator; test with a backflush if needed
- easyReplace the faucet cartridge or washer and reseal
- easyFully open shutoff valves and inspect supply lines for kinks
- mediumFlush the hot and cold lines to clear sediment
- mediumInspect for hidden leaks or corrosion and consider professional inspection
- hardCall a licensed plumber if the issue persists or involves plumbing code issues
Frequently Asked Questions
Why is my faucet dripping after I stopped it?
Drips after stopping a faucet are usually caused by worn washers or a damaged cartridge. Replacing these parts commonly stops the drip. Inspect the valve seats for any wear and reseal as needed.
A dripping faucet is usually due to worn washers or a bad cartridge; replacing those parts usually stops the drip.
How do I clean a clogged aerator?
Unscrew the aerator from the faucet spout, rinse with warm water, and scrub with a small brush to remove mineral buildup. If buildup is stubborn, soak the aerator in vinegar for 15-30 minutes before a final rinse.
To clean the aerator, unscrew it, rinse, brush away deposits, and soak if needed.
What tools do I need to replace a faucet cartridge?
You typically need an adjustable wrench, screwdriver, and pliers. Check the faucet’s model for any specialty tools and buy a matching cartridge before starting.
A wrench, screwdriver, and pliers usually suffice; check your model for any special tools.
Should I replace parts myself or hire a pro?
If you’re comfortable with basic plumbing tasks and have the right parts, DIY is feasible. For complex leaks, code violations, or gas-water mixups, hire a licensed plumber.
If you’re unsure or the job involves plumbing code concerns, hire a professional.
How often should I perform faucet maintenance?
Inspect aerators and cartridges once or twice a year and clean or replace as needed. Regular checks prevent clogs and leaks from becoming emergencies.
Check aerators and cartridges yearly, clean or replace as needed.
What if the issue persists after fixes?
If flow remains weak after replacing parts, consider inspecting supply lines for sediment, checking the municipal supply pressure, or scheduling a plumber visit for a pressure test.
If it still doesn’t flow well after fixes, you may need a professional pressure test or line check.
Watch Video
Top Takeaways
- Identify whether the issue is aerator, cartridge, or valve related.
- Follow a step-by-step approach to avoid missing components.
- Test flow after each fix to verify success.
- When in doubt, call a licensed plumber for safety and code compliance.
- Maintain regular faucet maintenance to prevent future clogs and leaks.