Why Does My Faucet Have Low Water Pressure? Quick Troubleshooting Guide
Diagnose and fix low faucet water pressure quickly with practical checks, aerator cleaning, valve adjustments, and a clear, step-by-step guide from Faucet Fix Guide.

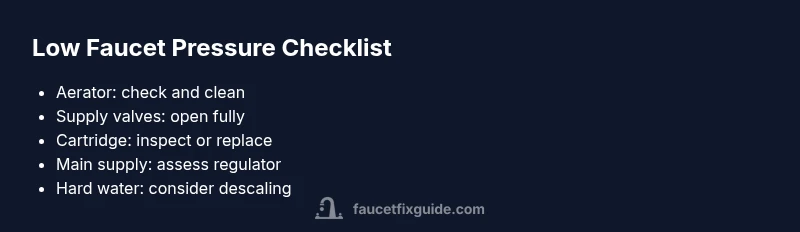
Why does my faucet have low water pressure? The most common causes are a clogged aerator, a partially closed shutoff valve, or a worn faucet cartridge. Start with the easiest fix: remove and clean or replace the aerator, then verify both supply valves are fully open. If pressure remains, inspect the cartridge and supply lines for blockages, and test other fixtures to determine if the issue is local or plumbed into the main supply.
Why low water pressure happens
If you’re asking why does my faucet have low water pressure, the answer is usually simpler than it seems. In most homes the problem isn't a broken pipe but a small blockage or a valve that isn't fully open. The two most common culprits are a clogged aerator and a shutoff valve that isn't completely opened. Hard water and mineral buildup can also restrict flow through the faucet internals. The Faucet Fix Guide team has found that these quick checks solve a large share of cases without calling a plumber. The first step is to test whether the issue is local to one faucet or affects multiple fixtures. If only one faucet is weak, the problem is almost always inside that faucet; if several fixtures are weak, you may be dealing with main supply pressure or a regulator. In either case, a methodical approach helps you avoid unnecessary repairs and keeps water flow strong.
Quick checks you can do yourself
Start with these quick checks to pinpoint the cause without calling a plumber. If you notice a consistent drop across several fixtures, the issue is more likely with the main supply or pressure regulator, not a single faucet. For a single weak faucet, focus on the aerator, cartridge, and nearby supply valves. Gather a few basic tools: an adjustable wrench, a clean cloth, and replacement aerators or cartridges if needed. After each step, test the faucet by running water for 30 seconds to observe any improvement. If you get stuck, proceed through the diagnostic flow rather than jumping to conclusions.
Aerator: the first culprit
The aerator at the tip of the faucet is a tiny filter that blends air with water. Over time, sediment, mineral deposits, and rust can clog it and dramatically reduce flow. To inspect, unscrew the aerator counterclockwise by hand or with a wrench if it’s stubborn. Rinse all parts under running water, use a small brush to remove debris, and soak in white vinegar for 15–30 minutes if mineral buildup remains. Reassemble and re-test. If pressure improves, you’ve resolved the issue; if not, move on to cartridge or valve checks.
Cartridge and valves: deeper causes
If the aerator is clear and flow remains weak, the faucet cartridge or valve seats may be partially blocked or worn. Remove the handle according to your model’s instructions, extract the cartridge, and inspect for cracks, mineral buildup, or cracks in seals. Soak the cartridge in vinegar if you see scale, rinse thoroughly, and reinstall. For cartridge replacement, match a compatible version from a store or manufacturer guide. After replacement, re-test water pressure at the faucet and move to supply lines if needed.
Supply lines, pressure, and_regulators
Low pressure can also originate from the supply side. Check under the sink for kinked hoses, clogged push-fit fittings, or partially closed shutoff valves. Fully open the hot and cold supply valves and listen for what feels like water hammer or vibrations, which can indicate a blocked line or failing regulator. If your home uses a pressure regulator, test or adjust it (carefully) to the recommended range. Persistently low pressure after these steps likely means a larger plumbing issue or municipal supply fluctuation, in which case a licensed plumber should be consulted.
Steps
Estimated time: 30-60 minutes
- 1
Turn off water supply and prep tools
Before you begin, turn off the hot and cold water under the sink to avoid splashes. Gather a towel, adjustable wrench, replacement aerator or cartridge, vinegar, and a soft brush. This reduces mess and protects surfaces.
Tip: Keep a small bucket ready for any drips while you work. - 2
Remove and inspect the aerator
Use your fingers or a wrench to loosen the aerator at the faucet tip. Inspect for sediment or mineral crust. If it looks clogged, clean with water and a brush; if damaged, replace with an exact match.
Tip: Note the aerator model so you can buy a correct replacement. - 3
Clean or replace the aerator
Rinse all components, soak metal parts in white vinegar for a few minutes if mineral buildup remains, then rinse again. Reassemble and reinstall the aerator, ensuring it threads on snugly but not over-tightened.
Tip: A tight fit prevents leaks and improves efficiency. - 4
Test flow and inspect the cartridge
If the aerator was clean and flow is still weak, remove the faucet handle and access the cartridge. Inspect seals and O-rings for wear. Clean deposits or replace the cartridge if needed. Reassemble and test again.
Tip: Use manufacturer parts to ensure compatibility. - 5
Check supply valves and main pressure
With the aerator functioning, verify both hot and cold valves are fully open. If pressure is still low across fixtures, inspect the supply lines for kinks or leaks and consider testing the home pressure regulator.
Tip: If you hear banging or surging, stop and call a pro. - 6
Confirm results and plan next steps
Run the faucet for 60 seconds to confirm sustained improvement. If pressure remains low, repeat tests on other fixtures to determine if the issue is isolated or system-wide.
Tip: Document what you did in case you need professional help.
Diagnosis: Single faucet or multiple fixtures with reduced flow
Possible Causes
- highClogged aerator or mineral buildup
- highPartially closed shutoff valve
- mediumLow overall home pressure or regulator issue
- lowLeaking or corroded pipes
Fixes
- easyClean or replace the aerator
- easyFully open both hot and cold supply valves
- mediumCheck faucet cartridge and replace if worn
- hardTest and adjust home water pressure or call a plumber for regulator/pipe issues
Frequently Asked Questions
What causes low faucet water pressure?
Common causes include a clogged aerator, a partially closed valve, a worn cartridge, and mineral buildup. If several fixtures are affected, the problem may be with main supply pressure or a regulator.
Common causes are aerator clog, valve position, or cartridge wear. If many fixtures are affected, the issue may be the main supply.
How do I test if the aerator is clogged?
Remove the aerator and inspect for debris. Rinse the screen under running water; if flow improves after reinstallation, the aerator was the culprit. If not, proceed to cartridge or valve checks.
Take off the aerator, clean the screen, put it back, and test the flow.
Will low pressure affect hot and cold water equally?
Often yes for a shared aerator or supply line. If only one side is weak, the issue may be with that side’s valve or cartridge.
Usually if both hot and cold are weak, it’s a supply issue; if only one side is weak, check that side’s valve or cartridge.
When should I call a plumber?
If the issue persists after cleaning the aerator and cartridge, or if you notice leaks, corrosion, or low pressure throughout the house, it’s time to call a professional.
Call a plumber if the problem sticks around after basic fixes or if you see leaks.
Can replacing the faucet help with low pressure?
A worn faucet can contribute to pressure loss, especially if the cartridge is difficult to replace. Replacing the faucet or cartridge often resolves persistent issues.
Yes, replacing the faucet or cartridge can fix ongoing pressure problems.
Is there a simple tool to measure faucet water pressure?
A faucet pressure gauge can help you determine if the home supply is within the normal range. Compare readings at multiple fixtures to diagnose.
Use a pressure gauge to check if your home pressure is within normal levels.
Watch Video
Top Takeaways
- Identify if the issue is local or system-wide
- Start with aerator cleaning to fix most cases
- Check shutoff valves before deeper checks
- Replace worn cartridges if indicated
- Test across fixtures to distinguish single-faucet vs. main supply issues