Shower Faucet Cartridge Replacement: A DIY Guide
Learn how to replace a shower faucet cartridge with clear, step-by-step instructions, safety tips, and maintenance advice from Faucet Fix Guide for a confident DIY fix.

With a shower faucet cartridge replacement, you can stop leaks and regain precise temperature control. You’ll shut off the water, gather basic tools, and choose a cartridge compatible with your faucet model. This guide covers prep, removal, installation, and testing for a confident DIY fix.
What a shower faucet cartridge replacement does
A shower faucet cartridge is the replaceable valve inside many modern shower fixtures. It controls water flow and temperature by aligning hot and cold passages as you move the handle. Over time, cartridges wear out, develop cracks, or accumulate mineral deposits, leading to drips, rough operation, or abrupt temperature shifts. Replacing the cartridge restores precise control without replacing the entire faucet. For homeowners tackling faucet diagnostics, understanding cartridge function is the foundation of a successful shower faucet cartridge replacement. Faucet Fix Guide explains how to identify cartridge types, select the correct replacement, and perform the swap safely, with practical tips drawn from real-world use.
Signs you need a replacement
Leaks when the handle is turned, temperature fluctuations, or a persistent drip after use are classic signs of a worn cartridge. If the handle spins with no resistance or you feel rough movement when turning, the internal seals may be worn. Hard water mineral buildup can also degrade O-rings and seals, causing leaks or uneven temperature. Before buying parts, observe where water drips from and how the faucet behaves at different temperatures. Compare the old cartridge's shape and size to reference images for quick compatibility checks.
Cartridge types and compatibility
Cartridges come in several designs, with ceramic-disc and rubber-seal (compression) styles being the most common. Ceramic cartridges use precision discs for smooth operation and longer life, while rubber seals accommodate older fixtures. Many brands—Moen, Delta, Pfister, and others—use proprietary cartridges; some universal cartridges work across multiple models. To avoid the frustration of a wrong fit, locate your faucet brand and model number, then bring the old cartridge to the store or verify exact dimensions and inlet/outlet geometry online. If you’re unsure, check the manufacturer’s site or the fixture’s manual for exact part numbers and compatibility notes.
Safety and preparation for replacement
Safety first: shut off both hot and cold water supplies before starting. Open the faucet to relieve pressure and drain any remaining water in the lines. Protect the work area with towels or a drop cloth, and place a shallow tray to catch any residual water. Gather the tools and a replacement cartridge that matches your faucet. A well-lit workspace and a clear plan reduce frustration and the risk of damage. If you wear eye protection, you’ll avoid splashes and mineral dust from the valve cavity.
Understanding compatibility and purchase decisions
Before buying, review compatibility notes: cartridge length, stem type, and the exact fit for hot and cold sides. Some cartridges have orientation marks—an arrow or notch—that guide installation. If you’re replacing a high-end fixture, you may need OEM cartridges for perfect fit and warranty coverage. For many DIYers, a reliable universal cartridge is acceptable if it matches the correct size and stem type. When in doubt, confirm with the retailer or manufacturer and verify return policies in case the part isn’t compatible after a closer inspection.
Removal of the old cartridge and preparing the housing
Start by turning off the water supply and removing the handle using the appropriate driver or Allen wrench. Lift off the decorative cap to expose the bonnet nut or retaining clip. Loosen and remove the clip, nut, or retaining mechanism that holds the cartridge in place. Gently pull the cartridge straight out, keeping track of its orientation. If the cartridge is stubborn, apply a gentle rocking motion and use pliers with a soft jaw to avoid marring the housing. Clean the cavity with a dry cloth and inspect O-rings for damage or wear.
Installing the new cartridge
Inspect the new cartridge for any shipping debris and ensure the O-rings are well-lubricated with silicone grease. Align the cartridge using the orientation marks and slide it straight into the cavity, pushing firmly until it seats fully. Reinstall the retaining clip or bonnet nut and confirm the cartridge has no wobble. Reassemble the trim, handle, and escutcheon in the reverse order of removal. Take care not to overtighten any threaded components to protect the valve seat and nearby fittings.
Reassembling, testing, and flushing
With the faceplate back on, restore the water supply in stages: first slowly open the cold valve, then the hot, checking for leaks as you go. If drips appear at the escutcheon or handle, reseat the cartridge and recheck the orientation. Run hot and cold water for several minutes to flush out any debris and to reestablish even temperature control. If a leak persists after testing, double-check O-ring seating, cracks in the cartridge, or alignment marks. Consider repeating the replacement with a fresh cartridge if necessary.
Maintenance and care after replacement
Keep cartridge life in good shape by inspecting O-rings yearly and cleaning mineral buildup from the valve area. Wipe away bathroom humidity that can accelerate corrosion, and use a mild descaling product if mineral deposits accumulate nearby. Avoid overtightening the handle, which can damage the cartridge stem. Document the cartridge model and date of replacement for future reference and warranty considerations. Regular maintenance helps prevent leaks and ensures smooth operation over time.
Troubleshooting if leaks persist after replacement
If leaks persist, re-check the orientation and seating of the cartridge, verify the correct model, and inspect for hardware damage in the valve body. Confirm that both hot and cold lines are fully shut off during reassembly. Examine the supply lines and escutcheon for any gaps where water could escape. If the issue continues, the faucet may require a replacement of the entire valve body or professional assessment.
Tools & Materials
- Replacement cartridge (matched to faucet model)(Ensure exact model compatibility; bring old cartridge for reference.)
- Adjustable wrench(Used to loosen nuts holding the cartridge; avoid overtightening.)
- Phillips and flat-head screwdrivers(For removing handles and caps.)
- Allen wrench set(Some fixtures use set screws behind handles.)
- Needle-nose pliers(Helpful for removing retaining clips.)
- Small tray or cup(Catch water and small parts during disassembly.)
- Towels or rags(Absorb spills and keep the area clean.)
- Silicone-based grease(Lubricates O-rings for a smooth seal.)
- Descale brush or cloth(Optional for removing mineral buildup in the valve cavity.)
- Cartridge puller (optional)(Helpful for stubborn cartridges.)
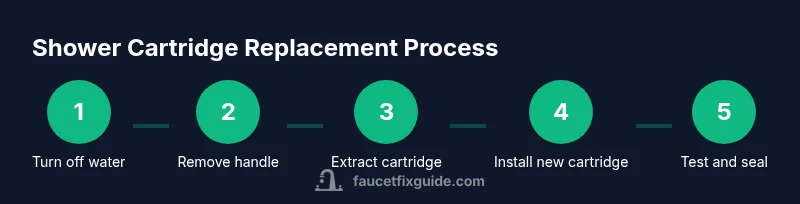
Steps
Estimated time: 30-60 minutes
- 1
Turn off water and prep area
Shut off both hot and cold supplies. Open the faucet to relieve pressure and drain lines. Place a tray under the work area and keep towels handy.
Tip: Having a clear workspace with good lighting reduces mistakes. - 2
Remove faucet handle
Use the correct driver or Allen wrench to remove the set screw, then lift off the handle. Remove any decorative cap to access the bonnet nut or clip.
Tip: Take a photo of the handle orientation before disassembly. - 3
Expose and remove the cartridge fastener
Loosen and remove the retaining clip or bonnet nut that holds the cartridge in place. Keep the fastener in a labeled container for reassembly.
Tip: If the clip is stubborn, gently wiggle with pliers rather than forcing it. - 4
Extract the old cartridge
Gently pull the cartridge straight out, noting its orientation marks. Inspect the cavity for damage and check O-rings for wear.
Tip: Do not twist aggressively; misalignment can crack the cartridge housing. - 5
Install the new cartridge
Lubricate O-rings with silicone grease, align using orientation marks, and press firmly into the cavity until seated. Reinstall the retaining clip or bonnet nut.
Tip: Verify the cartridge sits flush and does not bind when turning by hand. - 6
Reconnect trim and handle
Reassemble the handle, cap, and escutcheon in reverse order. Tighten all fasteners just enough to secure components without stressing the cartridge.
Tip: Double-check that the handle aligns with the correct hot/cold orientation. - 7
Restore water and test
Slowly turn on the water supply. Run both hot and cold to flush the line and verify leaks are gone. Adjust as needed.
Tip: Open the faucet gradually to avoid sudden pressure surges.
Frequently Asked Questions
How do I know which cartridge to buy for my shower faucet?
Check the faucet brand and model; compare the cartridge length and stem type. If possible, bring the old cartridge or model information to the store. Verify compatibility on the manufacturer’s site before purchasing.
Check the brand and model, compare length and stem type, and bring the old cartridge when shopping. Verify compatibility on the manufacturer’s site.
Can I replace the cartridge without replacing the entire faucet?
Many shower fixtures support cartridge replacement without a full faucet replacement. However some fixtures use non-replaceable valve bodies, which would require a different repair path or a full faucet replacement.
In many cases you can replace just the cartridge, but some fixtures aren’t compatible with cartridge-only repairs.
OEM cartridges vs universal replacements: which is better?
OEM cartridges guarantee exact fit and warranty alignment, while universal cartridges can work across multiple models if dimensions match. Always verify length, stem type, and flow characteristics before buying.
OEM parts fit perfectly and keep warranties intact, but universal options can work if you match the specs.
Is it safe to work with water on while replacing the cartridge?
No. Always shut off the water supply and relieve pressure before starting. Working with water off reduces slipping hazards and avoids accidental scalding.
No—turn the water off and relieve pressure before you start.
What if leaks persist after replacement?
Shut off water again, re-check orientation and seating, and inspect for damaged O-rings or cracks in the cartridge or valve body. If leaks continue, a professional assessment may be required.
If leaks stay, recheck the install and parts; you may need professional help.
How long does a typical shower cartridge replacement take?
For a DIYer, replacement typically takes about 30 to 60 minutes depending on fixture access and familiarity with tools.
Most people finish in about half an hour to an hour.
Watch Video
Top Takeaways
- Plan before disassembly and confirm cartridge compatibility.
- Lubricate O-rings to ensure a smooth seal during installation.
- Install cartridge with correct orientation to prevent leaks.
- Test thoroughly after reassembly and address any leaks promptly.