Repair a Bathroom Faucet: A Complete DIY Guide
Learn a clear, step-by-step method to repair a bathroom faucet, diagnose leaks, and replace cartridges or seals, with safety tips and maintenance to prevent future drips.

You're about to learn how to repair a bathroom faucet, from diagnosing common problems to completing a safe, leak-free repair. This guide covers tool lists, step-by-step instructions, and maintenance tips for compression, cartridge, and ceramic-disk faucets. By following these steps, homeowners, renters, and DIY enthusiasts can save time and avoid costly calls to a plumber.
Why Repair a Bathroom Faucet Matters
A dripping or stiff faucet wastes water and annoys everyone in the home. Fixing it quickly can save hundreds of gallons of water per year and reduce your utility bill by a noticeable amount. According to Faucet Fix Guide, most repairs are routine and do not require a full faucet replacement. Understanding the parts inside a faucet helps you target the right fix—whether you have a compression, cartridge, or ceramic-disk design. This section explains why repairs matter beyond comfort, covering water conservation, system longevity, and resale value. You'll also learn how a seal wears out and how mineral buildup affects smooth operation. By approaching repairs with confidence, you gain practical skills that pay off across many home maintenance projects.
Common Faucet Problems and What They Mean
Most bathroom faucet issues fall into a handful of categories: drips/leaks, a faucet that is hard to turn, reduced water flow, and uneven spray from the aerator. Leaks usually stem from worn O-rings, a failing cartridge, or damaged seals. A stiff handle often signals a worn cartridge or a seized stem. Reduced flow can come from a clogged aerator or mineral buildup in the cartridge. Understanding the symptom helps you decide whether to replace seals, swap a cartridge, or clean the aerator. This section breaks down symptoms by faucet type and provides practical diagnostic steps you can safely perform under a sink or at the counter. Remember, many fixes are straightforward, especially for common brands that use standard cartridges or seals. As you troubleshoot, document the part numbers and keep a few spare O-rings handy.
The Right Approach: Diagnosis Before Disassembly
Jumping straight into disassembly can waste time and damage parts. The right approach starts with a visual inspection: note where water is leaking, observe when it drips (steady or intermittent), and check the faucet handles for looseness. Power off the water supply only when you must, not as a default, to avoid accidental sprays. The next step is to determine whether the issue is inside the cartridge, the stem, or the aerator. Remove the aerator first to test water flow independently of the faucet internals. If the drip persists after aerator cleaning, focus on the cartridge or seals. Keeping a tidy workspace and labeling parts helps you reassemble correctly. This diagnostic mindset saves time and reduces the risk of overtightening threads or snapping delicate components.
Understanding Faucet Types and Repair Paths
There are three common bathroom faucet architectures: compression, cartridge, and ceramic-disk. Each uses different repairing parts and has unique wear patterns. Compression faucets rely on washers or O-rings to stop flow and are the simplest to service. Cartridge faucets use a replaceable cartridge to control the mix of hot and cold water; cartridges are often the male-female seal pair and can be swapped with a match to model. Ceramic-disk faucets use a ceramic disk mechanism and are long-lasting but require precise seals. Knowing your faucet type helps you order the correct cartridge, O-rings, or seals and choose the right disassembly steps. In many cases, a simple aerator clean can restore flow in minutes, while cartridge replacements may require a trip to the hardware store to pick the right part.
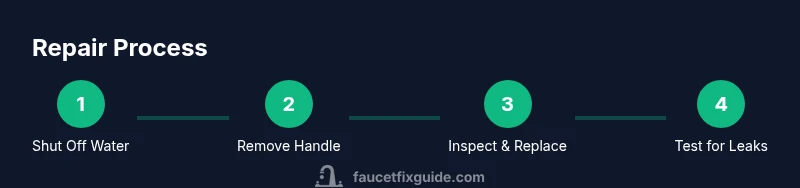
What to Expect: A Quick Overview of the Repair Process
Most repairs follow a predictable flow: shut off water, remove handles, inspect components, replace worn parts, reinstall components, and test for leaks. The time depends on faucet type and accessibility. Begin by turning off both supply lines under the sink and opening the faucet to relieve pressure. Then remove handles, exposing the stem or cartridge. Inspect seals, washers, O-rings, and the cartridge for wear. Replace any worn components with exact-fit replacements, reassemble, and turn on the supply. Finally, check for drips and adjust fittings if needed. This overview helps you plan your work and set realistic expectations for a repair that could take from 30 minutes to a couple of hours for more complex tasks.
Safety and Prep Before You Start
Safety matters when working with plumbing. Put on eye protection if you expect a spray of water and wear gloves if you’re dealing with metal parts that may have sharp edges. Work in a well-ventilated area, and protect cabinets with a towel or bucket to catch any spills. Gather your tools in advance and label parts as you remove them. Avoid using abrasive cleaners that can damage finishes. If you must use penetrating oil on corroded threads, apply a small amount and let it sit. When in doubt, consult the faucet’s manual or take a photo of the setup before disassembly. These precautions reduce risk and help you stay organized through the repair.
Maintenance Tips to Keep Faucets Drip-Free
After repairs, practice preventive maintenance to extend faucet life. Clean mineral buildup regularly with a soft brush and vinegar solution, and replace aerators or cartridges as recommended by the manufacturer. Wipe seals and O-rings dry before reassembly to ensure a proper seal. Use a small amount of plumber’s grease on O-rings to improve longevity and ease future disassembly. Check under-sink connections for leaks monthly and torque fittings to manufacturer-recommended tightness without forcing them. Keeping your faucet free of grit and mineral deposits reduces wear and helps prevent future leaks. These small habits add up to big savings in water and maintenance costs over time.
Troubleshooting After Repair
If you still notice a drip after completing a repair, recheck the part compatibility and seating. A loose bonnet nut, a misaligned cartridge, or a over-tightened stem can cause persistent leaks. Re-run the leak test: turn the water on slowly, run water for a minute, and observe. If leaks persist, don’t force additional disassembly; compare the removed parts with the replacement kit to confirm correct parts. Sometimes a faulty replacement cartridge is the culprit; try a different batch or model tooth count. Finally, if the issue seems beyond a standard home repair, consult a professional plumber for a diagnosis. Early intervention can prevent water damage and conserve water resources.
When to Call a Pro
Not all faucet issues are suited for DIY fixes. If you encounter persistent leaks after two replacement attempts, stubborn corrosion, or a multi-handle configuration, a licensed plumber can assess and resolve the problem safely. A pro can also help with structural issues behind the wall or a leaking supply line. When choosing a pro, ask about their experience with your faucet model, warranty on parts, and expected turnaround time. Investing in a professional service can prevent further damage and ensure code-compliant repairs, especially in homes with older plumbing systems.
Tools & Materials
- Adjustable wrench(Crucial for loosening valve nuts and faucet nuts)
- Phillips screwdriver(Used for handle screws)
- Flathead screwdriver(Useful for slotted screws on handles)
- Allen wrench set(Some faucets use hex screws)
- Replacement cartridge or seals(Match to faucet model; bring part numbers)
- O-rings and washers kit(Keep spare seals on hand)
- Teflon plumber’s tape(Wrap threads to seal leaks)
- Plumber’s grease or silicone lubricant(Lubricate O-rings (optional but helpful))
- Bucket or shallow dish(Catch water and hold parts)
- Towel or rag(Protect surfaces and wipe parts)
- Old toothbrush or scrub brush(For mineral buildup cleaning)
- Flashlight or headlamp(Improve visibility in tight spaces)
Steps
Estimated time: 1-2 hours
- 1
Shut Off Water Supply
Locate the under-sink shut-off valves and turn them clockwise to close. Open the faucet to relieve residual pressure and drain the line.
Tip: Have a bucket ready to catch any remaining water. - 2
Remove Faucet Handle
Use the appropriate screwdriver to remove the handle screws, then lift the handle off to expose the stem or cartridge.
Tip: Take a photo of how the handle sits before removal for easier reassembly. - 3
Inspect Cartridge and Seals
Examine O-rings, washers, and the cartridge for wear, cracks, or mineral buildup. Note any parts that look degraded.
Tip: Keep worn parts in a labeled container to compare sizes later. - 4
Replace Cartridge or Seals
Install the exact-fit cartridge or seals. If replacing, ensure correct orientation and seating to prevent leaks.
Tip: Avoid over-tightening; snug is enough for a good seal. - 5
Clean Aerator
Unscrew the aerator from the faucet tip, soak in vinegar if needed, scrub mineral deposits, and rinse.
Tip: A clogged aerator is a common cause of reduced flow. - 6
Reassemble Faucet
Reinstall seals, cartridge, and handle in the reverse order of disassembly. Reconnect hoses and tighten connections carefully.
Tip: Apply plumber’s tape to threaded connections to prevent leaks. - 7
Turn Water Back On and Test
Slowly restore water supply, then run hot and cold water to test for leaks and proper operation.
Tip: Watch for drips at every joint during the first few seconds of flow. - 8
Check for Leaks and Adjust
If leaks appear, re-check seals and seating. Slight adjustments may be needed to achieve a dry seal.
Tip: If a replacement part isn’t seating, verify compatibility with the faucet model.
Frequently Asked Questions
Can I repair a bathroom faucet myself?
Yes, most bathroom faucet issues can be repaired by a confident DIYer using standard tools and replacement parts. Start with simple fixes like cleaning the aerator or replacing a worn O-ring before moving to cartridge replacements.
Yes, you can usually fix a bathroom faucet yourself with basic tools and parts. Start with aerator cleaning and O-rings, then proceed to cartridge replacement if needed.
What tools do I need for a basic repair?
A small toolbox with an adjustable wrench, screwdrivers, an Allen wrench, and spare cartridges or seals is enough for many repairs. Include Teflon tape and plumber’s grease for a durable seal.
You’ll want a wrench, screwdrivers, an Allen key, spare cartridges or seals, plus Teflon tape and some grease.
What types of faucets can you repair at home?
Compression, cartridge, and ceramic-disk faucets are commonly repairable at home with replacement parts. Identify your faucet type to select the correct cartridge and seals.
Most homes have compression, cartridge, or ceramic-disk faucets that you can repair at home with the right parts.
How long does a typical repair take?
Most repairs take 30 to 90 minutes, depending on faucet type and accessibility. Complex setups may take longer if access is restricted.
Generally between 30 minutes and 1.5 hours, depending on the faucet and access.
Should I call a pro if the faucet is very corroded?
Yes. If corrosion is extensive or leaks persist after several attempts, a licensed plumber can resolve the issue safely and up to code.
If it’s heavily corroded or keeps leaking after attempts, call a pro.
Is it safe to use plumbers tape on faucet threads?
Yes. Apply Teflon tape to male threads to seal leaks; avoid overtightening parts to prevent damage.
Yes, use Teflon tape on threads to seal leaks and snug up fittings carefully.
Watch Video
Top Takeaways
- Diagnose before disassembly to save time.
- Use exact-fit parts for reliable sealing.
- Test leaks gradually after every reassembly.
- Keep parts organized to simplify reassembly.
- Regular maintenance prevents future drips.