How to Make Faucet Water Drinkable
Explore practical, safe methods to improve faucet water quality with filtration, disinfection, and testing. Learn how to choose a system, install it, maintain it, and ensure your drinking water stays safe and tasty.

To make faucet water drinkable, start with a filtration solution matched to your water quality, then add a disinfection step if needed and finish with post-installation testing. Choose a certified, point-of-use system and follow the manufacturer’s installation and maintenance guidance for safe, reliable results.
Why faucet water may need treatment
From taste and odor issues to safety concerns, there are multiple reasons households seek to improve faucet water. Municipal supplies are regulated, but local conditions and aging plumbing can introduce chlorine byproducts, iron, sediment, mineral hardness, or microbial risks. In some homes, well water may carry contaminants that a standard kitchen tap can’t address. According to Faucet Fix Guide, the decision to treat faucet water starts with identifying the problem you want to fix—taste, safety, or both—and then selecting an approach that targets that issue rather than over-treating. For renters, non-permanent options exist that improve taste and odor without invasive plumbing. For homeowners, more robust, multi-stage systems can handle several concerns in one installation. The goal is to match the solution to the water you actually drink, not just the supply’s generic capabilities.
Assessing your water quality
Start by identifying your primary concerns: taste, odor, cloudiness, or safety. Municipal sources are regulated, but local conditions vary. If you rely on well water, bacterial and mineral issues are common. Use a home water test kit to screen for chlorine or chloramine, hardness, iron, nitrate/nitrite, pH, and total dissolved solids. For microbial safety, consider sending samples to a certified lab. The Faucet Fix Guide Analysis, 2026 shows that households that test their water before selecting a treatment system are more likely to choose solutions that address their actual problems rather than over-treating. Keep a simple log of results and note who in the home drinks the water daily. If you see unusual color, odors, or cloudiness, prioritize safety and test promptly before purchasing equipment.
Filtration options for drinkable faucet water
There are several widely adopted options, each with strengths and trade-offs. Activated carbon filters (carbon block or granular) improve taste and reduce chlorine/disinfectant byproducts. Against dissolved minerals and minute contaminants, under-sink reverse osmosis (RO) systems offer comprehensive reduction, though they require more space and regular maintenance. Point-of-use UV disinfection provides an extra layer against bacteria when paired with pre-filtration and safe storage. Ceramic filters can target larger particulates, with periodic cartridge replacements. For many homes, a combination approach—carbon pre-filter with RO or carbon plus UV—delivers balanced results. When choosing, consider your water quality results, daily usage, available space, and maintenance willingness. Always verify that any system meets recognized standards (e.g., NSF/ANSI) and is certified for the contaminants you want to address. Faucet Fix Guide emphasizes matching the system to real water challenges rather than chasing every possible impurity.
Disinfection and safety considerations
Disinfection is not always required after filtration, but it can be appropriate in certain situations, such as well-water systems or compromised water sources. If you consider adding a disinfection step, use only methods approved by the system manufacturer and local health authorities. Do not attempt DIY chemical treatments beyond the recommended guidelines, as improper dosing can create harmful byproducts or unsafe water. Municipal supplies are generally already treated; however, a post-filter disinfection system can be added if your local utility flags concerns. Always follow the installation manual and local regulations. If in doubt, consult a licensed plumber or water treatment professional to avoid safety risks and to ensure compatibility with your existing plumbing.
Testing for safety and contaminants
After installing any drinking-water solution, test the water to confirm results. Use a reputable home test kit for quick checks and consider sending samples to a certified laboratory for comprehensive analysis. Track parameters such as chlorine/chloramine residual, pH, hardness, and any specific contaminants identified in your water report. For well owners, annual testing is advisable, with more frequent checks after system changes. Document results and compare them to health-based guidelines from authoritative sources. Regular verification helps ensure your solution continues to perform as intended and protects household members, including children and pets.
Choosing and installing a system
Begin with a water-quality plan: which contaminants are most problematic, your budget, and the space you can dedicate under the sink or at the faucet. For light taste/odor issues in municipal systems, a faucet-mounted carbon filter or a compact under-sink unit may suffice. For broader contaminant reduction or well-water challenges, a multi-stage RO system with a pre-filter and a post-filter is common. Ensure the system is compatible with your faucet and supply lines, and check that it fits under your sink or on the countertop as needed. Read installation instructions thoroughly and gather the necessary tools before starting. If you rent, consider temporary solutions that don’t require permanent mounting or pipe alterations. Faucet Fix Guide recommends verifying compatibility with your water quality report and choosing a solution that minimizes maintenance while delivering consistent results.
Maintenance, troubleshooting, and long-term care
Plan for routine maintenance that includes filter/cartridge replacements, sanitizing the system as recommended by the manufacturer, and periodic water testing to verify continued performance. Common issues include reduced flow, off-tastes, or unusual colors, which may indicate clogged cartridges or incorrect installation. Replace filters on schedule and avoid letting cartridges sit past their shelf life. Keep spare parts and installation manuals accessible. In case of persistent issues, re-test your water and re-evaluate your system’s compatibility with your current water quality. Regular maintenance helps ensure your drinking water remains safe and pleasant over time. The Faucet Fix Guide Team notes that proactive care reduces the likelihood of failures and improves long-term satisfaction with your home Water Treatment setup.
Cost, budgeting, and planning ahead
Costs vary by system type, installation complexity, and maintenance needs. Entry-level faucet-mounted filters are the most affordable option and require minimal installation effort. More comprehensive under-sink or whole-faucet systems offer greater contaminant reduction but demand space, professional installation in some cases, and ongoing cartridge replacements. Budget for initial purchase, installation (if needed), and ongoing cartridge replacements and occasional sanitization. Compare total ownership over 3–5 years, not just the upfront price. While price ranges exist, the best value comes from a system that matches your actual water quality needs and your maintenance capacity. The Faucet Fix Guide recommends selecting a solution with clearly stated replacement intervals and accessible customer support for troubleshooting and replacements.
Safety for households with children and pets
Drinking-water safety matters more in homes with children and pets. Keep filtration systems out of reach of curious kids, and ensure that any system components are securely installed to prevent leaks or accidental disassembly. Use storage containers that are clean and food-grade if you transfer treated water. Always follow label instructions and keep emergency contact numbers handy. If you’re unsure about any aspect of filtration, disinfection, or storage, consult a qualified plumber or water-treatment professional. Prioritize safety above all when implementing any home water-treatment solution.
Brand and consumer tips
To maximize confidence in your decision, compare certifications and read independent reviews. Start with a reputable, standards-compliant system and follow all installation and maintenance directions precisely. The Faucet Fix Guide Team recommends documenting your water-quality goals in writing and revisiting them after the first month of use to assess whether the system meets expectations. When in doubt, seek professional installation help to ensure proper plumbing connections and leak prevention. By staying informed and proactive, you’ll achieve reliable, drinkable faucet water while protecting your family’s health.
Tools & Materials
- Water quality test kit(Check for chlorine/chloramine, hardness, metals, pH, and nitrates)
- Filtration system (under-sink or faucet-mounted)(Choose based on shared contamination targets and space)
- Replacement cartridges or filters(Have a few on hand; replacement intervals vary by model)
- Teflon tape (plumber’s tape)(For sealing threaded connections)
- Adjustable wrench(For tightening fittings without overtightening)
- Screwdrivers (flathead and Phillips)(May be needed for mounting brackets or cartridge housing)
- Bucket or shallow pan(Catch any incidental water during disassembly)
- Cleaning cloths and mild sanitizer(Sanitize surfaces before re-assembly)
- Instruction manuals(Keep for reference on model-specific steps)
- Food-grade storage bottles (optional)(For safely storing treated water after filtration)
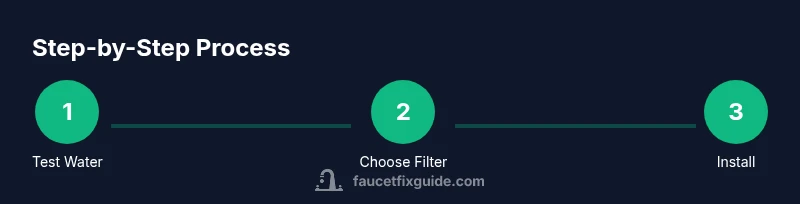
Steps
Estimated time: Total time: 90-120 minutes
- 1
Test incoming water
Before making changes, confirm what contaminants are present and in what levels. Use a home test kit or send samples to a certified lab if you suspect microbial or complex chemical issues.
Tip: Document which contaminants you test for and the results. - 2
Choose a filtration approach
Based on your water test results, select a filtration strategy (e.g., carbon filter for taste, RO for broad contaminant reduction, or a UV/ceramic combo for disinfection).
Tip: Ensure the system is certified for the contaminants you target. - 3
Plan placement and compatibility
Decide whether to mount under-sink or at the faucet. Check that fittings, flow rate, and shut-off valves suit your plumbing.
Tip: If you rent, prefer non-permanent options that don’t require drilling. - 4
Shut off water supply
Turn off the cold-water supply under the sink and relieve pressure by opening the faucet.
Tip: Have towels ready to catch any residual water. - 5
Install filtration system
Follow the manufacturer’s instructions to mount the housing, connect inlet/outlet lines, and secure fittings with Teflon tape where needed.
Tip: Use the included brackets or a stable surface to reduce vibration. - 6
Connect to faucet
Attach the system’s output line to the dedicated drinking-water faucet or to the existing faucet line as instructed.
Tip: Avoid cross-threading by aligning threads carefully before tightening. - 7
Flush and test
Run water through the system to flush out preservatives and initial residue. Check for leaks and confirm flow rate is acceptable.
Tip: Follow the manufacturer’s recommended flush duration and test again after flushing. - 8
Document maintenance schedule
Create a maintenance calendar noting replacement intervals and when to retest water quality.
Tip: Set reminders a few days before cartridge expiration to avoid gaps in performance.
Frequently Asked Questions
Do I need to disinfect faucet water after installing a filtration system?
Filtration alone often reduces contaminants; disinfection is not always required for municipal water. For well water or if advised by your water utility, consult a professional before adding a disinfection step.
Filtration may be enough for city water, but check your water type and consult a professional if you have well water.
Can I drink water immediately after installation?
Avoid drinking until you’ve flushed the new system per the manufacturer’s instructions and confirmed the water tastes normal. Use the test results to verify safety before regular use.
Flush as directed and test before drinking regularly.
Which filtration method is best for well water?
Well water often benefits from a multi-stage approach (carbon filtration plus RO and/or UV) tailored to your test results. A professional evaluation helps identify necessary components.
Well water needs a customized setup based on testing.
How often should I replace filters?
Replacement intervals vary by filter type and usage. Follow the manufacturer’s schedule and retest water periodically to ensure continued performance.
Change filters on schedule and recheck water quality.
Is DIY installation safe for renters?
Yes, many renters use non-permanent, plug-and-play filtration options. Ensure the setup is removable and does not alter plumbing permanently, and always follow building rules.
Non-permanent setups work for renters when allowed.
Watch Video
Top Takeaways
- Test water quality before selecting a system
- Match filtration and disinfection to actual water problems
- Schedule regular filter changes and retesting
- Flush after installation to remove preservatives
- Document maintenance to sustain water safety