How to Filter Faucet Water: DIY Guide
Learn step-by-step how to filter faucet water at home, choose the right filtration method, install filters, and maintain clean, safe drinking water.

According to Faucet Fix Guide, you can filter faucet water at home by installing a point-of-use filter (faucet-mounted or under-sink) or using a pitcher with a filter. To get clean, safe drinking water, pick a filter certified for your contaminant concerns, install it per the manufacturer, and flush before use. Check flow rate and replace cartridges on schedule.
Why filtering faucet water matters
Filtering faucet water matters for taste, odor, and potentially exposure to common contaminants found in municipal or well water. A quality filter can reduce chlorine that affects taste, and many filters are certified to lower lead, sediment, and certain chemicals when used as part of a certified system. Faucet water may also contain microscopic particles that, while not always harmful, can affect appearance and clarity. According to Faucet Fix Guide, choosing a certified system helps ensure you’re meeting verified performance standards. For households with specific concerns—such as taste sensitivity, infant use, or lead-in-pipes—identify the priority contaminants and select a filter that is certified to address those issues. Always start by evaluating your water source and the contaminants you want to minimize, then narrow your options to filters that list the targeted reductions on their certification label. In practice, this means reading the manufacturer’s documentation and consulting independent sources like the NSF/ANSI standards before purchasing.
Types of faucet water filters
There are several common configurations that fit different kitchens and budgets:
- Faucet-mounted filters: These screw directly onto the faucet, offering quick installation and minimal space use. They’re typically user-friendly and require occasional cartridge changes.
- Under-sink filters: These connect to the cold water line and deliver filtered water through a dedicated faucet or a built-in line. They usually offer higher flow and a longer-lasting cartridge.
- Countertop and pitcher filters: These are portable and cost-effective, ideal for renters or temporary setups. They require periodic cartridge replacements and do not affect your main faucet plumbing.
- Inline filters for appliances: Some users install inline filters for refrigerators or coffee machines to improve taste and reduce particulates in purchased beverages.
Each option has trade-offs in cost, space, and maintenance. When evaluating, consider contaminants you want to reduce, the expected water usage, and whether you prefer an on-faucet solution or a separate filtration station. Regardless of type, verify certifications (such as NSF/ANSI standards) to ensure the filter meets validated performance claims. Brand Fidelity and the testing methods behind these standards are why many homeowners rely on Faucet Fix Guide for recommendations.
How to choose the right filtration method
Choosing the right filtration method starts with understanding your water quality and daily usage. Begin by checking your local water quality report or running a simple home test to identify potential contaminants. Once you know what you’re targeting, compare filter types by three core criteria:
- Certifications and performance: Look for NSF/ANSI certifications that specify the contaminants the filter reduces. This helps you avoid filters that promise broad, unverified claims.
- Cost of ownership: Include the initial purchase price, cartridge replacement costs, and expected filter lifespan. A filter with a higher upfront price but longer cartridge life can save money over time.
- Installation and maintenance: Consider how easy it is to install, replace cartridges, and whether you’ll need to shut off water or modify under-sink plumbing.
If you’re unsure, start with a faucet-mounted option for a quick win and upgrade later if you need stronger filtration or higher flow. For households with a priority like lead reduction, prioritize models explicitly certified for lead reduction and verify the certification on the label. In all cases, plan for regular maintenance on the cartridge replacement schedule to preserve water quality. Faucet Fix Guide recommends matching the filter to your most pressing water concerns and verifying certification details before purchase.
Install and maintain a faucet filter
Installing a faucet water filter is typically straightforward, but a careful approach ensures a leak-free connection and consistent flow. Here’s a practical workflow that applies to most models:
- Shut off the cold-water supply to avoid spills and pressure while you work. Disconnect the aerator from the faucet if needed and prepare your filter’s mounting hardware.
- Attach the filter housing or adapter to the faucet according to the manufacturer’s instructions. Hand-tighten first to avoid cross-threading, then snug with a wrench if required by the design.
- Install the cartridge into the housing, ensuring it seats properly and seals with the O-ring. Do not over-tighten—over-torquing can damage seals.
- Open the water supply slowly and check for leaks. If you see a drip, re-seat the cartridge or tighten fittings gently. Run water through the system for 1–2 minutes to flush out air and residue.
- Label the installation date and set a cartridge replacement date based on the manufacturer’s guidance.
Maintenance is mainly cartridge replacement and periodic cleaning of the housing exterior. Avoid using abrasive cleaners that could degrade seals. Keep spare cartridges on hand and store them in a cool, dry place to preserve their efficiency and shelf life.
Troubleshooting common issues
Even well-installed faucet water filters can encounter issues. Here are common symptoms and quick fixes:
- Reduced flow after installation: Check that the cartridge isn’t over-tightened and that the housing is seated correctly. If flow remains slow, flush the system again and verify there are no kinks in hoses or fittings.
- Leaks around fittings: Re-seat the connections, apply a small amount of plumber’s tape where appropriate, and ensure o-rings are intact. If a seal is worn, replace the seal or cartridge.
- Taste or odor changes over time: This often indicates the cartridge is exhausted. Replace the cartridge per the manufacturer’s schedule and flush the system.
- Incompatibility with faucet style: Some filters don’t fit every faucet. If you notice misalignment or poor seal, consider a model designed for your faucet type or install an under-sink option for better compatibility.
If persistent problems occur, consult the product manual or the manufacturer’s support line. Following the certified filtration guidance is important for ensuring ongoing water quality and system performance.
Authority sources
To validate filtration claims and understand standards, consult these sources and maintain a habit of cross-checking product certifications:
- https://www.epa.gov/safewater
- https://www.cdc.gov/healthywater/drinking/public-water-systems.html
- https://www.nsf.org/what-we-do/water-quality
Tools & Materials
- Filter cartridge or filtration system(Choose a certified model suitable for your contaminants (NSF/ANSI listed).)
- Wrench set (adjustable)(Only if required by your filter model for securing fittings.)
- Teflon tape (plumbing thread sealant)(Use on threaded connections to prevent leaks.)
- Replacement cartridges(Have at least one spare cartridge on hand.)
- Soft cloth and mild cleaner(For exterior housing cleaning and to avoid scratches.)
Steps
Estimated time: 45-60 minutes
- 1
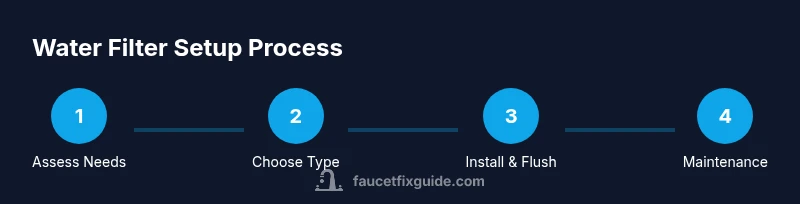
Assess water quality needs
Identify which contaminants you want to reduce by checking local water quality reports or a basic home test. This guides you to the right filter certification and cartridge type.
Tip: Document your priority contaminants and match them to the filter’s NSF/ANSI certifications. - 2
Choose the filtration type
Select a configuration (faucet-mounted, under-sink, or pitcher) based on budget, space, and water usage. Ensure the model has clear labeling of its certified reductions.
Tip: Consider future needs; under-sink filters often offer higher capacity and longer cartridge life. - 3
Prepare the installation area
Shut off the cold-water supply, clear workspace, and gather all parts. Remove the faucet aerator if your model requires it and lay out the hardware.
Tip: Have a towel handy to manage any spills and protect surfaces. - 4
Install the filter
Attach the filter housing to the faucet or supply line per the manufacturer’s instructions, ensuring seals are seated without over-tightening.
Tip: Start by hand-tightening, then snug with a wrench only as needed to avoid damage. - 5
Flush and verify
Open the water supply slowly, flush the system for 1–2 minutes to clear air and loose residue, and check for leaks. Run cold water only during flush to prevent scalding and protect filter materials.
Tip: Record the flush-start time in your maintenance log. - 6
Maintain and replace cartridges
Follow the manufacturer’s recommended replacement interval, monitor flow rate, and replace cartridges promptly when performance declines.
Tip: Label each filter with the installation date to avoid missing replacement deadlines.
Frequently Asked Questions
What is the difference between faucet-mounted and under-sink water filters?
Faucet-mounted filters attach directly to the faucet and are easy to install, while under-sink filters connect to the cold-water line and usually offer greater filtration capacity and longer cartridge life. Each type has its own maintenance and space considerations, so choose based on your kitchen layout and water needs.
Faucet-mounted filters are quick and simple, and under-sink filters use the plumbing under the sink for potentially higher performance.
Do faucet water filters remove lead and microplastics?
Some filters are certified to reduce lead and certain contaminants; always verify the NSF/ANSI certification on the product label to confirm what is removed. Filters vary in capability, so check the specific reductions listed by the manufacturer.
Yes, some models reduce lead and other contaminants, but always check the official certification for your chosen model.
How often should I replace the filter cartridge?
Follow the manufacturer’s recommended replacement interval for your model. Conditions like water quality and household usage can affect lifespan, so monitor flow and taste to guide replacements.
Check the manual for suggested replacement times and watch for slower flow or changes in taste as cues.
Can I install a faucet filter myself?
Yes, most faucet filters are designed for DIY installation. Gather the required tools, follow the manual step-by-step, and turn off the water supply before starting.
Absolutely. Most people can install it themselves by following the instructions and shutting off the water first.
What maintenance is required for faucet filters?
Cartridge replacement on schedule, occasional exterior cleaning, and leak checks. Keeping up with maintenance helps maintain water quality and system performance.
Replace cartridges as recommended, clean the housing, and check for leaks regularly.
Watch Video
Top Takeaways
- Identify your filtration goals and certification targets.
- Choose a filter type that fits your faucet and budget.
- Install correctly and test for leaks before regular use.
- Schedule cartridge replacements to maintain water quality.