How to Stop Faucet Handle Leaking: A DIY Guide
Learn how to stop faucet handle leaking with a clear, step-by-step approach. Identify leaks, replace worn seals, and test for lasting fixes—plus safety tips and maintenance to prevent future drips.

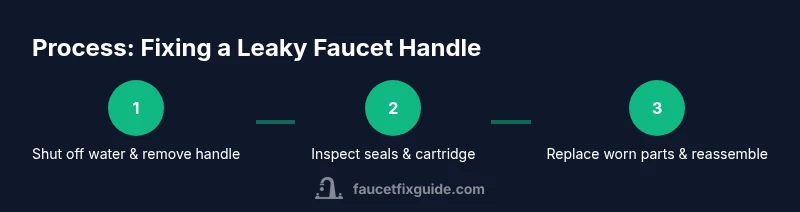
To stop a faucet handle leaking, identify the leak source (handle, cartridge, or packing) and shut off the water. Remove the handle, inspect for worn O‑rings, packing nut, or cartridge, and replace the failing part. Reassemble tightly and test; if leaks persist, reseat or replace the stem assembly and mounting hardware.
Why a faucet handle leaks and how to stop faucet handle from leaking
A dripping faucet handle isn’t just annoying; it wastes water and signals worn parts. According to Faucet Fix Guide, most leaks around the handle stem originate from worn O-rings, packing nuts, or cartridge assemblies. The key to a durable fix is identifying the faucet type (compression, ball, cartridge, or ceramic disk) and then replacing the worn component rather than just tightening screws. In many homes, a small drip is the result of a failing seal at the stem, and treating it early saves water and reduces wear on the rest of the faucet. The phrase how to stop faucet handle from leaking is frequently searched by homeowners who want a simple, reliable DIY method. With the right approach, you can restore a leak-free handle and extend the life of your faucet.
Identify your faucet type and the likely cause of leaks
Faucet leaks around the handle can come from several sources, and the remedy depends on the faucet style. Compression faucets use stem seals and O-rings that wear over time; cartridge and ceramic disk models rely on a cartridge seal that can crack or wear. Before buying parts, observe the drip pattern: a slow drip when the handle is off usually points to O-rings or packing; a constant drip when the handle is on points to a cartridge or stem issue. This step is crucial to avoid unnecessary part replacement and to focus your repair efforts on the root cause. As you search for solutions, remember the goal is to eliminate the leak at the source, not simply dampen the symptom of a worn seal.
Tools, materials, and safety prep
Before you begin, gather essential supplies: flat-head and Phillips screwdrivers, an adjustable wrench, replacement O-rings, a cartridge replacement kit if needed, plumber’s tape, silicone grease, towels or a small tray to catch water, and safety glasses. Clear the area under the sink to access supply lines. Shut off both hot and cold water valves and open the faucet to relieve pressure and drain residual water. Wearing eye protection helps protect against splashes when loosening parts. This prep reduces the risk of slips, spills, and additional damage to fittings.
Step-by-step diagnosis: remove handle and inspect components
- Shut off the water and relieve pressure. 2) Remove the set screw and lift off the handle to expose the stem. 3) Inspect the O-rings, packing nut, and the cartridge for wear or cracks. 4) If you see a damaged seal, replace it with the correct size part. 5) Clean seats and threads to ensure a good seal when reassembling. Pro tip: take photos of each step for reference during reassembly.
Replacement paths: cartridge, packing nut, or O-rings
If the leak is at the stem, replace the worn O-rings or packing nut. For cartridge-based faucets, replace the cartridge with a compatible kit and reinstall with correct orientation. When in doubt, verify the model and part numbers from the manufacturer’s guide. After replacement, apply silicone grease to O-rings to reduce friction and ensure a smooth seal. Always test with water on in a controlled manner to avoid a second leak due to overtightening.
Reassembly, testing, and adjustments
Reassemble the handle and tighten the mounting nut just enough to secure the stem without cracking fittings. Reconnect water supply lines and slowly turn on water, checking for leaks at both the supply joints and the handle base. If any drip remains, reseat the cartridge or seal and re-tighten as needed. Consider a second cleaning of the seating surfaces and reapplying plumbers tape to threaded connections if minor leaks appear at joints. Regularly inspect the faucet every few months to catch wear early.
Preventive maintenance and when to call a pro
Perform periodic inspections of O-rings and cartridges, cleaning aerators, and replacing worn components before leaks develop. If you encounter corrosion, stubborn leaks, or unfamiliar parts, it’s wise to consult a licensed plumber. For renters or first-time DIYers, keeping a repair log can help track parts and dates, preventing repeated failures. The goal is not only to stop the current leak but to extend the faucet’s life with preventative care.
Tools & Materials
- Flat-head screwdriver(for handle screws)
- Phillips screwdriver(for screw heads on some handles)
- Adjustable wrench(to loosen packing nuts and mounting hardware)
- Replacement O-rings(match size to faucet model)
- Cartridge replacement kit(only if cartridge faucet requires it)
- Teflon tape(for thread seals on supply lines)
- Silicone grease(lubricate O-rings for a better seal)
- Rags or towels(catch water and keep work area dry)
Steps
Estimated time: 30-60 minutes
- 1
Shut off water and prepare workspace
Turn off both hot and cold supply valves under the sink and open the faucet to drain remaining water. Place towels to catch any drips and protect the sink surface. This step prevents accidental spills and gives you a dry working area.
Tip: Test that the valve is fully closed by turning the faucet on after opening—if it still drips, close the main supply valve. - 2
Remove the faucet handle
Use the appropriate screwdriver to remove the handle screw and gently lift the handle off to expose the stem. Be mindful of how the screw was seated so you can reinstall it correctly.
Tip: Note the screw type and the orientation of the handle for easier reassembly. - 3
Inspect seals and stem components
Examine O-rings, packing nut, and cartridge (if present) for wear, cracking, or corrosion. Look for moisture around the seal area and test for movement without forcing parts apart.
Tip: Take photos of parts before removal to help with correct replacement orientation. - 4
Replace worn parts as needed
Install new O-rings or packing nut as required. If the faucet uses a cartridge, replace it with a compatible cartridge kit. Ensure correct orientation and seating of all components.
Tip: Lubricate O-rings with silicone grease before reinstalling to extend life. - 5
Reassemble and tighten
Reattach the handle, tighten screws snugly, and secure any mounting nuts without overtightening. Ensure the handle moves smoothly and seats evenly on the stem.
Tip: Avoid over-tightening; this can crack fittings or strip threads. - 6
Test for leaks
Turn the water back on slowly and monitor the handle area for any drips. Run both hot and cold water to ensure seals hold under temperature changes.
Tip: If a leak reappears, reseat the cartridge or seals and recheck for proper alignment.
Frequently Asked Questions
What causes a faucet handle to leak?
Most leaks around the handle stem come from worn O-rings, packing nuts, or cartridge seals. The exact culprit depends on faucet type (compression, cartridge, or ceramic disk).
Most leaks start at worn seals in the handle area. Replacing the worn part usually stops the drip.
Should I replace cartridge or packing nut first?
If you can see wear on the O-ring or packing nut, start there. For cartridge faucets, a worn cartridge is often the source; replace it only after inspecting seals.
Begin with the visibly worn part, then test before moving to more complex replacements.
Is it safe to repair a faucet myself?
Yes, with careful steps: shut off water, use proper tools, and follow manufacturer guidance. If you’re unsure, pause and consult a professional.
Yes, DIY is safe when you follow safety steps and don’t force parts.
How long does cartridge replacement take?
Cartridge replacement for many single-handle faucets takes about 20-40 minutes, depending on access and model. More time may be needed for older fixtures.
Most cartridge changes take under an hour with the right parts.
Can a leaking faucet cause damage to my sink?
Yes. Persistent leaks can cause water damage, mold, or wood rot over time. Address leaks promptly to protect fixtures and structure.
Leaks should be fixed quickly to prevent water damage.
Watch Video
Top Takeaways
- Identify leak source before disassembly
- Shut off water and drain, then inspect seals
- Replace worn O-rings or cartridges as needed
- Reassemble carefully and test slowly for leaks
- Regular maintenance reduces future leaks