Hose Leaking at Faucet: Fix Guide
Learn how to diagnose and fix a hose leaking at faucet with safe, practical steps. Tighten fittings, replace washers, seal threads, and know when to call a pro. Faucet Fix Guide

Most hose leaks at a faucet come from a loose connection, worn washer, or damaged O-ring. First, shut off the water and tighten the hose coupling at the faucet. If it still leaks, disassemble and replace the washer and O-ring, then reassemble with Teflon tape on metal threads if needed. If leakage continues, inspect the hose ferrule and seal for damage and replace as necessary.
Common causes of hose leaking at faucet
Leaks around a faucet hose are frustrating and often easy to fix when you learn to identify the common culprits. According to Faucet Fix Guide, the most frequent causes are a loose connection, a worn washer or O-ring, or a damaged hose ferrule. In many homes, the leak originates at the faucet-hose coupling, where vibrations from use gradually loosen threads. Mineral buildup and overtightening can also deform seals, creating drips even when the hose is tightened. Before you disassemble anything, shut off the water supply if the faucet feeds a sprayer or a supply line; this prevents a spray of water and reduces cleanup. Inspect visually for rust, cracks, or discoloration around the coupling. If you notice mineral scale, soak parts in vinegar or use a plastic-safe cleaner to avoid damage. By understanding these basics, you can quickly decide which part needs service.
Immediate checks to stop a leak
When hose leaks appear at the faucet, start with the simplest fixes. First, locate and shut off the water supply to avoid further water flow during repair. Then tighten the hose fitting by hand, followed by a snug grip with a wrench if needed; do not overtighten, which can strip threads. Next, disassemble the hose end to inspect the washer or O-ring; replace if worn, cracked, or flattened. Reassemble with plumber’s tape on metal threads to improve sealing. Check the ferrule and ensure the hose is properly seated in the connector. After reassembly, slowly turn the water back on and test for a drip for at least a minute to confirm the seal. If the leak is at the hose ferrule or the hose itself is cracked, replacement is usually required. These quick checks can stop most leaks in minutes, preserving water and avoiding a bigger stain.
Diagnostic flow you can follow
Start with the symptom: water dripping from the hose connection at the faucet. The likely causes feed into a simple decision tree: if tightening stops the drip, the issue was a loose connection (likelihood high). If tightening does not stop the drip, inspect the washer/O-ring in the hose coupling (likelihood medium). If replacing washers still leaks, inspect the ferrule or seal on the hose end (low). If leakage persists after all checks, the hose or faucet tailpiece might be damaged (low) and replacement is warranted. For each fix, test: run water briefly, wipe dry, and observe for 60 seconds for any subtle drips. If you’re uncomfortable with shutting off water or disassembling, call a professional. Based on Faucet Fix Guide analysis, many home leaks are resolved by a washer or O-ring replacement without replacing the entire hose.
Replacing parts: washers, O-rings, and hoses
If the washer or O-ring is worn, cracking, or flattened, replace it with an identical size to restore a snug seal. For threaded connections, ensure metal-to-metal contact and apply a small amount of plumber’s tape to the male threads. When the hose ferrule or seal is damaged, replacing the hose end or entire hose assembly is often the simplest fix. If the faucet tailpiece is corroded or cracked, replacement may be necessary and should be done by addressing the underlying supply line material. Always match the hose type (rubber vs. reinforced) to the faucet and ensure compatibility with spray heads or quick-connects. After parts replacement, recheck for leaks by running the water slowly and inspecting the connection point.
Prevention and maintenance to avoid future leaks
Adopt a routine check to prevent future hose leaks at faucets. Regularly inspect the hose connection for looseness or corrosion and replace worn washers at the 1-year mark or sooner if you notice dripping. Use quality washers and O-rings from reputable brands, and avoid overtightening metal connections. Keep the area around the faucet clean to spot small drips early. If you have hard water, consider mild descaling on metal threads to prevent scale buildup that can compromise seals. Finally, store hoses properly when not in use to minimize wear on fittings. Small maintenance steps now save bigger repairs later.
Steps
Estimated time: 30-45 minutes
- 1
Shut off water supply
Locate the shut-off valve for the faucet (under the sink or by the fixture) and turn it off. Open the faucet briefly to relieve pressure and confirm the water is fully stopped. This prevents water spray during inspection.
Tip: Keep a towel ready; some residual water may drain when you open the faucet first. - 2
Inspect hose and fittings
Visually inspect the hose end and all connections for looseness, cracks, or corrosion. If you see a flattened washer or split O-ring, plan to replace them. Have replacement parts on hand before disassembly.
Tip: Take a photo of the existing setup to reference part orientation during reassembly. - 3
Tighten the hose coupling
Hand-tighten the hose coupling first, then use a wrench for a final snug turn. Avoid overtightening, which can damage threads or crush seals. After tightening, wipe away any wipeable residue to observe drips clearly.
Tip: If threads are damaged, skip tightening and move to part replacement. - 4
Replace washer and O-ring
Disassemble the hose end and remove the old washer and O-ring. Install new, properly sized parts in the same order. Ensure the washer seats evenly and the O-ring sits flush against the housing.
Tip: Lubricate O-rings lightly with silicone grease to extend life. - 5
Apply plumber’s tape and reseal
Wrap plumber’s tape (PTFE) around the male threads in a single direction before reassembling. This helps seal metal-to-metal threads and reduces future leaks.
Tip: Use 2-3 wraps; excessive tape can cause binding or misalignment. - 6
Test for leaks
Slowly turn the water supply back on and watch the connection for a full minute. If no drip is observed, re-tighten slightly. If dripping returns, move to ferrule/ferule or hose replacement.
Tip: Test with a bucket under the connection in case of an unexpected drip.
Diagnosis: Hose leaks from faucet area
Possible Causes
- highLoose connection
- mediumWorn washer or O-ring
- lowDamaged hose ferrule or seal
Fixes
- easyTighten the hose coupling
- easyReplace washer and O-ring
- mediumInspect/replace ferrule or seal
- hardReplace hose or faucet tailpiece
Frequently Asked Questions
What are the most common causes of a hose leaking at a faucet?
Common causes include a loose connection, a worn washer or O-ring, and a damaged hose ferrule or seal. Mineral buildup and overtightening can also create leaks at the connection.
Most hose leaks come from a loose connection, a worn washer, or a damaged seal. Check connections, replace worn parts, and reseal threads.
Can I fix a hose leak without replacing the hose?
Often yes. If the problem is a loose connection or worn washer/O-ring, replacing those parts is sufficient. If the hose itself is cracked, replacement is usually necessary.
Often you can fix it by replacing the washer or tightening the connection; if the hose is cracked, you’ll need a new hose.
Do I need plumber’s tape on hose fittings?
Plumber’s tape helps seal metal threads and prevents leaks at field joints. Apply 2-3 wraps in the direction of the threads and reassemble.
Yes—apply a couple of wraps of plumber’s tape to metal threads before reassembling.
When should I call a professional?
If leaks persist after replacing washers and tightening fittings, or if you notice corrosion, cracks, or a damaged tailpiece, it’s time to call a professional.
If leaking continues after trying basic fixes, consider calling a plumber for a safe assessment.
How can I prevent hose leaks in the future?
Regularly inspect connections, replace worn washers, and avoid overtightening. Use quality parts, and descale mineral buildup to maintain seals.
Check connections often and replace worn parts to prevent future leaks.
Watch Video
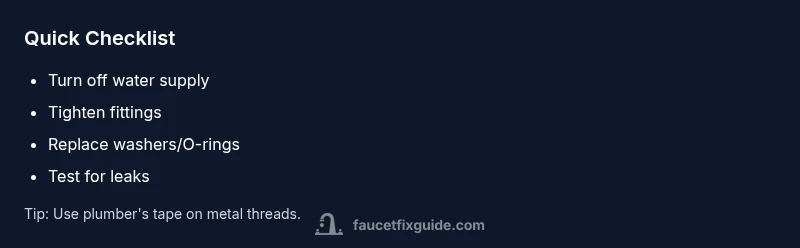
Top Takeaways
- Tighten fittings first to stop leaks fast
- Replace worn washers and O-rings promptly
- Seal threads with plumber’s tape when metal parts are involved
- Test carefully after each repair to confirm sealing
- Call a professional if the leak persists after all fixes