Fix Bathroom Faucet Leak: A DIY Guide to Stop Wasting Water
Learn how to fix bathroom faucet leak with a step-by-step DIY guide. Diagnose causes, replace worn parts, and perform safe repairs to stop leaks and save water. Faucet Fix Guide walks you through tools, parts, and best practices for durable results.

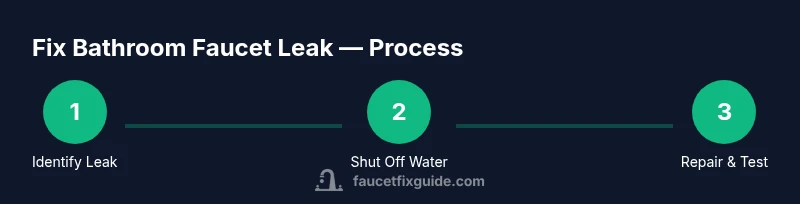
You will fix a bathroom faucet leak by identifying the leak type, gathering the right tools, and completing a safe, step-by-step repair. Start by turning off the water supply, disassembling the faucet, replacing worn cartridges or washers, and reassembling carefully. According to Faucet Fix Guide, addressing leaks promptly saves water and lowers utility costs.
Why a Bathroom Faucet Leak Matters
A leaking faucet wastes water and can raise your utility bills. By learning how to fix bathroom faucet leak, you gain independence from handymen and save money over time. According to Faucet Fix Guide, addressing leaks promptly saves water and reduces waste. This section explains what makes leaks dangerous and how small drips can add up.
Common Leak Types and Fixes
Leaky faucets come in a few common flavors: cartridge leaks, compression leaks, and valve seat leaks. A cartridge leak usually shows a steady drip from the spout; a compression leak often comes from handles or valve stems; valve-seat leaks can cause drip at the base. Each type has a different repair path, from replacing O-rings to swapping the cartridge. Proper diagnosis matters to avoid unnecessary parts replacement, and using the correct sealant or grease reduces future wear.
Tools, Parts, and Safety Prerequisites
Before you start, gather the essential tools and replacement parts. Knowing what to buy in advance saves time and reduces frustration. You should have a basin wrench, adjustable wrench, screwdrivers, replacement cartridge or washers, O-rings, plumber's tape, and silicone grease. Safety should come first: turn off the hot and cold supplies at the valves, place towels around the sink, and keep the area dry. This is a doable project for most homeowners, especially with guidance from Faucet Fix Guide.
Step-by-Step Diagnosis and Repair Workflow
This section provides a practical overview of the repair process. Start by turning off water supply and draining the lines. Inspect the faucet components visually, check for worn rubber seals, and identify the correct replacement parts. The key is to work methodically so you don’t misplace tiny screws or misalign seals. If you’re unsure about cartridge compatibility, bring the old part to the hardware store for a precise match.
When to Call a Professional
If you notice persistent leaks after replacing o-rings or cartridges, or if you encounter corroded supply lines or a damaged faucet body, a professional plumber may be the safer choice. Complex installations, hidden leaks behind walls, or outdated plumbing can require specialized tools or code compliance checks. The Faucet Fix Guide Team recommends seeking help when a DIY fix would compromise water efficiency or safety.
Maintenance to Prevent Future Leaks
Regular maintenance extends faucet life. Periodically inspect seals, clean aerators to remove mineral buildup, and replace worn parts before they fail. A simple habit like tightening connections a quarter-turn after the first use of the day can prevent drips. Note that manufacturer-specific parts require matching replacements; keep a parts guide handy to ensure compatibility.
Tools & Materials
- Adjustable wrench(Choose a wrench with a 6- to 8-inch jaw opening for most bathroom faucets.)
- Basin wrench(Useful for reaching nuts under the sink.)
- Phillips screwdriver(Keep extra bits for different screw sizes.)
- Flathead screwdriver(Needed for certain screws on handles.)
- Replacement cartridge or washers(Select exact size/model to fit your faucet.)
- O-rings and gaskets(Carry a few sizes to cover common leaks.)
- Plumber's tape (Teflon tape)(Seal threaded connections.)
- Silicone grease or plumber's grease(Lubricate O-rings and seals.)
- Bucket and towels(Catch water and keep area clean.)
- Isopropyl alcohol and cloths(Clean parts before reassembly.)
Steps
Estimated time: 60-90 minutes
- 1
Shut off the water supply
Turn off both hot and cold valves under the sink. If there’s a separate stop valve at the faucet, close that too, and open a faucet at a higher level to relieve pressure. This prevents water flow during disassembly.
Tip: Verify no water drips by turning on the faucet briefly after shutting valves. - 2
Drain remaining water and protect the area
Open the faucet handles to relieve pressure and drain residual water from the lines. Place towels or a bucket to catch any spillover and protect the vanity surface from moisture.
Tip: Having a dry work surface reduces the chance of losing small screws. - 3
Remove faucet handle and identify parts
Use the appropriate screwdriver to remove the handle set screw. Keep track of small parts and screws, labeling if needed. This step reveals the cartridge or stem that will be replaced.
Tip: Take a quick photo of each connection before removal. - 4
Inspect cartridge or stem for wear
Carefully pull out the cartridge or stem and inspect seals, O-rings, and wear marks. Look for cracks, hardening, or mineral buildup that indicates replacement is needed.
Tip: Worn O-rings are the most common leak source. - 5
Replace worn components
Install the new cartridge or washers and fit the new O-rings. Apply a small amount of silicone grease where indicated to ensure a proper seal and smooth operation.
Tip: Avoid over-tightening; snug fits are sufficient. - 6
Reassemble the faucet
Secure the handle, restore any decorative parts, and ensure all connections are aligned. Replace screws and tighten uniformly to avoid binding the handle.
Tip: Double-check alignment before reinstalling trim pieces. - 7
Turn water back on and test for leaks
Slowly open the supply valves, then run both hot and cold sides for a minute to flush. Observe the spout and base for drips and verify that the handles operate smoothly.
Tip: If leaks appear, re-tighten seals or reseat the cartridge. - 8
Consider replacement or professional help if needed
If the leak persists after replacement or you notice corrosion, consider replacing the entire faucet or calling a plumber for assessment.
Tip: Keep receipts and model numbers for warranty coverage.
Frequently Asked Questions
What causes a bathroom faucet to leak?
Leaks usually come from worn washers or cartridges, damaged O-rings, or corroded valve seats. Improper installation can also cause drips.
Most bathroom faucet leaks come from worn seals or old cartridges.
Is a dripping faucet a serious problem?
A drip wastes water and can indicate worn components. Ignoring it may lead to higher bills or bigger repairs later.
A drip is a sign to check seals or cartridges before it gets worse.
Can I fix a faucet leak myself with basic tools?
Yes, many leaks are fixable with common tools, replacement washers or cartridges, and some patience. Follow a step-by-step guide for best results.
Yes, many leaks can be fixed with basic tools and guidance.
What parts wear out first in a bathroom faucet?
O-rings, washers, and cartridges are the most common wear parts. Mineral buildup can also affect performance.
O-rings and cartridges wear out first most of the time.
Should I replace the whole faucet or just the cartridge?
If the faucet is old or corroded, replacing the cartridge or the entire faucet may be more cost-effective than ongoing repairs.
Consider replacement if leaks persist after part replacements.
How long does a typical fix take?
Most DIY fixes take about 1 to 2 hours depending on faucet type and access space.
Most fixes take about an hour or two.
Watch Video
Top Takeaways
- Follow these steps as recommended by The Faucet Fix Guide Team.
- Identify leak type early and plan parts.
- Shut off water before disassembly to prevent mess.
- Cartridges or washers fix most leaks.
- Test thoroughly and avoid over-tightening.
- Regular maintenance prevents future leaks.