Delta Bathtub Faucet Leaking: Troubleshooting & Fix Guide
This guide helps homeowners diagnose and fix a leaking Delta bathtub faucet quickly and safely with step-by-step troubleshooting, common causes, and prevention tips.

Most leaks from a Delta bathtub faucet come from a worn cartridge or packing nut. Begin by tightening the handle set screw slightly and inspecting for a drip at the valve stem. If the drip continues, replace the cartridge or packing nut and reseal the stem. If you’re unsure, follow the diagnostic flow or call a professional for safety.
What causes delta bathtub faucet leaking and how it starts
If you have a delta bathtub faucet leaking, you're not alone. Most leaks originate from worn cartridges or packings inside the Delta valve. Over years, mineral buildup, hard water, or frequent cycling can degrade seals. A dripping faucet wastes water and signals that the internal parts need service. By understanding which part is failing, you can target your repair and stop waste quickly. Faucet Fix Guide emphasizes that addressing the root cause early saves water and money, especially in busy bathrooms where leaks can go unnoticed.
Quick diagnostic intuition: where to look first
Start with the user-visible symptoms: is the leak present with the water off, or only while the handle is turned? A constant drip with the handle off points to a bad cartridge seal or packing nut. Leaks that appear only when the water is on may come from a worn O-ring or a loose stem. Check for drips around the handle, the spout, and beneath the escutcheon plate. The goal is to identify whether the issue is cartridge-related, packing-nut-related, or an external drip from a seating surface.
Essential tools and safety steps to prepare
Before you dig into the faucet, gather a few basic tools: an adjustable wrench, small screwdrivers (flat and Phillips), an Allen key, replacement cartridge or packing nut kit compatible with your Delta model, thread sealant or plumber's tape, and a clean rag. Safety matters: shut off the water supply to the bathroom, relieve any pressure by opening a nearby tap, and wear eye protection if you anticipate water sprays. Keep a towel handy to catch spills and protect the vanity.
Understanding Delta cartridge types and how to identify yours
Delta uses several cartridge designs across models. The cartridge is the main control component that regulates water flow and temperature. If your faucet leaks, the cartridge is often the culprit. To identify yours, remove the handle and escutcheon: note the cartridge color, shape, and model number molded on the casing. This information helps you select the correct replacement part and avoid buying the wrong kit. In many cases, a standard cartridge with compatible seals will resolve the leak.
Common failure points and how they fail
The most frequent failure points in Delta bathtub faucets are the cartridge seals, the packing nut, and the O-rings associated with the stem. mineral buildup can accelerate wear, especially in areas with hard water. A leaking cartridge typically shows as a steady drip when the faucet is off, while a leaking packing nut often produces a drip near the handle. Understanding these distinctions helps you decide between a cartridge replacement and a packing-nut reseal.
Step-by-step approach to a repair plan (conceptual overview)
Begin with the simplest fix: tighten any accessible packing nut or adjust the handle set screw if it’s loose. If the drip persists under normal operation, the cartridge is the likely culprit and should be replaced with a model-matching Delta part. If seating surfaces show pitting or corrosion, you may need to reseat or replace the valve seat. In many cases, replacing the cartridge cures the leak and restores smooth operation.
How to perform cartridge or packing-nut replacement safely
Replacement requires turning off water, removing the handle, and disassembling the valve stem. For a cartridge: remove the clip or nut securing the cartridge, pull the cartridge straight out, and replace with the new unit. For a packing nut: loosen the nut, reseal with Teflon tape, and re-tighten to the manufacturer’s specification. Always test the faucet after reassembly by slowly turning water on and off to check for any remaining drip.
Maintenance tips to prevent future leaks
To reduce future leaks, perform regular mineral buildup checks, clean the aerator and any external filters, and replace worn seals at the first sign of wear. Use water-softening treatments if your water is hard. Record the model and parts you install so you can easily source replacements later. Practicing preventive maintenance can extend faucet life and save water.
Steps
Estimated time: 60-90 minutes
- 1
Turn off water and relieve pressure
Shut off the bathroom shutoff valve and open the faucet to relieve any trapped pressure. Place towels to catch drips. This protects your fixture and keeps parts clean for inspection.
Tip: Take a quick photo of the assembly before disassembly for reference. - 2
Remove handle and access cartridge
Remove the handle by loosening the set screw, then lift off the decorative cap and escutcheon to expose the cartridge. Inspect for visible wear or damage.
Tip: Keep track of small screws and their locations. - 3
Identify and replace the component
If the cartridge shows wear, replace with the exact Delta cartridge model. If the packing nut is loose or damaged, reseal or replace as needed.
Tip: Choose the correct replacement part using model number. - 4
Reassemble and test
Reinstall the escutcheon and handle, turn the water back on slowly, and check for leaks after a few minutes of use.
Tip: Do a slow turn-through test and listen for drips. - 5
Final check and prevention
Inspect the faucet over 24 hours for any return of leaks. If the leak recurs, consider whole-faucet replacement and review maintenance steps.
Tip: Regularly clean aerator and inspect seals to extend life.
Diagnosis: Bathtub faucet leaks continuously or intermittently
Possible Causes
- highWorn cartridge
- mediumDamaged packing nut
- lowWorn O-ring or seat seal
- lowExternal leak at escutcheon/valve body
Fixes
- mediumReplace the cartridge with a model-matching Delta part and reseal the stem
- easyTighten or replace packing nut and apply plumber's tape or sealant
- hardReplace O-rings or valve seat if worn or damaged
- hardInspect for external leaks and reseat escutcheon or replace faucet body if necessary
Frequently Asked Questions
What is the most common cause of a delta bathtub faucet leaking?
The most common causes are a worn cartridge or a damaged packing nut. Replacing the cartridge or resealing the packing nut usually stops the leak.
Most leaks come from a worn cartridge or a bad packing nut, which you fix by replacing the cartridge or resealing the nut.
Can I fix a leaking Delta bathtub faucet myself?
Yes. With basic tools and a model-specific cartridge or packing kit, you can repair most leaks. Follow a careful diagnostic flow to identify the correct part.
Yes, you can fix it yourself with the right parts and careful steps.
Do I need special tools to repair a Delta faucet?
Only simple tools are usually required: an adjustable wrench, small screwdrivers, an Allen key, and the replacement cartridge or packing kit.
A few basic tools and the right replacement parts are enough for most fixes.
How long does cartridge replacement take?
Plan about 30-60 minutes depending on model and access to the cartridge.
Most cartridge replacements take about half an hour to an hour.
When should I replace the whole faucet instead of the cartridge?
If the valve body is corroded, the stem is severely damaged, or multiple components fail, replacing the whole faucet may be more cost-effective.
If the valve is badly corroded or multiple parts fail, consider replacing the faucet.
Watch Video
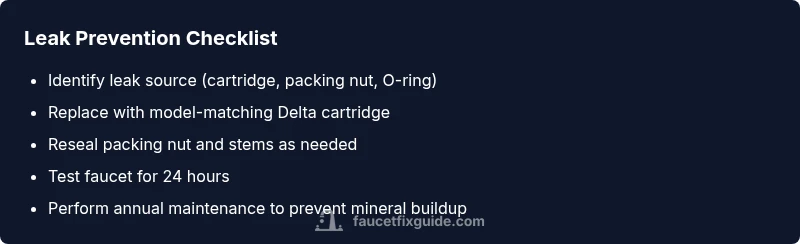
Top Takeaways
- Identify the leak source before parts replacement
- Cartridge replacement is often the fix for Delta leaks
- Tighten packing nuts and reseal carefully
- Test slowly after reassembly to confirm leak status
- Regular maintenance prevents future leaks