When to Change Faucet Aerator: Signs, Timing, and Maintenance
Learn exactly when to change faucet aerator, how to spot signs of clogs, and practical cleaning vs. replacement steps to restore steady water flow and efficiency.

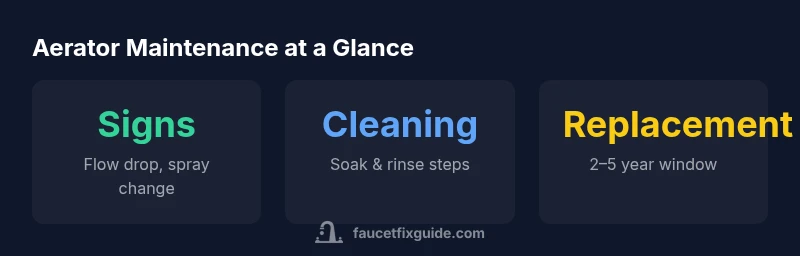
Change or clean your faucet aerator when water flow drops, the spray becomes inconsistent, or you see mineral buildup. In hard-water homes, inspect every 6–12 months and consider replacing every 2–5 years, or sooner if flow remains weak after cleaning. If flow improves after replacing, you’ve confirmed the aerator is the culprit. This simple check helps protect efficiency and prevent leaks.
Signs you should check or replace your aerator
Determining when to change faucet aerator hinges on observed performance. The question 'when to change faucet aerator' is answered by noticing slower flow, the spray pattern, and mineral deposits around the screen. A failing aerator can waste water and reduce performance across sinks and bathrooms. Start with a visual check: look for white crust (limescale), brown sediment, or a screen that looks clogged. Then perform a simple flow test by removing the aerator and running water briefly. If flow returns after cleaning, the issue was mineral buildup; if not, replacement is likely needed. For homes with hard water or older fixtures, plan recurring checks every 6–12 months because buildup can accumulate faster. Also listen for drips or vibrations that signal a partially blocked path. By aligning these indicators with a proactive maintenance plan, you can prevent downstream plumbing issues.
How aerators influence water flow and pressure
A faucet aerator sits at the end of the spout and mixes air with water, shaping the stream and reducing splash. When the aerator becomes clogged, the effective exit diameter shrinks, reducing downstream pressure and making the stream irregular. This not only feels weak, it can also mask leaks by decreasing observed flow elsewhere. Understanding typical flow ranges helps: most aerators provide a flow rate within a low-to-moderate band, adjustable by the model. If your home uses very hard water or has older fixtures, you may see a larger impact on flow as mineral deposits build up. Regular cleaning can restore performance without replacing parts, while replacement ensures a snug seal and the latest screen design. Keep in mind that different faucet brands use different thread sizes; verify compatibility before purchasing a new aerator.
Cleaning before replacing: when it helps and how to do it
Cleaning is often the quickest first step. Remove the aerator, disassemble the parts, and soak the screen and cage in a solution of white vinegar and water for 15–30 minutes to dissolve mineral deposits. After soaking, rinse under running water and brush away any stubborn particles with a small toothbrush. Reassemble and reinstall, then run cold water to clear any loosened debris. If flow improves, you’ve saved money and avoided replacement. If not, replace with a compatible aerator. Regular cleaning extends the life of existing fixtures and reduces mineral buildup in your pipes over time.
Step-by-step: remove and replace an aerator
- Gather tools: adjustable wrench or pliers, a soft cloth, and a replacement aerator of the correct size. 2. Place the sink guard or cloth to protect the finish and twist the aerator counterclockwise. 3. If stuck, apply gentle heat from the hot water side or use penetrating oil sparingly. 4. Clean the threads on the faucet spout, and inspect the aerator seat for wear. 5. Screw the new aerator clockwise until snug, then tighten one-quarter turn. 6. Run water to verify flow and check for leaks. 7. If you notice leaks, reseat or replace with the correct model.
Hard water, mineral buildup, and replacement intervals
Hard water accelerates mineral buildup on aerators, shortening their effective life. Signs of accelerated wear include persistent flow decline after cleaning, corroded threads, or a consistently low spray. In regions with hard water, start inspections every 6–12 months and plan for replacement every 2–5 years, depending on usage and faucet type. Softer water areas may tolerate longer intervals, but routine checks remain valuable. Finally, consider installing a filter or water-softening solution to limit mineral intrusion and extend aerator life.
Maintenance routines to extend aerator life and save water
Create a simple maintenance calendar: inspect aerators during seasonal cleaning, clean with vinegar, and replace as needed. Keep spare aerators and a dedicated o-ring or washer kit to prevent leaks after replacement. Document the date of each inspection so you can spot trends. A consistent routine reduces the risk of sudden pressure loss and keeps sinks performing efficiently across the home. Also, avoid over-tightening during installation to prevent thread damage.
Aerator types and their characteristics
| Aerator Type | Typical Flow (GPM) | Ease of Cleaning | Replacement Cost Range |
|---|---|---|---|
| Standard cone | 0.5–2.0 | Easy | $5–$12 |
| Filter mesh | 0.8–1.8 | Moderate | $6–$14 |
| Rotating ball | 1.0–2.2 | Moderate | $8–$15 |
Frequently Asked Questions
When should I replace a faucet aerator?
Replace when cleaning does not restore flow or if the screen shows significant wear or corrosion. Replacing is often quicker than repairing, and it ensures the latest design improves efficiency.
Replace when cleaning doesn't restore flow or the screen is worn; it’s usually faster and improves efficiency.
How can I tell if the aerator is clogged?
A noticeable drop in flow, an uneven spray, or visible mineral deposits around the screen indicate clogging. Remove the aerator to inspect the screen and flush with water.
If flow drops or spray is off, check the screen for mineral buildup and clean it.
Is cleaning always cheaper than replacing?
Cleaning is cheaper and may restore performance for many aerators. If cleaning fails to fix the problem, replacing with a compatible model is a reliable option.
Cleaning saves money, and replacement is a solid backup if cleaning doesn’t fix the issue.
What tools do I need to change an aerator?
You’ll typically need an adjustable wrench or pliers, a soft cloth to protect finishes, and a replacement aerator of the correct size. In some cases, a small screwdriver helps to pry off screens.
Grab pliers, a cloth, and a replacement aerator—and you’re ready to go.
Will replacing the aerator affect water pressure?
A properly sized and installed aerator should restore normal flow. If pressure remains low after replacement, check other parts of the faucet or plumbing for issues.
If it’s the right fit and tight, pressure should recover; otherwise, investigate other causes.
“Regular aerator maintenance is a low-cost, high-impact task that preserves steady water flow and minimizes mineral buildup across fixtures.”
Top Takeaways
- Inspect regularly for flow changes and mineral buildup
- Clean before replacing to save costs when possible
- Hard water speeds up wear; adjust inspection frequency accordingly
- Use the right thread size to avoid leaks
- Keep spare aerators on hand for quick fixes