What to Do If a Shower Faucet Is Leaking: A DIY Guide
Learn how to stop a leaking shower faucet with a practical, step‑by‑step approach. Identify leak types, shut off water safely, gather tools, and replace cartridges or O‑rings—plus maintenance tips to prevent future drips.

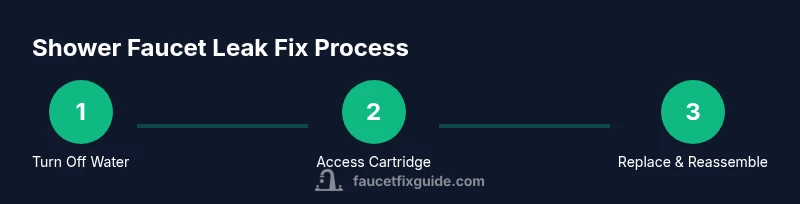
By the end of this guide you will know exactly what to do if a shower faucet is leaking: identify the leak type, shut off the water, gather the right tools, and perform a safe cartridge or O‑ring replacement. This step-by-step approach helps you stop drips, save water, and avoid costly repairs.
Understanding Shower Faucet Leaks
A shower faucet leak can show up as a steady drip, a sporadic spray, or a persistent drip behind the wall. In most homes, leaks come from wear in the cartridge, worn O-rings, or a loose valve stem. The problem isn’t just water waste; constant drips can damage fixtures, increase your water bill, and lead to mold in damp areas. The Faucet Fix Guide team notes that many leaks are solvable with common maintenance tasks and the right parts. Recognizing the difference between a leak at the handle, a leak at the spout, or a leak behind the wall helps you select the correct repair path. When in doubt about the valve type, consult a trusted guide or a professional.
When you start with what to do if a shower faucet is leaking, you’ll see that DIY fixes are often within reach for homeowners, renters, and DIY enthusiasts who tackle faucet issues with care and the right tools.
Safety First: Shut Off Water and Gather Tools
Before you touch a single screw, turn off the water supply to the shower and relieve pressure by opening the faucet away from the tub. If your bathroom sink and tub share a shut-off, close those valves too, so leaks won’t spill into other fixtures. Gather the essentials: a few towels, a bucket, an adjustable wrench, a screwdriver set, and replacement parts such as cartridges or O-rings compatible with your faucet brand. A flashlight helps you inspect tight spaces behind the escutcheon.
According to Faucet Fix Guide, taking time to turn off water and gather the right tools reduces mess and speeds up a successful repair. This upfront safety step also helps you avoid scalding injuries if a valve releases suddenly.
Identify Valve Type and Common Causes
Shower faucets come in several valve types: cartridge, compression, ball, and ceramic disc. A single-handle cartridge faucet might drip from the spout or handle, while a two-handle setup could leak from the cold/hot interface or the cartridge beneath the escutcheon. Common causes include worn O-rings, a faulty cartridge, mineral buildup, or loose retaining screws. A persistent drip after a full shut-off typically points to a worn cartridge or seal, while irregular spray can indicate mineral buildup or a diverter issue. Knowing your valve type guides you toward the correct replacement part and technique.
For most DIY fixes, you’ll identify the valve type by removing the handle and looking for a retaining clip or nut holding the cartridge in place. If you encounter a stubborn valve or suspect corrosion, you may want to compare replacement parts to your faucet model on the manufacturer’s site.
Tools and Replacement Parts You Might Need
Preparing ahead saves time and reduces frustration. Essentials include: an adjustable wrench, a small hex key (Allen), a screwdriver (flat and Phillips), replacement cartridge or O-rings appropriate for your faucet, Teflon tape, plumber’s grease, a bucket, and a clean rag. Depending on your faucet type, you may also need a retaining clip, bonnet nut, or an armless escutcheon tool to avoid scratching finishes. Always verify part compatibility with your exact faucet model before purchasing.
Having the right tools on hand lets you work efficiently and minimizes the risk of damaging parts during disassembly or reassembly.
When to DIY vs When to Call a Pro
Many shower faucet leaks are well suited for DIY repairs, especially when the problem is a worn cartridge or O-ring. If you discover corrosion, a valve that’s hard to shut off, pipes behind the wall with signs of water damage, or a leak that persists after a cartridge replacement, it’s wise to call a licensed plumber. If you’re renting, check with your landlord before starting work, and never perform electrical work near water without the proper training.
The Faucet Fix Guide team emphasizes that safety and code compliance matter: if you’re unsure about water supply lines or you notice basement dampness, seek professional help to avoid bigger problems.
Maintenance to Prevent Future Leaks
Prevention starts with regular faucet maintenance. Clean mineral buildup with a mild, non-abrasive cleaner and inspect cartridges or O-rings at least once a year. Replace worn parts promptly and avoid overtightening screws or nuts, which can wear seals faster. Consider installing a water-softening system if your area has hard water, since mineral deposits accelerate seal wear. Finally, keep an eye on the shower diverter and ensure the escutcheon plate sits flush to prevent creeping leaks behind the wall.
A simple annual inspection can save you from unexpected drips and more expensive repairs later.
Quick Troubleshooting If Drips Persist
If you finish a replacement and still see a drip, double-check the following: ensure the cartridge is fully seated, verify that the valve stem is not bent, and confirm there are no cross-threaded connections. Clean any mineral buildup around the faucet body and re-tighten components incrementally. If the leak continues after reassembly, you may need a different cartridge size or an update to a compatible seal kit. In some cases, leaks originate from the plumbing behind the wall and require professional assessment.
Tools & Materials
- Adjustable wrench(Fits most faucet nuts and cartridges)
- Screwdrivers (Phillips and flat)(Needed to remove handles and escutcheon)
- Allen keys (hex set)(Common for set-screw cartridges)
- Replacement cartridge or O-rings(Check model compatibility before purchase)
- Teflon tape ( plumbers tape )(Seal threaded connections)
- Plumber's grease(Lubricates seals to prevent wear)
- Bucket and towels(Contain spills and keep area dry)
- Flashlight(Better visibility in tight spaces behind escutcheon)
Steps
Estimated time: 60-90 minutes
- 1
Turn off water and relieve pressure
Locate the shower shut-off valve and turn it completely off. Open the shower faucet to relieve residual pressure and drain any remaining water. This prevents sudden sprays and makes disassembly safer.
Tip: If a local shut-off is hard to reach, consider lifestyle safety: twist on/off valves with a ring of padding to avoid pinching fingers. - 2
Remove the handle
Use the appropriate screwdriver or Allen key to remove the handle screw. Gently pull the handle straight off. If the handle is stubborn, spray a little penetrating oil and wait 5–10 minutes before retrying.
Tip: Take a photo of the handle assembly before removal to guide reassembly. - 3
Access and inspect the cartridge or cartridge seal
Loosen the retaining clip or bonnet nut to access the cartridge. Inspect for wear on O-rings or seals; look for mineral buildup and corrosion that may affect fit.
Tip: If you see deep corrosion, replace the cartridge rather than just seals to prevent future leaks. - 4
Replace cartridge or O-rings
Install the new cartridge or seals according to the faucet’s instructions. Apply plumber’s grease to O-rings to ensure smooth operation. Recheck seating to avoid misalignment that could cause leaks.
Tip: Do not overtighten the cartridge—tighten until snug and then an extra quarter-turn. - 5
Reassemble and apply seal on threads
Replace the bonnet nut and escutcheon. Apply Teflon tape to threaded connections where appropriate and snugly reassemble components. Ensure the faceplate sits flush against the wall.
Tip: Wrap tape in the direction of the screw rotation to prevent it from unraveling. - 6
Test for leaks and adjust as needed
Turn the water back on slowly. Check for leaks at the handle and spout; run the faucet through hot and cold cycles to verify sealing. If leaks persist, revisit steps 3–5 or consult a pro.
Tip: Allow a few minutes of running water to reveal slow leaks that only appear after pressure builds.
Frequently Asked Questions
Can I fix a shower faucet leak myself?
Many leaks resulting from worn cartridges or O-rings are doable for a confident DIYer with basic tools. If you encounter corrosion, complex valve types, or hidden pipes, consider professional help. Always prioritize safety and local code requirements.
Yes, many shower leaks are DIY fixes, but stop if you see corrosion or complex valves, and consult a professional.
What tools do I need for a DIY shower faucet leak repair?
You’ll typically need an adjustable wrench, screwdrivers, Allen keys, replacement cartridge or O-rings, plumber’s tape, grease, a bucket, and towels. Always verify compatibility with your faucet model before buying parts.
Common tools are adjustable wrench, screwdrivers, Allen keys, and the right replacement parts. Check compatibility first.
What is a cartridge faucet leak and how do I replace it?
A cartridge faucet uses a replaceable cartridge to control flow. Replacing the cartridge involves removing the handle, accessing the cartridge, installing a new one, and reseating seals. Always shut off water and follow manufacturer instructions for your model.
A cartridge leak happens when the cartridge wears out. Replace the cartridge following your faucet’s instructions.
How long does this repair take?
A straightforward cartridge or O-ring replacement typically takes about 45–90 minutes for a DIYer, depending on faucet access and model.
Most fixes take under two hours if you have the parts ready and space to work.
When should I call a plumber for a shower leak?
Call a plumber if you cannot locate the leak source, if water damage appears behind walls, or if the valve requires major replacement or professional permits. In rental homes, report issues promptly.
Call a plumber if the leak persists after DIY attempts or if you spot wall damage or valve replacement is needed.
Watch Video
Top Takeaways
- Identify leak type to choose the right fix.
- Always shut off water before any disassembly.
- Replace worn cartridges or O-rings with correct parts.
- Test thoroughly and monitor for at least 24 hours.
- Know when to call a professional for safety or code concerns.