Tap Leaking from Handle: Quick Fixes and Pro Tips
Diagnose and fix a tap leaking from handle with a practical, step-by-step guide. Safety tips, common causes, and prevention for DIY homeowners. Easy, urgent guidance.

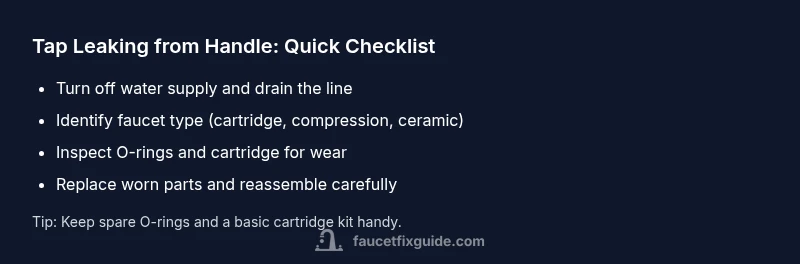
Short answer: A worn cartridge, O-ring, or valve seat is the most common cause of tap leaking from handle. Quick fix: shut off the supply, relieve pressure, then disassemble the handle to inspect and replace the faulty cartridge or O-rings. Reassemble, test for leaks, and tighten packing nut only if needed.
Understanding the problem: tap leaking from handle
A tap leaking from handle is one of the most common homeowner plumbing nuisances. The leak often appears as a steady drip when the handle is off, or a mist when you turn the water on. It’s easy to assume the problem is the whole faucet, but in most homes the issue sits inside the valve assembly. According to Faucet Fix Guide, the root cause is almost always worn seals—especially the O-rings or the cartridge—rather than a broken pipe. Recognizing the exact symptom helps tailor the fix: a rise in leak when the handle is turned, vs a constant drip. If you see water staining under the sink, or hear a hissing when the valve is closed, act quickly to prevent water damage. This guide emphasizes a methodical approach to diagnosing which internal part is at fault and then replacing only what’s necessary, to save time and money. Safety remains paramount: shut off both hot and cold supplies at the respective under-sink valves before touching the faucet.
Common causes of a leaky faucet handle
There are several scenarios that lead to a tap leaking from handle. The most frequent is a worn cartridge in cartridge-style faucets, which lets water bypass the seals. In compression faucets, the rubber O-rings or packing nut degrade over years, causing a drip around the handle. Ceramic-disk faucets wear down their disks, leading to small leaks around the control stem. Less common but possible are a loose packing nut, improper installation, or mineral buildup that prevents a proper seal. Understanding the faucet type (compression, cartridge, or ceramic disk) is essential, because the replacement parts and steps differ. If you’re unsure, starting with a visual inspection of the handle and the area behind the escutcheon can reveal telltale signs of wear, such as shiny spots on metal or torn O-rings. With each symptom, you’ll narrow the likely cause and choose a safe, efficient repair.
Before you begin: safety and prep
Before you touch a leaking faucet, gather your tools and protect the area. Turn off the water supply to the sink and open the faucet to relieve pressure. Place towels or a small basin to catch drips. If you have a hard water system or mineral buildup, consider wearing eye protection and gloves to avoid contact with sharp metal edges and hot water. Remove items from the sink area to prevent loss or damage. It helps to take a photo of the existing assembly before disassembly, so you can reference the original orientation during reassembly. Finally, confirm you have the correct replacement parts for your faucet model—wrong cartridges or O-rings can worsen leaks and cause damage over time. As you proceed, remember: a methodical approach, not force, yields the best results.
Diagnostic tips: confirm faucet type and parts
A precise diagnosis starts with identifying the faucet type. Look under the handle escutcheon for the cartridge or stem style: cartridge faucets typically leak from the handle area when the cartridge seals fail; compression faucets leak from the packing nut or O-rings; ceramic-disk faucets warn of mineral-seated misalignment. Perform a careful hand-inspection of the cartridge or stem; if parts are stuck, apply a small amount of penetrating oil and wait a few minutes before attempting removal. Check the shutoff valves for stiffness—leaking can sometimes be caused by a loose valve stem packing. After disassembly, clean mineral deposits and inspect the cartridge’s O-rings; replace any that show cracking or flattening. Testing the faucet after a partial reassembly can help you confirm whether the issue has shifted away from the suspected component.
Tools, parts, and buying replacements
Common tools include an adjustable wrench, small screwdrivers, pliers, a knife or blade to pry off old seals, and a soft cloth for wiping components. Replacement parts vary by faucet type: O-rings, cartridges, and valve seats are typical. When buying replacements, bring the faucet brand, model, and cartridge size if known; universal O-rings can bridge many scenarios, but ensure the correct diameter and material. If you’re unsure about compatibility, consult a parts catalog or a hardware store specialist. For cheap, quick fixes, keep spare O-rings and a basic cartridge in your toolbox. For more advanced repairs, consider a cartridge with a built-in valve seat to reduce future leaks. Remember: choosing quality components now saves cost and water over time.
Step-by-step overview: plan before you disassemble
A well-structured plan reduces time and mistakes when addressing a tap leaking from handle. First, verify you have the right tools and parts. Next, turn off water supplies and relieve pressure. Then, remove the handle and inspect the cartridge or stem area. If the cartridge is intact but the O-rings are worn, replace only those, and reassemble to test. If the cartridge is damaged, replace it with the same model or an equivalent compatible unit. Finally, re-tighten the packing nut just enough to stop minor leaks without pinching the stem. After reassembly, turn the water back on slowly and run both hot and cold to confirm a clean seal.
Maintenance to prevent future leaks
Once you’ve fixed the tap leaking from handle, adopt a simple maintenance routine to prevent future leaks. Regularly clean aerators and faucet components to reduce mineral buildup. Inspect under-sink valves yearly and replace worn washers before they fail. Keep a small spare parts kit on hand, including O-rings and a selection of cartridges. If you notice changes in water pressure, address it promptly, as high pressure can accelerate seal wear. Finally, document your faucet model and replacement parts for easy reference during future repairs. Proactive maintenance saves water, reduces service calls, and extends faucet life.
Steps
Estimated time: 60-90 minutes
- 1
Shut off water and depressurize
Locate under-sink shutoffs and turn them off. Open the faucet to relieve residual pressure. Place towels to catch drips and protect the cabinet.
Tip: Take a quick photo of valve positions for reassembly. - 2
Remove handle and escutcheon
Unscrew the handle screw (often hidden under a decorative cap) and lift the handle away. Gently slide off the escutcheon to expose the cartridge or stem.
Tip: Be mindful of hidden set screws behind caps. - 3
Inspect cartridge/valve stem
Assess wear on O-rings, seals, and the cartridge body. Note orientation of parts so replacement matches the original setup.
Tip: If parts are sticky or corroded, apply a touch of penetrating oil and wait. - 4
Replace worn parts
Install new O-rings or cartridge identical to the original. Make sure seats are clean and seats align properly before reassembly.
Tip: Lubricate O-rings with plumber's grease to extend life. - 5
Reassemble and adjust
Put the cartridge back, reseat the escutcheon, and reattach the handle. Do not overtighten the packing nut.
Tip: Hand-tighten, then snug with a wrench—no brute force. - 6
Test for leaks
Turn water back on slowly and run both hot and cold to verify a tight seal. Check for drips at every joint and connection.
Tip: If leaks persist, revisit the O-ring seating or cartridge compatibility.
Diagnosis: Continuous drip or mist at the handle when the faucet is off or during use
Possible Causes
- highWorn cartridge O-ring or seal in the cartridge faucet
- mediumDamaged valve seat or worn packing nut in compression faucets
- lowImproper installation or overtightened packing nut
Fixes
- easyShut off water, disassemble handle, inspect/replace cartridge O-rings or seals
- mediumReplace valve seat or stem seals if indicated by diagnostic check
- easyTighten packing nut or replace packing if leaks persist after parts replace
Frequently Asked Questions
What causes a tap to leak from the handle?
Leaks from the handle are usually caused by worn cartridge seals or O-rings. Debris and mineral buildup can worsen wear over time.
Leaks from the handle are usually from worn seals or O-rings; debris can make it worse.
Can I fix a leaky faucet handle myself?
Many leaks can be fixed with basic tools and parts by following manufacturer instructions. A cautious approach is essential.
Yes, you can often fix it yourself with basic tools.
When should I call a professional?
If the leak persists after replacing parts or you suspect hidden plumbing issues, contact a licensed plumber.
If it still leaks after parts replacement, call a professional.
Are all faucet leaks the same to fix?
No. Cartridge, ceramic disk, and compression faucets have different parts. Identify faucet type before starting.
Leaks vary by faucet type; identify it first.
What safety precautions should I take?
Shut off water, relieve pressure, and wear eye protection. Work in a well-lit, ventilated area.
Always shut off water and wear protection.
Will a small drip always lead to a big leak?
A small drip can indicate worn seals that may worsen. Addressing it early prevents larger leaks and water waste.
A small drip may get worse over time; fix early.
Watch Video
Top Takeaways
- Identify faucet type before repair.
- Replace worn O-rings or cartridges to stop leaks.
- Test thoroughly after reassembly.
- Maintain parts to prevent future leaks.