Is Your Faucet Cartridge Bad? Quick Troubleshoot
Discover how to tell if your faucet cartridge is bad with a practical diagnostic flow, quick fixes, safety tips, and prevention ideas for homeowners and DIYers.

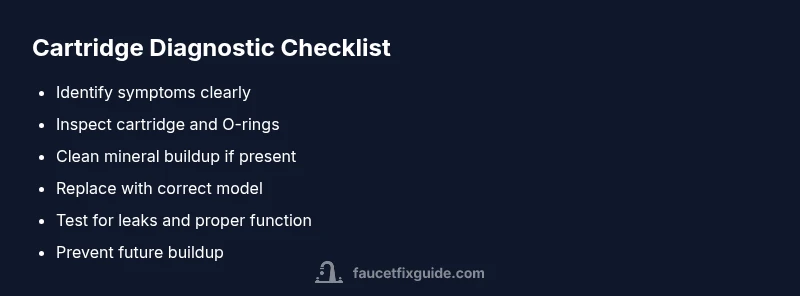
Most faucet cartridges fail with a dripping handle, stiff or loose operation, or air gaps. Start with the simplest fix: shut off water, remove the handle, and inspect the cartridge for wear or mineral buildup. If you see cracks, torn seals, or excessive wear, replace the cartridge and O-rings. If uncertain, call a professional.
What a faucet cartridge does and why failure happens
A faucet cartridge is the heart of many modern faucets, regulating water flow and temperature. It sits between hot and cold supplies and, as you turn the handle, opens and closes channels to mix hot and cold water. Over time, cartridges wear out due to repeated operation, mineral buildup from hard water, and micro-pitting from abrasive debris. In this guide on how to tell if faucet cartridge is bad, we'll walk through the telltale signs and practical fixes. According to Faucet Fix Guide, the most reliable early signals are persistent drips when the faucet is off, stiff or loose handle movement, and temperature inconsistencies. Knowing what to look for helps homeowners act fast before a minor issue becomes a costly leak. The cartridge type matters: ceramic disc cartridges tend to last longer but can fail from pitting; compression cartridges wear through washers; understanding your faucet model helps you pick the right replacement without guesswork.
Common symptoms of a failing cartridge
Leaking or dripping from the spout is the most common symptom, especially after you shut the faucet. A handle that is difficult to turn, feels gritty, or has play can indicate worn internal components. Temperature inconsistency—hot-cold mix not reaching expected warmth or coolness—often points to cartridge trouble. You might also notice a sudden drop in water pressure or irregular spray patterns. In some cases, you’ll hear a faint squeak or click as you rotate the handle. If you see mineral crust around the valve body or you must tighten components to stop leaks, that’s another sign. By compiling symptoms, you narrow down whether the issue is the cartridge or another part like o-rings, seats, or the faucet aerator. Faucet Fix Guide notes that diagnosing symptoms early reduces the risk of flooding and interior damage.
Quick checks you can safely perform
Start with the simplest steps: turn off the supply valves under the sink and run the faucet to relieve pressure. Remove the handle and inspect the visible cartridge sealing surfaces for wear or mineral buildup. Soak the cartridge in a mild vinegar solution if you see white crust, then rinse and dry. Check O-rings and the retaining nut for cracks or looseness. If you observe obvious wear or damage, plan to replace the cartridge. Based on Faucet Fix Guide research, mineral buildup is a leading cause of sticking valves, so regular cleaning can extend life. If the cartridge looks intact but symptoms persist, your problem might be the valve seats or a misaligned cartridge.
Diagnostic flow (quick narrative)
Start with symptom: dripping after closure. Diagnosis: worn or scaled cartridge seals causing imperfect shutoff. Solution: replace cartridge; in some cases, reseating or replacing O-rings is enough. If bleeding persists, verify hot/cold mix aligns with handle direction and ensure supply stops are fully closed during service. When in doubt, replacing the entire cartridge is a safer long-term fix than patching worn seats. Always verify after replacement by testing multiple hot and cold positions and checking for leaks around the handle.
Tools and considerations during replacement
Preparation matters. You’ll typically need an adjustable wrench, small screwdriver, replacement cartridge compatible with your faucet brand, replacement O-rings, plumber’s grease, and towel or bucket for catching water. Take a photo of the valve assembly before disassembly to guide reassembly. Confirm the model number on the old cartridge or faucet manual to ensure compatibility. If your faucet uses a retaining clip, keep track of its orientation. Expect some water to spill—even with valves closed—so protect the cabinet with towels. If the cartridge has mineral buildup, clean seats if accessible before installing the new unit, but never force components. A wrong installation can cause leaks or poor performance.
Safety and common mistakes to avoid
Always shut off both hot and cold supplies before starting. Never hammer the valve stem or forcing parts; this can crack ceramic components. Avoid over-tightening the retaining nut, which can damage seats or cracks. Do not mix brands; cartridges are not universal. Work slowly and keep tiny parts organized in a labeled tray. If you’re unsure of the correct cartridge, consult the faucet’s brand spec sheet or contact a professional. The aim is to complete the repair safely and avoid creating a bigger leak.
Prevention tips to extend cartridge life
Regular cleaning of the faucet aerator and screens reduces debris that can enter the cartridge. Use water-softening systems if you have hard water, and consider a filtration solution for the supply lines. Periodically inspect O-rings and seals for cracking and replace them proactively. Avoid overtightening knobs and handles; gentle, snug tightening usually suffices. Keep a replacement cartridge on hand for routine maintenance, especially if you have a high-use faucet. By adopting these habits, you minimize mineral buildup, reduce leaks, and prolong cartridge life.
Steps
Estimated time: 45-60 minutes
- 1
Shut off water and relieve pressure
Close both hot and cold valves under the sink and run the faucet until water stops to relieve pressure. This prevents accidental sprays when you begin disassembly.
Tip: Take a photo of the valve layout before removing parts to guide reassembly. - 2
Remove handle and access cartridge
Use the appropriate screwdriver or Allen wrench to remove the handle and the decorative cap. Gently lift out the retaining clip or nut to free the cartridge.
Tip: Be careful not to drop small parts into the cabinet; keep a shallow tray handy. - 3
Inspect cartridge, O-rings, and seats
Check for cracking, wear, or mineral buildup on the cartridge, O-rings, and valve seats. If scales are present, clean with vinegar and a soft brush; replace worn parts.
Tip: Don’t force stuck parts; if it won’t budge, stop and reassess. - 4
Replace with the correct cartridge model
Purchase a cartridge specified for your faucet brand and model. Align any tabs or notches to ensure proper seating and operation.
Tip: Bring old cartridge or model number to the parts store for accuracy. - 5
Install new cartridge and reassemble
Install the cartridge, rotate to seat evenly, reattach O-rings, and reinstall the clip or nut. Replace the handle and decorative cover.
Tip: Apply a thin layer of plumber’s grease to O-rings for a smooth seal. - 6
Test thoroughly and check for leaks
Turn the water back on and test hot and cold positions. Check under the sink and around the handle for any leaks. If leaks persist, re-tighten connections or reseat the cartridge.
Tip: Test multiple times from different angles to verify a true seal.
Diagnosis: Dripping or slow sealing after turning the faucet off
Possible Causes
- highWorn cartridge causing imperfect seals
- mediumMineral buildup preventing full closure
- highDamaged O-rings or seals
- lowLoose retaining nut or improper installation
Fixes
- easyReplace cartridge with a compatible unit
- easyReplace O-rings and seals
- easyClean mineral deposits from seats (if accessible)
- easyTighten mounting nut to spec and reseat cartridge
Frequently Asked Questions
What is a faucet cartridge?
A faucet cartridge is the replaceable component that controls water flow and temperature in many modern faucets. It seals and opens passages when you turn the handle.
A faucet cartridge is the replaceable part that controls water flow and temperature, sealing and opening passages as you turn the handle.
How can I tell if the cartridge is bad?
Look for persistent drips, stiff or loose handle movement, temperature inconsistency, and reduced water pressure. Visible wear or mineral buildup is also a sign.
Signs include dripping, hard-to-turn handles, temperature changes, or reduced water flow.
Can I fix it without replacing it?
Some issues, like worn O-rings or mineral buildup, can be addressed without full cartridge replacement. If wear is evident or the problem recurs, replacement is recommended.
Sometimes you can fix minor wear by replacing O-rings, but often you’ll need to replace the cartridge.
How long does a cartridge last?
Lifespan varies by use and water quality, but many cartridges last several years. Signs of wear include leaking, stiffness, or temperature shifts.
Cartridge life varies, but leakage and changes in temperature or movement usually signal replacement.
Do I need a professional to replace a cartridge?
If you’re comfortable with basic plumbing, you can replace it yourself with the right cartridge. If you’re unsure about model compatibility or encounter leaks, hire a plumber.
You can usually replace it yourself if you have the right part; otherwise, call a pro.
What tools do I need?
Common tools include an Allen wrench, screwdriver, adjustable wrench, replacement cartridge, O-rings, plumber's grease, and a towel.
You'll typically need a screwdriver, wrench, and replacement cartridge with O-rings.
Watch Video
Top Takeaways
- Replace worn cartridge promptly to stop leaks.
- Shut off water before any disassembly.
- Use the correct cartridge model for compatibility.
- Regular cleaning minimizes mineral buildup and sticking.
- Consult a pro if you're unsure.