How to Remove a Faucet Cartridge Without Tools: A DIY Guide
Learn a safe, tool-free method to remove a faucet cartridge. Step-by-step instructions, safety tips, and maintenance guidance for leak-free reassembly.

Learn how to remove faucet cartridge without tool using safe, step-by-step techniques. You’ll identify cartridge types, assess risks, and apply a tool-free method that minimizes damage to seals and finishes. This quick guide sets you up with a clear plan, required safety notes, and a path to a successful DIY repair.
Understanding faucet cartridges: what they are and why removal matters
Faucet cartridges are the mechanical heart of most modern faucets. They control water flow and temperature by guiding the movement of the handle and mixing hot and cold water. There are several cartridge styles, but for many residential setups the goal of maintenance or replacement is the same: access the cartridge to inspect wear, reseat a seal, or upgrade to a ceramic disk for smoother operation. If you’re wondering how to remove faucet cartridge without tool, you’ll want to understand the basics before you pry. In many cases, a tool-free approach works when the faucet uses a simple retainer clip or flat O-rings. The key is to work deliberately, keep the sink protected, and avoid forcing components that are meant to move freely only within a chosen range. This guide walks through how to identify your cartridge, assess the retention method, and execute a safe removal without tools. By following the steps, homeowners can diagnose leaks at the source, confirm worn seats, and prepare for reseating or replacement. The Faucet Fix Guide team notes that tool-free removal is feasible for a large portion of cartridge designs, especially in single-handle bathroom faucets, where manufacturers prioritize serviceability. Always check your faucet model’s manual for any model-specific cautions, but the general approach described here will apply to many common designs. In this article you will learn, in practical terms, how to remove faucet cartridge without tool and what to do next to ensure a long-lasting seal.
Tools and safety considerations
The goal of this method is to remove the cartridge without specialized tools, but you still need a few basics to stay safe and organized. Before you start, turn off both hot and cold water valves under the sink and drain the line to relieve pressure. If you can't shut off valves, you should not attempt the cartridge removal; instead call a professional. Protect the sink with a towel or rag to catch drips and protect surfaces from scratches. Depending on your fixture, you may use gloves, eye protection, and a flashlight to improve visibility in tight spaces. While no dedicated tools are required for many tool-free extractions, you may choose optional helpers like a flashlight for visibility or a small tray to keep parts from rolling away. If your faucet access is limited, or if you live in a rental with sensitive fixtures, proceed slowly and avoid forcing components that resist gentle movement. This section outlines why safety matters and how to prepare your workspace so you can follow the steps with confidence. The aim is to minimize risk of leaks, avoid damage to the faucet finishing, and keep the removal process predictable and clean. This setup is suitable for many common residential fixtures and aligns with best practices documented by Faucet Fix Guide in 2026. After setting up, you should also consider whether you want to replace worn seals later, or upgrade to a cartridge that reduces future maintenance.
Identifying your cartridge type
Not all cartridges come out the same way, which is why identifying the type is essential before attempting removal without tools. Most residential single-handle faucets use ceramic disk or cartridge-based assemblies. Ceramic disks wear gradually and seal differently than older compression cartridges, so the removal approach may vary. Start by inspecting the handle and escutcheon to locate any retention features: are there a clip, a C-clip, a retaining nut, or a simple friction fit? If you can see a clip with your naked eye and can reach it with a gloved finger, you may be able to release it without tools. In contrast, a stubborn retaining nut will often require more advanced access or a manufacturer-approved approach. For a tool-free path, focus on access, visibility, and gentle manipulation. This knowledge helps you anticipate how much leverage is safe and how to apply steady twists without bending the valve body. Read the faucet’s manual if available, but remember that many designs share a common approach: locate the retention element, verify it’s not metal-on-metal, and apply light, even pressure to release without damage. Understanding cartridge types improves your odds of a clean removal and reduces the risk of damaging O-rings or seats. The goal is to confirm compatibility with a tool-free approach before applying force, and to prepare for reassembly with minimal surprises.
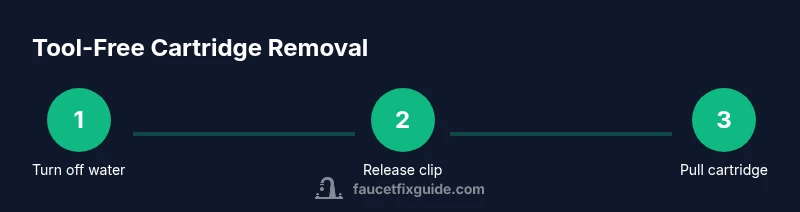
Step-by-step overview for tool-free removal
This overview explains the flow of steps, while the detailed, step-by-step instructions follow in the dedicated STEP-BY-STEP section. The core idea is to expose the cartridge by locating the retention method, relieve pressure, and perform a careful, controlled extraction using hand pressure and gentle wiggling. Begin by turning off the water shutoffs, protecting the sink, and verifying the faucet is cool to the touch. Inspect the area around the cartridge for a visible clip or a retaining ring and remove it with gloved fingers if possible. If a clip is not obvious, look for a small access window or a notch that indicates a friction-fit cartridge. With the retention released, grasp the cartridge body and apply slow, even pressure while turning slightly to loosen any friction fit. If the cartridge resists, avoid forceful prying; instead, back off, re-check the alignment, and attempt again. Once the cartridge begins to move, continue pulling straight out to prevent tilting and keep the seals intact. This approach minimizes risk to the faucet finish and preserves O-rings for reassembly. Finally, wipe down the seat area to remove mineral buildup and prepare for inspection.
Common mistakes to avoid when removing a faucet cartridge
- Forcing a stuck cartridge can damage the valve body or scratch the finish.
- Ignoring safety steps increases the risk of leaks and personal injury.
- Forgetting to shut off the supply leads to water spray and mess.
- Underestimating the importance of O-rings can cause leaks after reseating.
- Rushing the reassembly process can misalign seats and cause future leaks.
- Using metal tools can gouge ceramic disks or metal components, causing long-term leaks.
If you encounter resistance, pause and reassess rather than forcing the component free. Take a quick photo or draw a simple diagram of how parts were arranged to aid reassembly. Keeping the workspace clean and dry helps you maintain control as you progress. Remember: slow, deliberate moves reduce the risk of damage and improve the odds of a successful, leak-free reassembly.
Replacing or reseating the cartridge after removal
After removing the cartridge, inspect the valve seats and O-rings for wear, cracks, or flat spots. Replace worn O-rings with new ones designed for your faucet model, and lightly lubricate them with silicone-based grease to improve seal and ease future removal. If your faucet uses a ceramic disk, check the disk surfaces for chips or scoring and consider replacing the cartridge assembly if wear is evident. When reseating, align the cartridge with the guides in the valve body and press straight in until you feel it seat evenly. Reinstall any retainer clips or nuts as needed, being careful not to overtighten. If there is a metal retaining nut, tighten it just enough to compress the seal without pinching the cartridge. Clear, smooth seating is essential for a leak-free operation. Finally, turn the water back on slowly, check for drips, and wipe away any residual water. With the cartridge replaced or reseated, switch the faucet handle through its full range to confirm proper operation and even temperature mixing. If you notice any irregularity after the test, disassemble again and verify alignment, then re-seat once more.
Maintenance tips after cartridge removal
To extend the life of your faucet and reduce the frequency of cartridge service, consider these maintenance steps. Regularly clean mineral deposits using a mild, non-abrasive cleaner and a soft cloth to avoid scratching finishes. Use a dedicated faucet aerator brush to clear mineral buildup and keep water flow steady. Periodically inspect O-rings and seals and replace them as recommended by your faucet manufacturer. Document model numbers and replacement parts in a simple home maintenance log so you can quickly source the right cartridge in the future. If you notice persistent leaks after reseating, re-check alignment and seating, and verify that the water supply lines are properly tightened. Finally, protect fixtures from hard water by using a water softener or filter where appropriate. These practices help you avoid repeated disassembly and keep your faucet performing reliably over time. Consider scheduling a yearly quick check: loosen slightly, dab away mineral buildup, and ensure the handle returns to your preferred temperature without hesitation.
Tools & Materials
- Gloves(non-slip grip and hand protection)
- Clean rag(catch drips and wipe o-rings)
- Flashlight(improve visibility inside cabinet)
Steps
Estimated time: 25-45 minutes
- 1
Turn off the water supply
Shut off both hot and cold valves under the sink by turning clockwise until firmly closed. If they leak or won’t close, shut off the main supply and ventilate. After turning off, open the faucet handle to relieve any remaining pressure.
Tip: Always verify zero pressure by running the faucet after shutting off. - 2
Relieve pressure and prepare the area
Place a towel under the sink to catch drips and prevent water from pooling. Open the faucet a little to exhaust pressure and avoid sudden sprays when the cartridge is released.
Tip: Keep a clean rag handy to wipe areas as you go. - 3
Identify cartridge retention
Look inside the valve body for a visible clip, ring, or friction-fit. Confirm you can access it by hand without tools. If you see a clip, ensure your fingers can reach it safely before attempting release.
Tip: A quick photo helps with correct reassembly. - 4
Release the retention mechanism
Carefully release the clip with your fingernail or a non-metal tool. If there’s a retaining ring, rotate it gently to loosen. Do not lever with metal tools that could scratch components.
Tip: Avoid bending or forcing; small, patient movements win here. - 5
Loosen and extract the cartridge
Grasp the cartridge body with fingers, keep it straight, and apply steady, even pressure while turning slightly to break any friction fit. Pull straight out once movement begins to avoid tilting and seal damage.
Tip: If it stalls, stop and re-check alignment before trying again. - 6
Inspect components
Check O-rings for wear and inspect valve seats for scoring. Wipe surfaces clean and prepare any replacements. This minimizes future leaks after reinstallation.
Tip: Have fresh O-rings ready before reassembly. - 7
Prepare for reinstallation
Lubricate O-rings lightly with silicone grease, align guides, and insert the cartridge. Reinstall any retainer clips or nuts, avoiding over-tightening which can pinch the cartridge or damage seats.
Tip: Use a light touch; if you feel resistance, stop and realign. - 8
Test the faucet
Turn the water back on slowly and operate the handle through its full range. Check for leaks and even temperature. Wipe away any residual water and recheck after a short run.
Tip: If leaks persist, revisit steps 5-7 and reseat once more.
Frequently Asked Questions
Can I remove a faucet cartridge without tools?
Yes, in many common designs you can release a retention clip or friction-fit cartridge with your hands. If you encounter resistance, reassess alignment and avoid forcing.
Yes, in many designs you can remove the cartridge with your hands if the retention is simple; avoid forcing.
What should I do if the cartridge is stuck?
Do not force the cartridge. Try releasing any clip, warming slightly with hot water, and rechecking alignment. If it still won't budge, consider professional assistance.
Don't force it. Try gentle removal or seek professional help if needed.
Do I need to replace O-rings after removal?
Inspect O-rings for wear and replace if cracked or deformed. Lubricate with silicone grease when reseating to improve seal and prevent leaks.
Yes, inspect and replace worn O-rings and lightly grease when reassembling.
How long does this process take?
A typical tool-free removal and reseat can take 15-40 minutes depending on access and cartridge type. Plan for a gradual, careful approach.
Plan for 15-40 minutes depending on access and cartridge design.
Is this safe for rental properties?
Yes, as long as you can access the faucet safely and avoid permanent alterations, tool-free removal minimizes damage and maintains fixtures. Check your lease and manual.
Yes, you can, just mind the lease and follow safe steps.
Watch Video
Top Takeaways
- Shut off water first before attempting removal
- Handle friction with care—no force
- Inspect seals and seats for wear
- Test for leaks after reassembly