How to Fix Faucet Leaking from Handle: A Homeowner's Guide
Learn how to fix faucet leaking from handle with a practical, step-by-step approach. Diagnose cartridge issues, choose parts, and perform a safe repair with basic tools from Faucet Fix Guide.

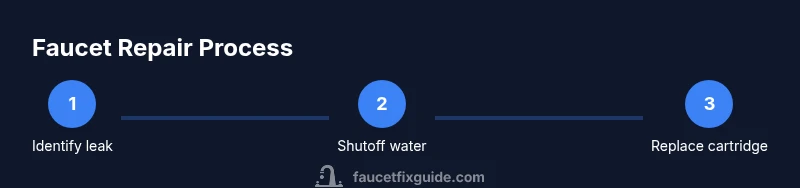
To stop a faucet leaking from the handle, identify the handle type, shut off the water supply, and replace the worn cartridge or seat. This repair is beginner-friendly and often resolves a persistent drip. You’ll need a few basic tools and the correct replacement parts. Follow the step-by-step guidance below.
Understanding the common causes of faucet leaking from the handle
If you’re wondering how to fix faucet leaking from handle, the most common culprits are worn cartridges on cartridge-type faucets, damaged O-rings, or a faulty valve seat. Over time, the moving parts wear out from frequent use, mineral buildup, or improper past repairs. According to Faucet Fix Guide, most handle drips originate from a degraded cartridge or seat that cannot seal water pressure. A loose handle or packing nut can also allow water to escape around the handle, especially with compression faucets. By diagnosing which part is leaking, you can choose the right replacement without replacing the entire faucet. Read through this guide to learn how to identify the problem, select compatible parts, and perform a safe repair with common household tools. In many cases, once you replace the worn cartridge or O-ring, the faucet will stop dripping and maintain steady water pressure. This section will outline the typical failure modes and how to spot them during a hands-on inspection.
Identify your handle type
Faucets come in several handle configurations. The most common are single-handle cartridge faucets, two-handle compression faucets, and ball-and-disc types. To identify which one you have, remove the small handle screw or decorative cap and gently pull the handle away from the faucet body. If you see a cartridge seated in the body, you likely have a cartridge faucet. If there are two separate handles and a visible stem, you probably have a compression faucet. For ball-and-disc models, the handle will reveal a ball mechanism with rotating parts. Knowing the type guides which parts to replace and how to disassemble safely. When in doubt, photograph the setup before disassembly so you can reassemble correctly.
Tools and parts you’ll need
Before you begin, gather the essential tools and replacement parts. The exact cartridge type must match your faucet model, but the list below covers common essentials:
- Adjustable wrench (essential) – for loosening nuts under the sink
- Screwdrivers (Phillips and flathead) – to remove screws and handle caps
- Allen wrench set – many handles use an hex set screw
- Replacement cartridge or O-rings – verify model compatibility
- Plumber’s grease or silicone lubricant – to lubricate O-rings and cartridges
- Toothbrush or small brush – to clean mineral buildup
- Rag/towel and bucket – to control spills and catch water
- Teflon tape – for threaded connections (optional but helpful)
- Penetrating oil – if screws are rusted or stuck (optional)
- Safety gloves – to protect hands during disassembly
Step-by-step: diagnosing and replacing the cartridge
-
Turn off both hot and cold shutoff valves under the sink and open the faucet to drain residual water. This prevents pressure buildup during disassembly.
-
Remove the handle by taking off the decorative cap, then unscrewing the set screw with the appropriate screwdriver or hex key. Take note of handle orientation for reassembly.
-
Lift off the handle to expose the cartridge or stem. Inspect for wear, cracks, or mineral buildup. If you see a damaged cartridge or O-rings, you’re likely dealing with a drain-leak at the handle.
-
Remove the cartridge following the faucet-specific instructions. Use the correct tool to loosen any retaining nut or clip. Inspect the seat and replace if pitted or corroded.
-
Install the replacement cartridge or new O-rings. Lubricate seals lightly with plumber’s grease to ensure a snug seal. Recheck alignment and orientation before reassembly.
-
Reassemble the handle and tighten all screws firmly, but avoid overtightening. If there was a decorative cap, snap it back into place.
-
Turn the water back on slowly and check for leaks around the handle. Run hot and cold to ensure full performance and watch for any drips.
-
If the leak persists, recheck the seat and consider replacing additional components or consulting a professional. Sometimes mineral buildup in the supply lines or a worn packing nut requires extra steps.
Alternative fixes: seats, O-rings, and aerator checks
Not every leak originates from the cartridge. A worn valve seat can allow water to bypass even a new cartridge. In some models, the O-rings degrade after years of use, causing side leaks around the handle. Inspect the seat for pitting and replace it if needed. Don’t overlook the aerator on the faucet spout; a clogged aerator can force water to escape around the handle area when you operate the tap. Clean or replace the aerator as part of a thorough inspection.
Safety and maintenance tips to prevent future leaks
- Always shut off water supply before starting any repair. A sudden burst can cause damage and water waste.
- Use the correct cartridge model and compatible parts to avoid improper seals.
- Apply a thin layer of plumber’s grease on O-rings and cartridges to reduce friction and wear.
- Don’t over-tighten connections; this can crack plastic components or strips threads.
- Regularly clean mineral buildup around the handle and stem to extend gasket life. A quick wipe during monthly maintenance reduces corrosion.
Common mistakes to avoid and how to test after repair
- Skipping the shutoff step can lead to water damage. Always turn off both hot and cold valves first.
- Mixing parts from different faucet families leads to poor seals. Ensure compatibility with your model.
- Forgetting to test with both hot and cold water after repair can hide a misalignment. Run several cycles and inspect for leaks from multiple angles.
- Not cleaning residue before reassembly can trap debris and cause leaks later. Wipe components thoroughly and dry before reinstall.
Authority sources
For reliable, professional guidance on faucet repairs, you can consult official sources and reputable publications:
- https://www.epa.gov
- https://www.energy.gov
- https://www.consumerreports.org
Tools & Materials
- Adjustable wrench(Loosens nuts under sink; choose 6-12 inch range)
- Screwdrivers (Phillips and flathead)(Remove handle and caps)
- Allen wrench set(For set screws on many handles)
- Replacement cartridge or O-rings(Model-specific match required)
- Plumber’s grease or silicone lubricant(Lubricate seals lightly)
- Rag/towel and bucket(Catch drips and keep area clean)
- Teflon tape(Optional for threaded connections)
- Penetrating oil(If screws are rusted)
- Safety gloves(Protect hands during disassembly)
- Replacement valve seat or retaining clips(Only if inspection shows wear)
Steps
Estimated time: 60-90 minutes
- 1
Shut off water supply
Locate hot and cold shut-off valves under the sink and turn them clockwise until snug. Open the faucet to relieve pressure and drain residual water from the lines.
Tip: Have a towel ready to catch drips. - 2
Remove handle and identify screws
If there is a decorative cap, pry it off gently to expose the screw. Use the correct screwdriver or hex key to remove the set screw, and keep track of screws for reassembly.
Tip: Take a quick photo to remember orientation. - 3
Expose the cartridge or stem
Carefully pull the handle away to reveal the cartridge or stem. Inspect for wear, cracks, or mineral buildup that could cause leaks.
Tip: If the part sticks, apply a drop of penetrating oil and wait 5 minutes. - 4
Remove and inspect the cartridge/seat
Release the retaining nut or clip, then pull out the cartridge. Inspect O-rings and the valve seat for wear or corrosion.
Tip: Replace worn parts with exact-match replacements. - 5
Install new cartridge or O-rings
Lubricate seals lightly, insert the new cartridge in the correct orientation, and ensure it seats evenly. Replace any retaining hardware.
Tip: Avoid forcing the cartridge; alignment matters. - 6
Reassemble the handle and trim
Put the handle back on, replace screws, and reattach any decorative caps. Tighten screws until snug but not over-tightened.
Tip: Confirm the handle moves smoothly without wobble. - 7
Restore water and test cues
Turn the supply valves back on gradually and run both hot and cold water. Check for leaks around the handle and under the sink.
Tip: Run the faucet for several minutes to clear any air pockets. - 8
If leaks persist, inspect further
If dripping continues, recheck seating and consider replacing adjacent components like the valve seat or aerator. Seek professional help if necessary.
Tip: Keep a repair log for future maintenance.
Frequently Asked Questions
What are the signs that the cartridge needs replacement?
If water drips from the handle, has variable temperature response, or leaks after tightening the handle, the cartridge or O-rings may be worn and need replacement. Inspect the cartridge for wear and install a compatible replacement.
Common signs include dripping at the handle and temperature control issues, which usually mean the cartridge needs replacement.
Can I fix leaks without shutting off the water?
Shutting off the water is a safety requirement for faucet repairs. Without turning off the supply, you risk water damage and personal injury during disassembly.
Always turn off the water supply before starting repairs.
Why does the leak persist after replacement?
A persistent leak may indicate a worn valve seat, damaged packing, or misaligned cartridge. Reinspect components, ensure proper orientation, and replace any additional worn parts.
If it keeps dripping, check the seat and seals again and consider replacing adjacent parts.
How long should a cartridge replacement take?
Most single-handle cartridge replacements take about 30-60 minutes, depending on faucet model and access space under the sink.
Most people finish in about half an hour to an hour.
Is it safe to reuse old screws and caps?
Reusing worn screws or caps can compromise seal and alignment. Replace damaged fasteners with exact-match parts when possible.
Use new screws and caps if the old ones show wear.
Should I check the aerator during a handle leak repair?
Yes. A clogged aerator can cause reduced water flow and weird leak behavior. Clean or replace the aerator if needed during maintenance.
Don’t skip aerator cleaning during a leak repair.
Watch Video
Top Takeaways
- Identify leak source before ordering parts.
- Cartridges and O-rings are common failure points.
- Repair with model-specific replacements for best seals.
- Test hot and cold water after repair to confirm results.
- Prevent future leaks with regular maintenance.