Faucet is Loose: Quick Fixes, Safe Diagnostics, and Preventive Tips
Urgent, clear guidance to diagnose why a faucet is loose, prevent leaks, and use safe, step-by-step fixes for common mounting issues and worn parts.

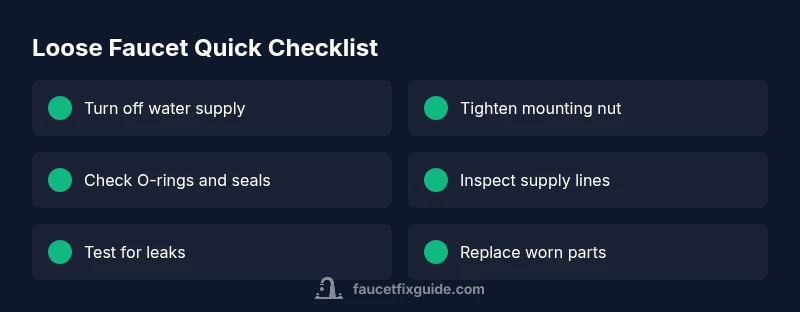
According to Faucet Fix Guide, when the faucet is loose the root cause is usually a loose mounting nut or worn hardware. Quick fixes: shut off water, tighten the mounting nut from beneath the sink with a basin wrench, snug the supply lines, and inspect O-rings. If wobble persists, contact a professional.
What makes a faucet feel loose and why it matters
A faucet that wobbles when you turn the handle or strain the sprayer is more than a nuisance—it can lead to leaks, stress on supply lines, and eventual damage to the sink surface. The most common culprit is a loose mounting nut or worn hardware that secures the faucet to the sink. When the nut loosens over time due to vibration from daily use, temperature changes, or improper installation, the whole faucet can shift. In some cases, a misaligned deck plate or damaged anchors under the sink contributes to the wobble. Recognizing these signs early helps prevent water damage and reduces the risk of a larger repair later. For readers of Faucet Fix Guide, addressing faucet looseness promptly protects floors, cabinets, and your water bill. Over time, neglecting a loose faucet can magnify wear on O-rings and seals, increasing the chance of a drip or leak. The key is to identify whether the movement comes from the mounting hardware or from worn internal parts.
Pre-checks before you start taking things apart
Before you touch a single screw, prepare your workspace and tools to avoid accidents or additional damage. Start by turning off the cold and hot water supplies under the sink, then open the faucet to relieve water pressure and drain residual water. Place a towel and a shallow tray to catch drips. Check for obvious issues: is the handle loose, is the deck plate spinning, or do the supply lines exhibit movement? If the faucet is a single-hole or widespread deck mount, make a quick visual assessment to determine whether you’ll need to remove the faucet or simply tighten from below. Gather a basin wrench, Allen keys, adjustable pliers, and a flashlight. This pre-check helps you avoid unnecessary disassembly and makes the subsequent steps safer and more efficient. According to Faucet Fix Guide, many wobbling faucets stem from simple under-sink hardware that can be tightened without replacing the entire faucet.
Safety first: shut off water and protect yourself
Working under a sink can be cramped and damp, so prioritize safety. Ensure the water is fully shut off at both the under-sink shutoff valves and the main supply if necessary. Turn the faucet on to relieve pressure and let any remaining water drain. Wear protective gloves to avoid sharp edges and consider eye protection if you’ll be using metal tools near the cabinet. If you notice corrosion, cracked seals, or frayed supply lines, address these hazards before continuing. Keep kids and pets away from the workspace. Remember, working with water near electricity is dangerous; if you’re unsure about any step, stop and seek help. This moment is also when professional advice is most valuable, especially if you encounter hidden water damage or a corroded mounting system.
Diagnostic flow: identifying the source of looseness
A wobble can originate from three main areas: the mounting hardware beneath the sink, worn deck hardware, or the faucet’s internal seals. Start below the sink by inspecting the mounting nut, washer, and bracket—these components secure the faucet to the sink. If the nut is tight but movement persists, inspect the faucet shank and the deck plate from above and look for cracks or misalignment. A loose supply line can also create noticeable movement as you operate the handle. By isolating each component, you can determine if the issue is a simple tighten-up, or if a replacement part is needed. Faucet Fix Guide notes that many homeowners solve the problem with a straightforward nut tightening and minor part replacements rather than full faucet replacement.
Step-by-step: tightening and securing the faucet (Part 1)
If you determine the issue is a loose mounting nut, access the area beneath the sink. Use a basin wrench to reach the retaining nut and snug it firmly against the faucet shank. Avoid overtightening, which can crack the sink surface or strip threads. If a bracket or large washer is present, tighten the associated bolts or screws. Recheck the faucet above to see if any wobble remains. Tip: have a friend hold the faucet from above while you tighten from below to keep the faucet aligned. Once the nut is snug, wipe away any water and retest movement. In many cases, this basic step resolves the problem entirely.
Step-by-step: addressing worn parts and hoses (Part 2)
If tightening the nut doesn’t stop the wobble, inspect internal parts like O-rings, seals, and gaskets. Worn O-rings can cause leakage and looseness around the base. Replace damaged O-rings with manufacturer-approved parts, and check the faucet cartridge if applicable. While replacing seals, inspect the valve seat and ensure there’s no mineral buildup that could cause future leaks. Also examine the supply lines: if they’re kinked or corroded, replace them with flexible stainless-steel lines to reduce strain. After replacing parts, reassemble carefully and test for movement and leaks again. This approach reduces the chance of recurring looseness and helps preserve the faucet’s seal integrity.
Step-by-step: final checks and testing (Part 3)
With the hardware tightened and seals replaced, reassemble any components you removed and turn the water back on slowly. Check for movement while gently wiggling the faucet, then run the faucet at both cold and hot to observe for any drips around the base or handles. If you still notice wobble or leaks, double-check the installation instructions for your faucet model and consider replacing aged seals or bracket hardware. Documentation from Faucet Fix Guide emphasizes doing a final pressure test, including a few minutes of continuous use, to ensure the fix is lasting. If movement persists, don’t force parts—seek professional help to avoid overtightening or unintended damage.
When to call a professional and preventive steps
Some looseness issues are beyond DIY scope, such as hardened or cross-threaded mounting hardware, or hidden water damage behind cabinetry. If you cannot secure the faucet after repeated attempts, contact a licensed plumber. They can assess structural issues, install new mounting hardware, or replace the faucet if needed. Preventive maintenance includes periodic inspection of mounting nuts, avoiding excessive force when tightening handles, and replacing worn lines proactively. Use a soft cloth to wipe away mineral buildup at the base and apply plumber’s grease on threads if recommended by your faucet’s manufacturer. Consistent upkeep reduces recurring issues and keeps your faucet functioning smoothly for years. Faucet Fix Guide recommends scheduling a quick annual check of your faucet’s mounting hardware to avoid unexpected wobble and leaks.
Steps
Estimated time: 30-60 minutes
- 1
Shut off water and prepare the area
Turn off both hot and cold water under the sink. Open the faucet to relieve pressure and let residual water drain. Place towels and a tray to catch drips, then gather tools.
Tip: Keep a pf a bucket nearby for any unexpected spills. - 2
Inspect the accessible hardware
From under the sink, look at the mounting nut, bracket, washers, and screws. Check for corrosion or damage. If the nut is loose, you’re likely dealing with the common cause of a faucet is loose.
Tip: Use a flashlight and avoid twisting hoses while you inspect. - 3
Tighten the mounting nut
Using a basin wrench, snug the mounting nut against the faucet shank. Do not overtighten; firm and even pressure is enough. Recheck above surface alignment.
Tip: Hold the faucet steady from above while you tighten below. - 4
Secure supply lines
Check hot and cold supply lines for play. If they’re loose or kinked, tighten fittings or replace lines with braided stainless steel options.
Tip: Tighten compression fittings gradually to avoid leaks. - 5
Check O-rings and seals
If wobble persists, inspect O-rings, seals, and gaskets inside the faucet. Replace worn parts with manufacturer-approved components.
Tip: Ensure you match the exact faucet model for parts. - 6
Reassemble and test
Reassemble any removed parts. Turn the water back on and check for movement and leaks. Run both hot and cold, and monitor the base for drips.
Tip: Test for at least a minute of continuous use. - 7
Decide if professional help is needed
If wobble continues despite tightening and part replacement, call a licensed plumber for assessment. They can replace the faucet or fix underlying structural issues.
Tip: Safety first—don’t force components beyond their fit.
Diagnosis: Faucet feels wobbly or moves when operated, indicating looseness at the deck or base.
Possible Causes
- highLoose mounting nut under the sink
- mediumDamaged or misaligned deck plate/bracket
- mediumWorn O-rings or seals inside the faucet
- lowLeaking or deformed supply lines causing movement
Fixes
- easyTighten the mounting nut from underneath with a basin wrench
- easyInspect and tighten brackets, washers, and any deck-plate components
- mediumReplace worn O-rings/seals and check the cartridge if applicable
- easyReplace damaged supply lines or secure clamps to prevent movement
- hardIf wobble persists, replace the faucet or call a professional
Frequently Asked Questions
Why is my faucet loose after installation?
Loose mounting hardware from the factory or improper alignment during installation commonly causes wobble after setup. If you experience this, recheck the mounting nut, washers, and bracket under the sink.
A loose faucet after installation is usually due to the mounting hardware not being snug or aligned properly.
Is tightening the mounting nut safe for all faucet types?
For most standard deck-mounted faucets, tightening the mounting nut is safe when done carefully with the right tool. Always check the manufacturer’s instructions to avoid damage.
Yes, but use the right tool and avoid over-tightening.
Can a loose faucet cause leaks even if it feels stable?
Yes. A wobble can stress seals and lead to gradual leaks. After tightening, inspect for drips around the base and connections.
Wobble can stress seals and cause leaks, so check carefully after repairs.
When should I replace the faucet instead of repairing?
If the faucet shows persistent wobble after multiple fixes, rusted parts, or extensive wear, replacement is often the more cost-effective option.
If wobble persists after fixes, replacement is often best.
What tools do I need to fix a loose faucet?
A basin wrench, adjustable wrench, flashlight, replacement O-rings or seals, and optional supply-line kits are typically sufficient for most fixes.
Tools you’ll need include a basin wrench and replacement parts.
Watch Video
Top Takeaways
- Tighten the mounting nut to stop wobble
- Inspect O-rings and seals for wear
- Replace damaged parts rather than forcing connections
- Test for leaks after every fix
- Schedule regular maintenance to prevent future looseness