Bathtub Faucet Drips: Diagnose and Fix
Learn to diagnose and fix bathtub faucet drips quickly with our step-by-step guide. Stop leaks, save water, and know when to call a pro from Faucet Fix Guide.

Bathtub faucet drips are most often caused by a worn cartridge or damaged O-rings. Quick fix: shut off the water, remove the handle, and inspect or replace the cartridge or washer. According to Faucet Fix Guide, starting with the simplest component saves time and water. If the drip continues, check for a loose packing nut, verify valve seat seating, and confirm supply lines are fully shut off before proceeding.
What causes a bathtub faucet drips
A dripping tub faucet is typically a symptom of worn internal parts that fail to seal water completely. The most common culprits are a worn cartridge or seal washers, but mineral buildup, a loose packing nut, or a damaged valve seat can also let water escape. The exact part you replace depends on your faucet type (compression, cartridge, ball, or ceramic-disc). For homeowners, understanding these parts helps you choose the right replacement and reduce wasted water. Throughout this guide, you’ll see practical, safe steps and brand-agnostic instructions. According to Faucet Fix Guide, starting with the simplest component often stops the drip fast and minimizes parts cost.
Quick checks you can do before disassembly
Before pulling apart your faucet, run through a few quick checks. Confirm the water is off at the shutoff valves, not just the faucet handle. Inspect the handle for wobble, which can indicate a loose packing nut. Look for visible leaks around the handle escutcheon and spout. If you have a two-handle faucet, test each side separately to identify which side drips. These checks are cheap and fast and can spare you a more involved repair if the cause is obvious.
Common failure points by faucet type
Most bathtub faucets fall into a few main categories, each with typical wear points. Compression faucets use a packing nut and washers; over time washers wear, causing a slow drip. Single-handle cartridge faucets rely on a cartridge that seals the valve; when the cartridge wears, water leaks past the seal. Ball-and-claw or disc-type fixtures have their own seals and seats that can degrade with mineral buildup or corrosion. Ceramic-disc faucets are durable but can still drip if the cartridge or seats wear down. The key is to identify which mechanism you have, then source the correct replacement parts. For most homeowners, replacing a worn cartridge or a cracked washer resolves the majority of tub-drip problems. If you’re unsure of your faucet type, consult the faucet’s model number or remove a small sample for comparison. The Faucet Fix Guide team notes that correct part matching is essential for a lasting fix.
How to identify the parts you may need
Start by examining the handle to determine the faucet style. With a two-handle faucet, each side may drip independently. For single-handle and cartridge faucets, you’ll often identify a stem or cartridge under the handle. Remove the nut and pull the cartridge to inspect for wear. If o-rings are visible, they’re commonly the drip source around the base. Gather a replacement kit based on the model, and avoid mixing parts from different faucet families. Consulting the model number or manufacturer can help you buy the right cartridge, washer kits, or o-ring sets. As a rule, carry spare o-rings and a universal washer kit for quick fixes. If the inspection reveals significant corrosion or brittle components, consider replacing the faucet kit entirely.
Safety first: turning off water, protecting finishes, tools you need
Before any disassembly, shut off the water supply to prevent a flood. Use a towel and bucket to catch drips; wear eye protection to protect from flying debris. Keep small screws in a magnetic dish; many tub faucets use tiny Phillips screws or set screws. Gather tools: adjustable wrench, screwdriver, pliers, replacement cartridge or washers, plumber’s tape, and a clean rag. Protect finishes with painter’s tape around the escutcheon and avoid using abrasive cleaners that could scratch metal. Work slowly and never force parts that resist removal, as damaged parts can cause leaks or injury. If you feel resistance or find corrosion, stop and seek professional help.
Prevention: maintenance tips to stop future drips
After you fix the drip, schedule regular maintenance to extend the faucet’s life. Clean mineral deposits monthly with a vinegar solution and a soft cloth, taking care not to remove protective coatings. Replacing cartridges on schedule and inspecting o-rings every 2-3 years helps catch wear early. Keep the faucet clean and dry when not in use, and replace worn supply lines if they show signs of rust. Finally, consider installing water-softening treatment if you live in a hard-water area to reduce mineral buildup.
Steps
Estimated time: 45-60 minutes
- 1
Shut off water and prep workspace
Turn off the hot and cold water valves under the sink or behind the tub. Relieve any pressure by slightly opening the faucet to drain residual water. Gather tools and a towel to catch drips before you begin.
Tip: Label screws and take photos during disassembly to aid reassembly. - 2
Remove the faucet handle
Use the appropriate screwdriver or Allen key to remove the handle screw. Gently lift off the handle to reveal the cartridge or stem.
Tip: Keep the screw in a magnetic tray so you don't lose it. - 3
Inspect the cartridge or washer
Check for wear, cracks, or mineral buildup. If the seal looks worn, replace it with the correct part for your faucet model.
Tip: If you’re unsure of the exact part, photograph the area before removing components. - 4
Replace worn parts
Install a new cartridge, washer, or O-rings according to the manufacturer’s instructions. Ensure the parts are seated evenly and clean surfaces before reassembly.
Tip: Apply plumber’s tape to threads if advised by your kit. - 5
Reassemble and test
Reinstall the handle, tighten screws, and turn the water back on slowly. Run the faucet for several minutes to confirm no drip.
Tip: Check for leaks at the handle and escutcheon after test. - 6
Final checks and adjustments
If leaks persist, inspect the packing nut and valve seat; tighten gently or consider replacing the entire faucet if corrosion is present.
Tip: If you see rust or stubborn leaks, stop and call a professional.
Diagnosis: Bathtub faucet drips
Possible Causes
- highWorn cartridge or washer
- mediumLoose packing nut
- mediumDamaged O-ring or seal
- lowValve seat wear or mineral buildup
Fixes
- easyReplace cartridge or washer
- easyTighten packing nut and re-seat handle
- mediumReplace O-ring or seal kit
- hardDeep-diagnose and replace valve seat or faucet kit
Frequently Asked Questions
What is the most common cause of bathtub faucet drips?
Worn cartridge or damaged washers are the most frequent culprits for bathtub faucet drips. The exact part depends on faucet type.
Worn internal parts like the cartridge or washers are usually to blame.
Can a drip be fixed without professional help?
Yes, many drips come from affordable wear parts such as washers, O-rings, or cartridges that you can replace with basic tools.
Yes, you can often fix it yourself with basic tools.
How long does a faucet replacement take?
Most DIY replacements take under an hour, depending on access and faucet type.
Most fixes take under an hour.
When should I replace the faucet entirely?
If corrosion, multiple leaks, or parts keep failing after replacements, replacing the faucet may be the best option.
If leaks persist after replacements, consider replacing the faucet.
Are there safety risks with DIY faucet repair?
There are safety risks if you rush; always shut off water and use proper tools to avoid injury or further leaks.
There are safety risks if you rush or skip safety steps.
What tools do I need?
Common tools include an adjustable wrench, screwdriver, pliers, replacement cartridge or washers, and plumber’s tape.
You’ll typically need a wrench, screwdriver, pliers, and replacement parts.
Watch Video
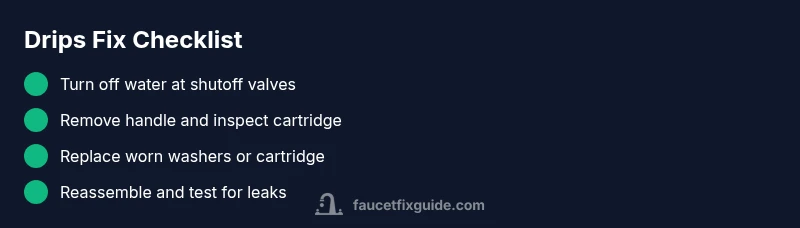
Top Takeaways
- Turn off water before work.
- Worn cartridge is the common cause.
- Replace washers or O-rings to stop most drips.
- Use correct parts for your faucet model.
- Consult a pro if corrosion or persistent leaks appear.