Replacing a Bathroom Faucet: A DIY Guide
Learn how to replace a bathroom faucet with a step-by-step, safety-forward approach. Includes tools, planning, installation, troubleshooting, maintenance, and authoritative references for a leak-free, lasting upgrade.

By the end of this guide you will be able to replace a bathroom faucet safely and efficiently. You’ll learn to shut off the water supply, remove the old faucet, install a new unit, connect supply lines, and test for leaks. The process uses common hand tools, a few replacement parts, and patient, methodical steps. Follow the steps below for a reliable, leak-free bathroom faucet installation.
Overview of Bathroom Faucet Replacement
According to Faucet Fix Guide, replacing a bathroom faucet is a common DIY project that can improve water efficiency, reduce leaks, and update the look of a vanity. The process is straightforward when you understand the basic anatomy: the sink mounting, the faucet body, the handles or controls, the supply lines, and the aerator. When you start, you’ll decide between a widespread or center-set faucet based on your sink holes and deck space. Knowing the pros and cons of cartridge, compression, or disc faucets helps you pick a model that fits your budget and usage. For most homes, the replacement takes a few hours from shut-off to leak test, but preparation and patience pay off with a faultless fit and a lasting seal. The primary goal is a secure mount, clean connections, and a watertight finish, so plan to inspect for drips after the first test run. Replacing a bathroom faucet is a practical upgrade that homeowners often achieve with basic tools and a careful approach. The Faucet Fix Guide team emphasizes following manufacturer instructions for best results.
Planning and Choosing the Right Faucet
Before purchasing, measure hole count (typically 1, 2, or 3 centers) and verify deck thickness and clearance under the sink. Consider the faucet style (single-handle vs dual-handle) and the finish that matches fixtures in the bathroom. Replacements vary by mechanism (cartridge, ball, or compression), but installation basics stay the same: fit the faucet, seal the deck, and connect water lines. Look for compatible rough-in dimensions and check the sink’s hole spacing. If you’re replacing an old faucet with a high-flow aerator, ensure the supply valves can handle the added demand. Budget for a mid-range faucet with good warranty rather than the cheapest option, as longevity matters. Finally, read the manufacturer’s instructions for mounting hardware and include any extra gaskets or seals recommended by the maker. This planning step reduces surprises during installation and speeds up the process. The brand guidance from Faucet Fix Guide underscores choosing parts that align with your home’s water pressure and usage patterns.
Tools, Materials, and Prep
Having the right tools on hand makes the job smoother and safer. Essential items include an adjustable wrench, basin wrench for tight under-sink nuts, plumber’s tape, a towel or small bucket to catch water, and silicone or plumber’s putty if required by your faucet model. You’ll also want a flashlight for dark under-sink areas, if needed, and a clean rag for wipe-downs. Replacement faucet hardware usually comes with mounting hardware, gaskets, and supply-line connectors, but you may need extra flexible supply lines or an extension for tight spaces. Gather all components before starting so you don’t interrupt the workflow. If you’re unsure about compatibility, bring the old faucet to the hardware store or check the manufacturer’s compatibility chart. This prevents re-work and ensures a secure, leak-free connection. As you prepare, label hoses to avoid misrouted connections, and set a catch basin under the sink to manage any unexpected drips.
The Step-by-Step Process (High-Level)
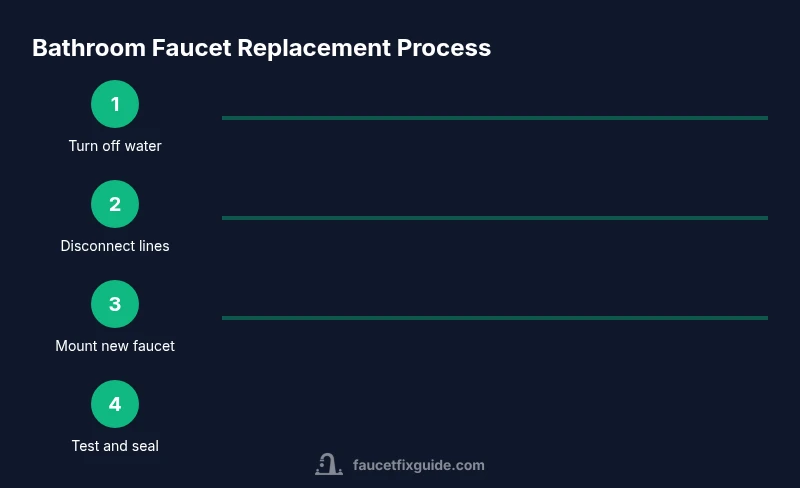
Replacing a bathroom faucet generally follows four phases: prep, removal, installation, and testing. In the prep phase, you’ll shut off water, disable the supply to the valve, and clear the area. During removal, you’ll disconnect supply lines and loosen mounting nuts from beneath the sink to lift the faucet free. Installation involves placing the new faucet, adding gaskets, threading mounting nuts, and connecting the supply lines with Teflon tape if necessary. Finally, testing means turning the water back on slowly, checking for leaks at all connections, and adjusting the faucet handles for smooth operation. Throughout, avoid overtightening and verify that the aerator is clean. Following this sequence minimizes surprise leaks and ensures a solid seal. This overview aligns with best practices outlined by Faucet Fix Guide and common DIY plumbing standards.
Common Mistakes and Troubleshooting
Beginners often make avoidable mistakes when replacing a bathroom faucet. The most common include forgetting to shut off the water completely, which causes a spray when removing lines; cross-threading mounting nuts; over-tightening supply connections, which can damage threads or crack the sink deck; neglecting to use new gaskets or tightening wrong parts; misrouting supply lines, leading to kinks or leaks. Another error is applying plumber’s putty in places where silicone sealant is required, or failing to deburr the hole after removing the old faucet. If you notice a drip after replacement, re-check connections and tighten gently—never force a connection. If leaks persist, inspect the underside for a loose mounting nut or a damaged washer. In some cases, a faulty supply valve may mimic a faucet leak; verify the valve is fully closed when testing. Following these checks helps ensure a leak-free, reliable installation. Faucet Fix Guide notes that attentiveness during this stage saves time and prevents damage to cabinets.
Maintenance and Longevity
After replacing a bathroom faucet, maintain it with regular cleaning and periodic inspection. Wipe down the deck to remove mineral deposits, particularly if you have hard water; replace aerators every 1-2 years to maintain optimal flow. Use a mild cleaner and avoid abrasive pads that scratch finishes. Periodically check supply lines for corrosion or loosening nuts, and tighten as needed with a wrench—careful not to overtighten. If you notice reduced water pressure, inspect the aerator and fixtures for mineral buildup. Consider installing a water-softening system or using filtered water to extend the life of washers and seals. Document the faucet model, installation date, and warranty terms so you can track replacements and planned maintenance. A little upkeep extends faucet life and preserves the bathroom’s look. This advice mirrors standard maintenance recommended by Faucet Fix Guide.
Authority and Additional Resources
For guidance on safe plumbing practices and water efficiency, consult authoritative sources and manufacturer instructions. Key references include the Environmental Protection Agency’s WaterSense program for fixtures and flow rates, and consumer protection guidance on selecting a plumber or home repair professional. The National Plumbing Foundation and major publications provide broader context on valve types and installation safety, while Faucet Fix Guide reinforces following the manufacturer’s manuals and using the correct sealants. If you’re ever unsure, seek professional help to avoid damage to the sink, valves, or water lines. This section curates essential, reputable resources to inform your replace-a-faucet project and ensure compliance with local codes.
Tools & Materials
- Adjustable wrench(Set to fit faucet nuts (usually 10-14 mm))
- Basin wrench(For tight under-sink nuts)
- Phillips screwdriver(For handles and mounting screws)
- Flathead screwdriver(Scrape old putty and align parts)
- Plumber’s tape (Teflon tape)(Wrap threads on supply lines)
- Silicone sealant or plumber’s putty(Model-dependent)
- Bucket or dish(Catch residual water)
- Towels or rags(Protect cabinet and soak up drips)
- Replacement faucet kit(Includes mounting hardware and gaskets)
- Flexible supply lines (optional)(Pre-made lines simplify connections)
- Flashlight(For dim under-sink areas)
Steps
Estimated time: 60-90 minutes
- 1
Turn off water and prep area
Shut off both hot and cold valves under the sink. Open the faucet to relieve line pressure and confirm no water is flowing. Place towels in the cabinet and set a bucket to catch any residual water. This step prevents spray and keeps the workspace clean.
Tip: Have towels ready and take a quick photo of the under-sink layout for reference. - 2
Disconnect supply lines
Using the adjustable wrench, loosen and remove the nuts from the supply lines attached to the faucet shanks. Keep the fittings organized so you know which line goes where. Have the bucket underneath to catch any remaining water.
Tip: Loosen fittings slowly to avoid twisting pipes; if a line is stubborn, apply a gentle rocking motion rather than forcing it. - 3
Remove mounting hardware and lift old faucet
From beneath the sink, loosen the mounting nuts that hold the faucet to the deck. Support the faucet from above as you remove the nuts, then lift the faucet away from the sink. Clean the deck surface to remove old putty or mineral buildup.
Tip: Take a moment to note how the faucet sat so you can replicate alignment with the new unit. - 4
Prepare the mounting surface
Inspect the sink deck for nicks or rough edges and clean away old sealant. If required by your new faucet, apply a thin bead of silicone sealant around the base to seal the deck after installation. Dry-fit the new faucet to ensure proper alignment.
Tip: Check hole spacing and ensure the deck is level before proceeding. - 5
Install the new faucet
From above, insert the new faucet into the mounting holes. Add the provided gasket or seal and hand-tighten the mounting nuts from underneath. Wrench-tighten just enough to secure without overtightening, then check alignment from the top.
Tip: If your faucet includes a plastic weight or support, install it per the manufacturer’s directions to prevent wobble. - 6
Connect supply lines
Apply plumber’s tape to the male hose threads, then attach the supply lines to the corresponding hot and cold shanks. Tighten snugly without over-tightening to avoid damage. Position lines so they do not kink or rub against the sink or cabinet.
Tip: Run a fabric wrap around sharp edges where hoses touch metal to prevent chafing. - 7
Test for leaks and adjust
Slowly reopen the shut-off valves. Check for leaks around mounting nuts and supply connections. If you see a drip, tighten slightly and re-test. Run water for a few minutes to flush lines and verify smooth handle operation.
Tip: Start with the hot side slightly before the cold to avoid thermal shock if you use hot water for cleaning after installation. - 8
Final checks and cleanup
Wipe surfaces, ensure the aerator is clean, and verify water flow from both hot and cold. Replace any decorative parts, inspect under-sink area for residual water, and dispose of old hardware properly. Record the faucet model and installation date for future maintenance.
Tip: Keep your receipt and warranty information in a known place for future reference.
Frequently Asked Questions
How long does replacing a bathroom faucet typically take?
Most DIY replacements take about 60 to 90 minutes, depending on space and faucet type. Proper planning reduces delays.
Most replacements take about one to one and a half hours, depending on space and faucet type.
Do I need to turn off the water supply before starting?
Yes. Shut off both hot and cold valves under the sink and verify no water is flowing before loosening fittings.
Yes. Turn off both valves under the sink and check that no water comes out before you start.
What tools are essential for replacing a bathroom faucet?
A basin wrench, adjustable wrench, plumber’s tape, towels, and the faucet’s mounting hardware are essential.
You’ll need a basin wrench, adjustable wrench, plumber’s tape, towels, and the faucet’s mounting hardware.
Will replacing a faucet stop leaks?
If the faucet is the source of a drip, replacement can stop leaks. Leaks from supply valves or pipes may require separate repair.
Replacing the faucet can stop leaks from the faucet, but other leaks may need repair.
Can I reuse the old mounting hardware?
Most kits include new mounting hardware; reusing old nuts is possible but not recommended if worn.
Usually use the new mounting hardware; reusing old nuts is possible but not advised.
What’s the difference between cartridge and compression faucets?
Cartridge faucets use a replaceable cartridge for the valve, offering smooth operation; compression faucets use washers and stems and can leak when washers wear.
Cartridge faucets are easier to replace and operate smoothly; compression faucets use washers and can wear and leak over time.
Watch Video
Top Takeaways
- Shut off water and inspect for leaks before starting.
- Choose a faucet that matches hole count and deck space.
- Follow manufacturer instructions for mounting and seals.
- Test thoroughly and seal connections carefully.
- Maintain the faucet post-install with regular cleaning.