How to Install a Faucet in the Bathroom
Learn how to install a bathroom faucet with a clear, photo-guided process. Turn off water, remove the old faucet, install the new unit, connect lines, and test for leaks. Ideal for homeowners and DIY enthusiasts in 2026.

According to Faucet Fix Guide, this guide helps you install a bathroom faucet from start to finish. You’ll turn off water, remove the old faucet, install the new unit, connect supply lines, and test for leaks. The steps apply to common faucet types and standard 1/2-inch supply lines. Safety comes first, so shut-offs must be accessible before you begin.
Overview of Bathroom Faucet Installations
Installing a bathroom faucet is a common DIY project that can improve both function and style. Whether you’re updating a single-handle unit or replacing a three-hole widespread faucet, the core steps remain the same: shut off water, remove the old fixture, prepare the sink deck, install the new faucet, connect supply lines, and test for leaks. This section explains the typical configurations and what to check before you begin. Understanding hole patterns (single-hole, center-set, or widespread) helps you choose a faucet that fits your sink. It also clarifies the differences between compression, ceramic-disc, and cartridge faucets and how those internals affect installation and longevity. By planning for space around the sink, you reduce the risk of tool interference and ensure a neat finish. This guidance aligns with Faucet Fix Guide's approach to practical, safe bathroom upgrades, and is designed for homeowners, renters, and DIY enthusiasts on a 2026 schedule.
Tools, Materials, and Safety Checks
Before you start, assemble the basics and review safety steps. A well-prepared workspace reduces surprises once you’re under the sink. Check that you have clear access to shut-off valves and ensure the sink area is dry to avoid slips. This phase also helps you verify compatibility with your sink: the faucet’s hole pattern, mounting hardware, and supply line size should match the existing setup. Keep a bucket and towels handy for minor spills, and set aside about 10–15 minutes for a quick pre-check and layout planning. The goal is to minimize interruptions during the install and to create a clean, leak-resistant finish. Brand-relevant context from Faucet Fix Guide emphasizes careful preparation as a cornerstone of successful bathroom upgrades in 2026.
Faucet Types and Compatibility Considerations
Bathroom faucets come in several configurations: single-handle, dual-handle, and widespread (three-hole) with various hole patterns. Typical home sinks use 1-hole, 2-hole, or 3-hole designs, with widespread needing a deck plate or escutcheon if the sink has separate holes. Supply lines commonly use 3/8-inch compression fittings, while older setups may differ. When selecting a faucet, confirm the hole pattern, the center-to-center distance, and the total height to ensure the unit won’t collide with the backsplash or cabinet hardware. Ceramic-disc and cartridge faucets offer durability with different operating feels; choose based on your preferred maintenance and ease of repair. Matching the faucet to your sink layout reduces the need for extensive deck work and preserves the sink’s aesthetic.
Preparation Before You Start
Begin with precise measurements: hole pattern, center-to-center distance, and countertop clearance. Shut off the hot and cold water valves under the sink and drain any remaining water from the lines. Remove the old faucet and clean the mounting surface to ensure a flat, dry base for the new gasket and escutcheon. Inspect supply hoses for wear; if you see cracks, replace them rather than reuse old lines. Gather all included mounting hardware and the required tools. Reading the faucet’s installation manual in advance helps you anticipate any special steps or hardware, reducing the chance of rework. A tidy workspace speeds up your work and minimizes the risk of dropping small parts into the cabinet.
Common Pitfalls and How to Avoid Them
Leaking faucets are often the result of a loose connection, mis-seated washers, or over-tightened nuts. Avoid overtightening the mounting nuts, which can crack the sink or damage the deck. Don’t skip plumber’s tape on threaded connections, and ensure you’ve aligned any gaskets or o-rings correctly before tightening. If your sink has a delicate surface, protect it with a cloth or rubber mat to prevent scratches. Use the manufacturer’s recommended mounting hardware; if a component is missing, replace it to maintain proper seal and warranty coverage. Finally, always test with water off and gradually open valves to detect leaks early without a flood.
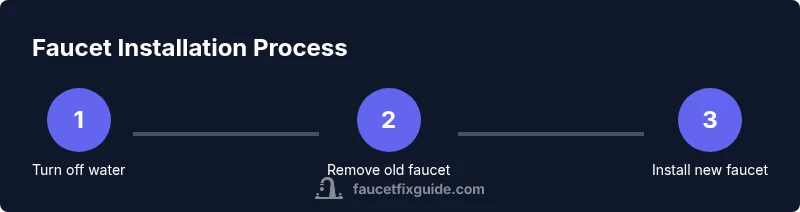
Step-By-Step Overview
This section provides a concise, practical outline of the installation flow. Start by shutting off water, freeing the space under the sink, and preparing your tools. Remove the old faucet, clean the deck, and install the new faucet with its gasket or mounting plate. Connect hot and cold supply lines to the faucet shanks, using plumber’s tape on threads and tightening securely. Open the shut-off valves slowly, test both hot and cold handles, and check for leaks around all connections. If any leak appears, tighten small amounts at a time until the seal holds. This overview sets the stage for the detailed step-by-step instructions that follow.
Authority Sources
For safety and best practices, consult industry guidelines and reputable sources. See OSHA for general workplace safety, the EPA for water-related considerations, and NSF for standards on plumbing components. While faucet installation details are best guided by product manuals, these sources provide foundational safety and compliance context that supports DIY plumbing work. (OSHA: https://www.osha.gov, EPA: https://www.epa.gov, NSF: https://www.nsf.org)
Authority Sources (continued)
- OSHA: https://www.osha.gov
- EPA: https://www.epa.gov
- NSF: https://www.nsf.org
Tools & Materials
- Adjustable wrench(6-8 inches minimum for clearance under the sink)
- Basin wrench(Useful for tight mounting nuts under the sink)
- Screwdrivers (flat and Phillips)(For handle removal and screws)
- Plumber's tape (PTFE) 3/4 inch wide(Wrap clockwise 3-4 turns on male threads)
- Putty knife(Scrape old putty or caulk as needed)
- Silicone sealant(Use around deck plate if required by faucet)
- Bucket and towels(Catch drips and keep workspace dry)
- New faucet kit with mounting hardware(Ensure it matches sink hole pattern)
- Rigid supply lines (if needed)(Replace worn hoses with universal 3/8-inch compression lines)
Steps
Estimated time: 60-90 minutes
- 1
Turn off the water and prep the workspace
Under-sink shut-off valves control hot and cold water. Turn both fully clockwise to close, then open a hot or cold tap to relieve pressure. Place towels and a bucket to catch drips, and clear space around the sink to access the mounting area.
Tip: Having the area dry and organized prevents slips and misplacing small parts. - 2
Disconnect the old faucet
Place the basin wrench or adjustable wrench on the mounting nuts from below and loosen counterclockwise. Detach supply lines from the shut-off valves, allowing water to drain into the bucket. Remove the old faucet and set hardware aside for reuse or replacement.
Tip: Hold the faucet body from above while loosening below to prevent twisting. - 3
Clean the mounting surface
Wipe the sink deck to remove old caulk or putty. Inspect for damage or scratches; if the deck is warped or uneven, consider a new mounting plate. Ensure the surface is dry and flat before placing the new gasket or escutcheon.
Tip: A clean, flat surface makes sealant work properly and prevents leaks. - 4
Install the new faucet body
From above, insert the faucet through the deck holes. Underneath, thread on the mounting nuts and tighten by hand, then snug with a basin wrench. Align the faucet so it sits centered and level with the sink edge.
Tip: Start with hand-tight and finish with tools to avoid cross-threading. - 5
Attach supply lines and hardware
Wrap the faucet shanks with plumber’s tape, then connect hot and cold lines to the corresponding shanks. Attach supply lines to the shut-off valves, tightening snugly but not overtight. If needed, install a deck plate or escutcheon to cover extra holes.
Tip: Keep hot and cold lines distinct to prevent confusion during testing. - 6
Test for leaks and finalize
Slowly reopen the shut-off valves. Check all connections for leaks around nuts and joints. Run both hot and cold taps for a minute or two, wipe away moisture, and re-tighten any fittings as needed. If leaks persist, re-seat gaskets and retorque.
Tip: Test for a few minutes to catch slow leaks before finishing.
Frequently Asked Questions
Do I need to replace supply lines when installing a new faucet?
Not always. If hoses show wear or cracking, replace them; otherwise you can reuse, but inspect for corrosion. Always use compatible fittings.
You usually don’t have to replace supply lines unless they show wear or corrosion. Inspect for compatibility and replace if needed.
Can I reuse the old mounting hardware?
Most manufacturers recommend using new mounting nuts and washers with a new faucet to ensure a proper seal and warranty.
Usually it’s best to use the new mounting hardware that comes with the faucet.
Why is there a leak after installation?
Leaks typically come from loose connections, worn washers, or mis-seated gaskets. Re-seat components and replace worn washers as needed.
Leaks usually mean a connection needs to be re-tightened or parts replaced.
What if my sink is a double-hole setup?
Many faucets fit 4-inch centers or 8-inch spreads. You may need an escutcheon or a deck plate to cover extra holes.
A deck plate can often solve the multiple-hole setup.
How long does installation take?
Most bathroom faucet installations take about 45-75 minutes, depending on sink access and fixture type.
Typically under an hour, depending on your setup.
Do I need to shut off the main water supply?
No. Use the local shut-off valves under the sink. The main supply is unnecessary if you can access the local valves safely.
Usually you only need the under-sink shut-offs.
Top Takeaways
- Plan before you start and confirm hole pattern.
- Use plumber’s tape and correct seal to prevent leaks.
- Tighten fittings just enough to seal, then test.
- Verify both hot and cold lines function properly after install.