Filter Water Faucet: Install, Maintain, and Troubleshoot
Learn how to install and maintain a filter water faucet. This step-by-step guide covers tools, safety, troubleshooting, and cartridge maintenance for clean, great-tasting water at home.

You will install or upgrade a filter water faucet that includes built-in filtration or connect a faucet to a compatible filtration system. You’ll confirm compatibility, gather the right tools, and complete a step-by-step installation with cartridge maintenance. Whether you’re replacing an old unit or adding filtration to a new sink, the steps emphasize safety, leak testing, and performance.
What is a filter water faucet and how it works
According to Faucet Fix Guide, a filter water faucet combines filtration with the convenience of a dedicated faucet on your sink. It can be built into the faucet body or attached as a compatible accessory, delivering filtered water directly at the tap. The core idea is simple: a cartridge removes impurities as water flows, then clean water exits through the faucet spout. This eliminates the extra steps of running tap water through a separate pitcher or under-sink filter and reduces the chance of cross-contamination during preparation. For most households, this setup is a practical upgrade that supports better tasting water and improved safety for food prep and beverages.
When evaluating options, consider how you use your water. If you drink lots of filtered water, cook frequently with filtered water, or have concerns about chlorine taste, a filter water faucet can offer consistent results with less effort than frequent pitcher refills. In addition, a well-chosen faucet integrates smoothly with existing décor and plumbing, so you can retain your kitchen’s aesthetics while upgrading water quality.
Common filtration options for faucets
Faucets designed for filtration fall into a few broad categories. Activated carbon cartridges are common for reducing chlorine smell and improving taste; they’re inexpensive and easy to replace. Ceramic or multi-stage cartridges add physical filtration to catch sediment and particulates. Some systems use reverse osmosis (RO) modules integrated with a faucet or connected under the sink to deliver higher purity. For specialty needs, UV disinfection or mineral-improving cartridges can be paired with certain faucet kits. When selecting a filter for a faucet, balance filtration strength, flow rate, cartridge life, and replacement costs. A higher filtration grade can slow flow, so verify that the faucet’s flow matches your expectations for daily tasks like filling a pot or washing produce. Always check for certifications and test results from reputable sources, and ensure the cartridge you choose is compatible with your faucet’s threading and fittings.
Sizing, compatibility, and selecting parts
Selecting a filter faucet or filtration kit requires attention to threading, hoses, and mounting. Most residential faucets and attachments use standard thread sizes, but adapters are often needed to connect a specific cartridge to an existing supply line. Before purchasing, confirm the faucet’s shank diameter, the number of inlet lines (hot, cold, or filtered), and the length of supply hoses. If your sink uses a pull-down spray or a side spray, consider how the filtration unit will interface with this setup. It’s helpful to bring a photo of your sink’s underside and the current supply valves when shopping. Keeping a small checklist handy for thread sizes, hose lengths, and mounting type reduces returns and ensures a smoother install. If you’re unsure, consult the kit’s installation guide or reach out to the manufacturer. Faucet Fix Guide recommends verifying compatibility with your home’s plumbing layout and the intended filtration cartridge to avoid mismatches later.
Troubleshooting common issues
Low flow from a filtered faucet is a frequent concern. It can result from a partially clogged cartridge, a restrictive filter, or a narrow supply line. Leaks at the faucet base or water lines are often caused by loose fittings or insufficient thread sealing. If you notice off-tastes or odors, it could indicate a cartridge nearing the end of its life or a need for backflushing. Start troubleshooting by turning off the water and inspecting connections, then replace the cartridge following the manufacturer’s instructions. For persistent leaks, re-seal thread joints with PTFE tape and check that gaskets are seated correctly. If you’re upgrading an older faucet, ensure the new cartridge is compatible with your current valve and that the supply lines aren’t kinked or damaged. Regular maintenance minimizes the likelihood of performance drops and prolongs the life of your filtration system.
Maintenance and long-term care
Cartridge replacement frequency depends on usage, water quality, and the cartridge type. Many carbon-based cartridges last 6–12 months under typical residential use, but heavily used households may need monthly changes. When replacing, shut off water, depressurize the line, and follow the kit’s instructions for removing the old cartridge and installing a new one. After replacement, flush the system for several minutes to clear out any packaging debris and to saturate the new media. Rinse the faucet handle and the exterior to remove mineral residue. Periodically inspect seals and valves for wear and replace worn gaskets to prevent leaks. Keep a small log of cartridge dates and any issues observed to optimize maintenance.
Cost and value considerations
Prices for filter water faucet setups vary widely based on filtration type, cartridge life, and whether the unit is built-in or an attachment. Expect cartridge replacements to cost more for higher-grade filtration, while entry-level carbon cartridges are typically less expensive. Built-in filtration faucets may have higher upfront costs due to integrated filtration modules, but they can offer convenience and cleaner water at the tap. Plan for annual maintenance costs that include replacement cartridges and occasional gasket or seal replacements. When budgeting, compare the total cost of ownership over 2–3 years, including cartridge replacements and any necessary repairs. Keep in mind that higher-quality cartridges often provide longer life and better water quality, which can reduce the need for other filtration methods.
Quick comparison: built-in vs. under-sink filtration
- Built-in filtration faucet: filtration occurs at the faucet, easy access, potentially higher upfront cost.
- Under-sink filtration: uses a separate filtration stage with separate faucet; can offer higher purge flow and cartridge choices but requires more space and installation planning.
- Maintenance footprint: both require cartridge changes; under-sink models may offer broader filtration options.
- Water quality outcomes: both can meet common drinking-water standards when paired with certified cartridges; verify certifications and replacement schedules.
Safety and code considerations
Install filtration parts and faucets in accordance with local plumbing codes and manufacturer instructions. Use lead-free components to protect drinking water. When working with copper or PEX supply lines, ensure clean cuts and proper crimping or compression fittings. If you’re unsure about your plumbing’s compatibility or local code compliance, consult a licensed plumber. Always turn off the main water supply before starting work and verify that all connections are fully tightened to prevent leaks.
How Faucet Fix Guide can help
This guide provides practical, actionable steps for selecting, installing, and maintaining a filter water faucet. By focusing on compatibility, safety, and maintenance, you’ll achieve reliable filtered water with minimal hassle. For homeowners and DIY enthusiasts, having a clear plan, the right tools, and a maintenance cadence makes a big difference in results and satisfaction.
Tools & Materials
- Filter water faucet kit (built-in filtration or compatible attachment)(Check compatibility with your sink and water needs)
- Adjustable wrench (crescent)(2–4 inches for small fittings)
- Teflon tape (PTFE) or plumber’s tape(Wrap threads 2–3 times to seal)
- Silicone sealant or plumber’s putty(Optional for extra sealing on sink surfaces)
- Bucket or bowl(Catch drips during removal)
- Soft cloth or rag(De-grease and wipe spills)
- Replacement cartridge(s) and seals(Carry correct model and size)
- Safety gear (goggles, gloves)(Protection during cutting and threading)
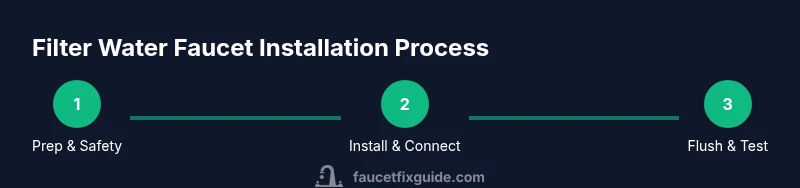
Steps
Estimated time: 60-90 minutes
- 1
Turn off water and relieve pressure
Locate the under-sink shut-off valves and close them to stop water flow. Open the existing faucet to relieve residual pressure and drain lines. This prevents leaks while removing old components.
Tip: Have towels and a bucket ready in case of overflow. - 2
Detach existing faucet or filtration hardware
Using two wrenches, loosen and remove the current faucet or any prior filtration hardware. Keep the old parts for reference or reuse if compatible.
Tip: Hold the faucet shank with one wrench to avoid twisting the sink deck. - 3
Prepare mounting and attach faucet body
If your kit includes mounting hardware, install the bracket or deck plate first. Insert the faucet body through the sink hole and secure from beneath with the provided nut or mounting hardware.
Tip: Check alignment before final tightening to avoid misalignment. - 4
Install cartridge and filtration housing
Unpack the cartridge and housing, insert into the filter body according to the kit’s instructions, and secure with the cap or nut. Ensure O-rings are seated and free of debris.
Tip: Lubricate O-rings lightly with clean water or food-grade silicone grease if recommended. - 5
Connect water lines and seal joints
Attach hot/cold or filtered lines to the designated ports using PTFE tape on threaded connections. Tighten snugly without over-tightening to avoid stripping threads.
Tip: Mark your connections to avoid cross-threading in the future. - 6
Flush, test, and adjust
Turn the water back on and let the system flush for several minutes to clear any packaging debris. Check for leaks at all joints and ensure the filtered water flow meets expectations.
Tip: Run the faucet for 1–2 minutes and inspect for leaks during operation. - 7
Final checks and routine care
Wipe surfaces, re-seat any trim pieces, and set the cartridge replacement schedule according to the manufacturer’s recommendations. Keep a maintenance log for future reference.
Tip: Store replacement cartridges with their packaging to prevent mix-ups.
Frequently Asked Questions
What is a filter water faucet and what does it do?
A filter water faucet is a dedicated faucet that dispenses filtered water. It uses a cartridge to remove taste and impurities, delivering clean water directly from the tap. Maintenance mainly involves cartridge replacement and periodic checks for leaks.
A dedicated faucet with a cartridge that filters water to improve taste and purity.
Do I need a separate filtration system or can I install directly on my existing faucet?
You can install a faucet with built-in filtration or attach a compatible filtration kit to an existing faucet. Built-in models may require a dedicated faucet, while attachments offer flexibility but require correct adapters and fittings.
You can choose built-in filtration or attach a kit to your current faucet depending on compatibility.
How often should I replace the cartridge in a filter water faucet?
Replacement intervals depend on usage and cartridge type. Most carbon cartridges last 6–12 months with typical household use; high-usage homes may need more frequent changes.
Cartridge life varies; check the manufacturer’s schedule and monitor water taste and flow.
Is a filter water faucet safe to use for drinking water?
Yes, when the cartridge is appropriate for your water quality and replaced on schedule. Follow the manufacturer’s maintenance guidance and ensure the unit is properly installed and vented.
Yes, with proper maintenance and a certified cartridge.
Can I install a filter water faucet myself?
Many homeowners can install a filter water faucet with basic plumbing skills and careful adherence to instructions. If you’re unsure about plumbing codes or fittings, consult a professional.
Yes, if you’re comfortable following the kit’s directions and basic plumbing safety.
What maintenance tips help maximize filtration performance?
Keep cartridges dry and stored correctly, flush new cartridges per instructions, and inspect seals regularly. A simple maintenance log helps prevent missed cartridge changes.
Replace cartridges on schedule, and keep lines and seals in good condition.
Watch Video
Top Takeaways
- Verify compatibility before buying a kit
- Shut off water and relieve pressure
- Follow cartridge replacement guidelines
- Test for leaks and flush before use
- Maintain a simple log for cartridges and parts