Bathtub Single-Handle Faucet Replacement: A DIY Guide
Learn a clear, step-by-step method to replace a bathtub single-handle faucet, with essential tools, safety tips, installation steps, and leak testing for DIY homeowners.

You will complete a bathtub single handle faucet replacement by turning off the supply valves, removing the old cartridge and escutcheon, installing the new faucet and cartridge, reconnecting lines, and testing for leaks. Gather basic tools, correct replacement parts, and caulk or plumber's tape before you begin. This guide assumes standard three-hole mounting or single-hole prep.
Introduction to bathtub single handle faucet replacement
Replacing a worn or leaking bathtub faucet with a single-handle design can simplify control of water temperature and flow, reduce leaks, and save water over time. According to Faucet Fix Guide, this upgrade is approachable for most homeowners with basic tools and careful prep. In this guide, we cover the essential steps, common pitfalls, and maintenance tips to ensure a reliable, leak-free installation. Whether you're upgrading a vintage fixture or replacing a failing cartridge, a well-planned replacement pays off with smoother operation and fewer drips.
Why a single-handle design matters for bathtubs
Single-handle faucets simplify operation—move the lever left-right for temperature, up-down for flow. In bathtubs, this design reduces joints and potential leak points, making maintenance easier and repairs faster. When selecting a unit, check cartridge compatibility, mounting style, and whether the faucet height relative to the tub surround. Faucet Fix Guide notes that properly matched cartridges minimize leaks and provide consistent temperature control, which is especially important for family bathrooms and shared baths.
Tools and materials you'll typically need
A standard bathtub faucet replacement involves a mix of hand tools and replacement parts. You should have a wrench, screwdrivers, a basin wrench for tight spaces, thread sealant or plumber's tape, silicone sealant or plumber's putty, and a compatible single-handle faucet cartridge. Gather towels or rags to catch water, a bucket for drips, and a flashlight to inspect mounting hardware. Having everything ready reduces interruptions during the job.
Safety and preparation tips
Always turn off the hot and cold water supplies before starting. If your supply lines are hard to reach, shut the main water supply and drain the lines by opening the faucet. Wear eye protection when removing old fittings, and keep pets and children away from the work area. Lay a towel or mat to protect the tub surface and prevent dropped parts from rolling away.
Step 1 overview: turn off water and prep area
Before touching any fittings, locate and close both shutoff valves under the tub or behind the access panel. If these valves are corroded, turn off the main supply and drain the lines. Protect surrounding surfaces with towels, and set up a well-lit workspace to clearly see screws, nuts, and cartridge retainer rings.
Step 2 overview: remove handle, escutcheon, and retainer nut
Start by removing the decorative cap to expose the set screw. Use the correct driver to loosen the screw and lift off the handle. Remove the escutcheon plate, then use a basin wrench to loosen the retainer nut or mounting bracket that holds the cartridge in place.
Step 3 overview: extract the cartridge and inspect the valve body
Carefully pull the old cartridge straight out, noting its orientation for correct replacement. Inspect the valve body for corrosion or mineral buildup; clean as needed with a soft brush and vinegar solution if allowed by manufacturer. Replace any worn O-rings or seals per the new faucet's kit instructions.
Step 4 overview: install the new cartridge and secure the faucet
Insert the new cartridge in the correct orientation, seat it fully, and tighten the mounting hardware evenly. Attach the handle and escutcheon in the reverse order of removal. Ensure the faucet body sits flush against the mounting surface to prevent leaks behind the plate.
Step 5 overview: reconnect lines and test for leaks
Reconnect hot and cold supply lines, apply plumber's tape where needed, and snug fittings without overt tightening. Open the shutoff valves slowly, then operate the handle through full range to check for leaks and smooth operation. Wipe away excess sealant and allow cure time if you used silicone.
Maintenance tips after replacement
Flush the new cartridge with clean water for a few minutes to remove debris. Periodically inspect under-sink connections for leaks and tighten gently if needed. Use a mild cleaner on the faucet finish and avoid harsh abrasives that can scratch the surface. Regular maintenance extends the life of your bathtub faucet.
Tools & Materials
- Adjustable wrench(Versatile for nuts and fittings of various sizes)
- Basin wrench(Access tight spots under the tub / vanity)
- Screwdrivers (Phillips and flat-head)(Small and medium sizes; keep handy for screws and caps)
- Allen wrench set(Set screws in handle or cartridge retainer)
- Teflon plumber's tape(Wrap clockwise 3-5 turns on threaded connections)
- Silicone sealant or plumber's putty(For sealing base plates and escutcheon if needed)
- New single-handle faucet cartridge(Check compatibility with existing hole spacing and mounting type)
- Rags, towels, and bucket(Catch drips and protect surfaces)
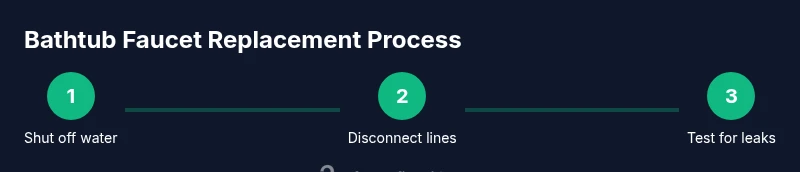
Steps
Estimated time: 45-75 minutes
- 1
Shut off water and prep area
Turn off both hot and cold shutoff valves. If necessary, shut off the main supply and drain the lines by opening the faucet. Clear the area, lay towels, and set up good lighting before touching fittings.
Tip: Have a bucket handy to capture residual water. - 2
Disconnect supply lines from faucet
Carefully loosen and detach hot and cold supply lines from the faucet shanks using the appropriate wrench. Keep the connectors organized to ease reassembly.
Tip: Take a quick photo of hose orientations before removing them. - 3
Remove handle and escutcheon
Remove decorative cap, loosen the set screw, pull off the handle, and lift away the escutcheon plate to expose the cartridge retaining hardware.
Tip: Do not scratch the finished surfaces of the escutcheon or tub. - 4
Extract cartridge and mounting hardware
Use the basin wrench to loosen the cartridge nut or mounting bracket. Gently pull the old cartridge out, noting its orientation for the new part.
Tip: If the cartridge sticks, apply a small amount of penetrating oil and wait 5 minutes. - 5
Install new cartridge and secure faucet
Position the new cartridge in the correct orientation, tighten the mounting hardware evenly, and reattach the escutcheon and handle.
Tip: Do not overtighten mounting nuts; this can crack the valve body. - 6
Reconnect lines and test for leaks
Reconnect hot and cold lines, turn on water, and cycle the handle to test for leaks and smooth operation. Check under the sink for any drips and seal as needed.
Tip: If you see a leak, re-tighten fittings a quarter-turn at a time.
Frequently Asked Questions
Do I need to replace the entire faucet or just the cartridge?
In many cases, replacing the cartridge is sufficient and more cost-effective. If the faucet body is corroded or damaged, replacing the entire unit may be warranted. Check compatibility with your existing mounting and spout style.
Often you only need the cartridge, but inspect the body for corrosion to decide if a full replacement is needed.
What tools are essential for bathtub faucet replacement?
Essential tools include an adjustable wrench, basin wrench, screwdrivers, Allen keys, plumber's tape, and silicone sealant. Having a towel and bucket helps manage water during the process.
You’ll need a wrench, screwdrivers, and tape to get the job done, plus some sealant for a neat finish.
Can I replace a bathtub faucet without a plumber?
Yes, a bathtub faucet replacement is commonly a DIY task for homeowners with basic plumbing skills. Follow a step-by-step guide and consult manufacturer instructions for your specific model.
Absolutely, with the right tools and careful steps you can DIY this.
How long does the replacement take?
Most replacements take about 45-75 minutes depending on access, pipe layout, and cartridge type. Plan for a little extra time if you encounter tight spaces.
Plan for roughly one hour to replace and test the faucet.
What if leaks persist after replacement?
If leaks persist, recheck the connections for tightness, ensure proper cartridge seating, and inspect the mounting bracket. Replace worn gaskets or seals if necessary.
If leaks continue, re-tighten and check seals; you may need new gaskets.
Is a single-handle faucet easier to install than a two-handle faucet?
Single-handle faucets are generally simpler to install due to fewer connections and fewer potential leak points. A two-handle setup can be more complex and requires precise balancing of hot and cold.
Single-handle units usually mean fewer parts to manage during installation.
Watch Video
Top Takeaways
- Turn off water and prepare area before work
- Use the correct cartridge and mounting hardware
- Test for leaks after installation
- Maintain the faucet with gentle cleaning and periodic checks