Bathtub and Shower Faucets: Troubleshooting, Installation, and Maintenance
A comprehensive, step-by-step guide to diagnosing, repairing, and upgrading bathtub and shower faucets. Learn common causes of leaks, cartridge replacement, seal maintenance, and preventive tips for a leak-free bathroom.

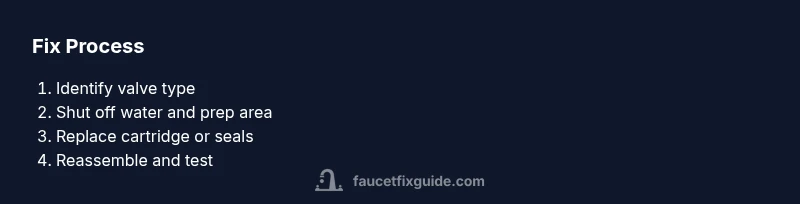
According to Faucet Fix Guide, you can diagnose and repair tub and shower faucets with a safe, step-by-step approach. Start by identifying the faucet type, shut off the water, and gather basic tools. Then disassemble, replace worn cartridges or seals, reassemble, and test for leaks. This quick guide sets you up for a successful DIY fix.
Understanding Tub and Shower Faucet Configurations
Bathtub and shower faucets come in several configurations, from single-handle mixers to classic dual-handle setups. Modern homes often use cartridge-based valves that control both temperature and flow with a simple, compact cartridge. Older fixtures may rely on compression valves with rubber seats and screws. When diagnosing leaks or stiffness, start by noting whether the handle turns smoothly, whether water drips from the spout or the handle, and whether temperature control is consistent across settings. This knowledge helps you select the right replacement parts and reduces guesswork during disassembly. Based on Faucet Fix Guide analysis, cartridge wear and seal degradation are among the most common failure points in tub/shower faucets, especially in high-use bathrooms.
To keep your project on track, identify if your fixture is a tub-and-shower combo, a standalone tub faucet, or a dedicated shower valve. Each configuration has a distinct cartridge style and service method. The terminology can be confusing, but the goal remains the same: control water flow and supply while maintaining a reliable seal. When you know the system type, you can source the correct cartridge size, handle kit, and escutcheon.
In this section, you’ll learn to distinguish between valve types (compression, cartridge, ball, and ceramic disk) and why that choice matters for replacement parts and performance. Having a basic map of your valve helps you avoid buying the wrong parts and wasting time on returns. If your home has recent fixtures from reputable brands, expect color-coded cartridges or standardized cartridge families that fit multiple models.
Finally, consider your bathroom’s water quality. Hard water can accelerate mineral buildup on seats and seals, increasing wear. Regular maintenance and the right filtration can extend the life of tub/shower components and keep performance high over the years.
note: null},
bodyBlocks_2_
bodyBlocks_3
bodyBlocks_4
bodyBlocks_5
bodyBlocks_6
bodyBlocks_7
Tools & Materials
- Screwdrivers (Phillips #2 and flathead)(Have both to access decorative caps and set screws.)
- Adjustable wrench or pliers(For loosening nuts and fittings without damaging pipes.)
- Allen wrenches (hex keys)(Some handles use hex sockets; bring a set.)
- Replacement cartridge or seals specific to faucet brand(Bring identifications like model number if possible; take photos.)
- O-ring kit or per-wear seals(Stock up on common sizes used by tub/shower valves.)
- Plumber’s tape (Teflon) and thread sealant(Use sparingly on threaded connections to prevent leaks.)
- Rags, bucket, and towels(Protect surfaces and catch residual water.)
- Penetrating oil (e.g., WD-40)(Helpful for stubborn fittings, especially corroded parts.)
Steps
Estimated time: 60-90 minutes
- 1
Turn off water and prep area
Locate the shutoff valves for the bathroom or fixture and fully close them. Place a towel or bucket to catch drips and remove loose items from the vanity to prevent damage. Take clear photos of your connections before disassembly to aid reassembly.
Tip: Label hoses or connections and document the valve positions with photos. - 2
Remove handle and escutcheon
Use the appropriate screwdriver to remove the handle screws, then lift the handle off the cartridge stem. Remove any escutcheon plates or decorative trim carefully to reveal the valve body. Keep screws organized.
Tip: If the screw is buried under a plug, gently pry it with a thin blade; don’t scratch the surface. - 3
Identify cartridge/valve type
Examine the exposed stem and cartridge to determine whether it is a cartridge-type, compression valve, or ball-type faucet. This guides the replacement part you’ll need and helps you avoid buying the wrong item.
Tip: Consult retailer or manufacturer diagrams with your faucet model for precise cartridge identification. - 4
Replace worn cartridge or seals
Remove the old cartridge or O-rings, clean the valve chamber, and insert the new cartridge or seals. Ensure correct orientation and seating. If needed, apply a thin layer of plumber’s tape to threaded connections before reinstalling.
Tip: Do not overtighten cartridge nuts; hand snug plus a quarter-turn is usually enough. - 5
Reassemble and test for leaks
Reattach the escutcheon and handle, restore water supply, and turn on slowly to check for leaks around the cartridge and stem. Operate hot and cold settings to verify smooth operation and consistent temperature control.
Tip: Run water for 1–2 minutes to flush debris that could cause leaks or noise. - 6
Advanced troubleshooting if leaks persist
If dripping continues from the spout or handle after replacement, inspect the stem seat and packing nut for wear. Consider replacing the entire valve assembly or consulting a professional if the issue persists beyond cartridge replacement.
Tip: Persistent leaks may indicate a failing valve body or hidden mineral buildup; professional inspection is recommended.
Frequently Asked Questions
What are the most common causes of tub/shower faucet leaks?
Leaking faucets are usually due to worn cartridges, O-rings, or faulty seals. Mineral buildup can also degrade seating surfaces. Inspect each component and replace worn parts.
Most leaks come from worn cartridges or seals; check O-rings and seating surfaces too.
Can I fix a two-handle tub faucet myself?
Yes. For a two-handle setup, replace each cartridge or gasket individually, and ensure both hot and cold lines are properly reseated. Take photos to confirm correct alignment.
Yes, you can fix it by replacing the cartridges and reseating the handles, with careful alignment.
Is it necessary to replace the entire valve body?
Only if replacement parts fail to stop leaks or if corrosion has compromised the valve body. In many cases, cartridge or seat replacement suffices and is more economical.
Only if the valve body is corroded or damaged beyond repair, otherwise cartridges usually fix it.
How long does a typical faucet repair take?
Most tub/shower faucet repairs take about 1–2 hours for a straightforward cartridge swap, plus extra time for testing and cleanup.
Usually about an hour or two, including testing.
Do I need a professional for bathroom faucet repairs?
DIY repairs are feasible for common cartridge and seal replacements. If you encounter stubborn corrosion, unusual valve types, or gas/water mixing issues, a licensed plumber is recommended.
DIY works for common fixes, but call a pro if you hit corrosion or unusual valve types.
What maintenance helps prevent future tub/shower leaks?
Regularly clean mineral deposits, replace O-rings during annual checks, and consider water-softening if you have hard water. Keep handles tight but not overtightened.
Keep things clean, replace worn O-rings, and think about water-softening if your water is hard.
Watch Video
Top Takeaways
- Identify faucet type before replacement
- Shut off water and prep area first
- Replace worn cartridges or seals to stop most leaks
- Reassemble carefully and test for leaks
- Consider valve wear if leaks persist