What to Tap On at Home: A Practical Faucet Maintenance Guide
Learn what to tap on at home to safely diagnose leaks, inspect fixtures, and perform basic faucet maintenance. This guide covers aerators, cartridges, shut-off valves, and common missteps, with clear steps and safety tips.

The quick answer is that you can safely identify and tap on key fixtures around your home by inspecting faucets, aerators, valve stems, and shut-off valves. Start with kitchen and bathroom taps, check aerators for mineral buildup, and test valve handles for smooth operation. This routine helps spot leaks, improve flow, and plan maintenance without major disassembly.
Why Tap On at Home? Understanding Safe Interactions
Tap, in this guide, means physically interacting with fixtures to diagnose problems, not forcing parts or using brute force. Knowing what you can safely touch helps you locate leaks, improve water flow, and prevent unnecessary repairs. According to Faucet Fix Guide, a cautious approach reduces the risk of damaging delicate components such as cartridge seals and ceramic discs. The Faucet Fix Guide team found that most home issues stem from simple maintenance tasks you can perform with common tools and a clear plan. By starting with what is easiest to access—an aerator, a faucet handle, or a nearby shut-off valve—you can often determine whether a problem is local to one fixture or part of a broader plumbing issue. This mindset also supports safer DIY work for homeowners, renters, and DIY enthusiasts who want to maintain their fixtures without professional help. In short: know what to tap on at home, and tap thoughtfully, testing each change as you go.
-10 words not counted-
Tools & Materials
- Adjustable wrench(Loosen nuts on aerators and valve connections)
- Faucet aerator wrench(For stubborn aerators with mineral buildup)
- Phillips screwdriver(Cartridge access screws (if applicable))
- Flathead screwdriver(Flat-head screws or settings on certain fixtures)
- Teflon/PTFE tape(Seal threads when reassembling fittings)
- Rag or towel(Keep your workspace dry and clean)
- Replacement cartridge (optional)(Only if cartridge wear is evident)
- Vinegar or CLR (optional)(For mineral buildup after aerator removal)
Steps
Estimated time: 35-50 minutes
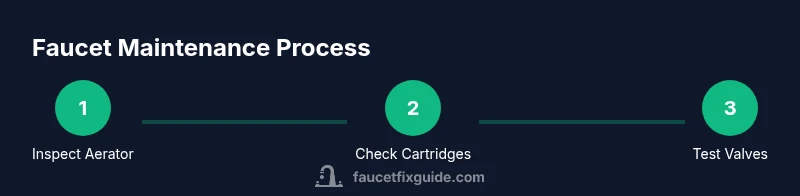
- 1
Identify fixtures to inspect
Walk through the kitchen and bathrooms to list every faucet and under-sink valve. Note which parts have removable components like aerators, cartridges, or handles. This initial survey helps you plan the order of inspection and prevents missed steps.
Tip: Use masking tape to label fixtures for easy reassembly. - 2
Shut off water and prep workspace
Before touching any parts, close the under-sink shut-off valves and open the faucet slightly to relieve pressure. Place towels to catch drips and protect surfaces.
Tip: Confirm water is off by running a small amount of water at a nearby fixture. - 3
Remove the aerator (if present)
Use the aerator wrench or pliers to unscrew the aerator from the faucet spout. Inspect for mineral buildup and clean with a brush or vinegar solution.
Tip: Wrap the aerator with a cloth to prevent slipping. - 4
Inspect or replace the cartridge
If the faucet uses a cartridge, check for wear or damage. Replace with a compatible cartridge if needed and orient correctly according to the fixture’s design.
Tip: Take a photo of the cartridge orientation before removal. - 5
Check shut-off valves under sink
Inspect for leaks, inspect washers, and tighten fittings gently. Replace worn washers if necessary and ensure pipes aren’t stressed.
Tip: Do not overtighten plastic fittings. - 6
Test and reassemble
Turn water back on, test the faucet for leaks and smooth operation. Reassemble any removed parts carefully and verify everything seals properly.
Tip: Document what you did for future maintenance.
Frequently Asked Questions
What does it mean to tap on a faucet?
In this guide, tapping on a faucet means inspecting and lightly manipulating components to diagnose issues like leaks or inconsistent flow.
Tapping on a faucet here means inspecting and adjusting faucet parts to diagnose leaks or flow problems.
Is it safe to tap fixtures under the sink?
Yes, with the water shut off and proper tools. Move slowly and avoid forcing parts.
Yes, just shut off the water and proceed slowly.
What tools do I need to tap a faucet aerator?
Most tasks require an adjustable wrench or aerator wrench and possibly pliers or screwdrivers.
You’ll likely need a wrench or screwdriver to handle the aerator.
How do I know if I need to replace the cartridge?
Leaks, poor flow, or inconsistent temperature control suggest cartridge wear; verify with a part compatible with your faucet model.
Leaks or erratic flow means you may need a cartridge replacement.
Can I fix a leaky faucet without replacing parts?
Many leaks come from mineral buildup or loose fittings; cleaning or tightening may solve them. Replacement is needed for worn parts.
Often cleaning and tightening fixes leaks; replacing worn parts may be required.
Watch Video
Top Takeaways
- Identify fixtures to inspect regularly
- Start with aerators before cartridge replacement
- Shut off water before disassembly
- Test thoroughly after reassembly
- Document findings for future maintenance