How to Put Faucet Handle Back On
Learn how to reinstall a faucet handle safely with clear steps for common faucet types. This guide from Faucet Fix Guide covers tools, tips, and maintenance to prevent loosening and leaks.

Goal: Reattach a faucet handle securely and stop leaks. You’ll finish by tightening the set screw or bonnet nut, aligning the handle with the stem, and testing for leaks with water slowly turned back on. This how-to guide, from Faucet Fix Guide, covers common handle types and safe disassembly steps to avoid damaging parts.
Identify your faucet type and handle assembly
Before you touch anything, inspect the faucet to determine which handle style you have and how it attaches. Most homes use one of three common configurations: a single-handle cartridge faucet, a two-handle compression faucet, or a center-set faucet with a single bonnet nut in the middle. Look for the visible screw on the handle itself or a small set screw under the handle's base. If you see a small hex socket, you’re likely dealing with an Allen screw; if there’s a tiny slotted screw, use a flathead. The handle is usually held to a stem by a screw, a clip, or a bonnet nut. If your handle remains wobbly after reseating, the issue may be a worn cartridge, stripped stem, or a loose nut. By identifying the correct type, you can select the right disassembly approach and avoid bending metal or damaging rubber gaskets.
Tools and safety prep
Tools you’ll need and safety steps before starting:
- Shut off the hot and cold water valves under the sink; turn on the faucet to relieve pressure.
- Wipe up any water and place a towel to catch drips.
- Keep a tray or muffin tin to hold small screws and springs.
- Choose the right screwdriver or hex key for your faucet model.
- Have a replacement handle or cartridge on hand if needed.
Safety: wear eye protection if components are worn or rusted, and avoid forcing parts that resist removal.
Step-by-step: reinstall a single-handle faucet
If you have a single-handle faucet, start by removing the cap to access the set screw, then loosen and remove the screw. Slide the handle off the stem, inspect the cartridge and bonnet nut, align the handle with the stem, and reseat the bonnet nut. Reattach the handle, tighten the set screw, and replace the decorative cap. Finally, turn the water back on slowly and test for leaks over several cycles.
Step-by-step: reinstall a center-set faucet with a bonnet nut
Center-set faucets typically use a single bonnet nut to secure the handle. After removing the cap and set screw, loosen the bonnet nut with an adjustable wrench, then lift the handle from the stem. Inspect the cartridge and O-rings; reseat the handle, tighten the bonnet nut until snug, and reattach the cap. Lower the water supply and test.
Step-by-step: reinstall a two-handle faucet
Two-handle faucets have separate handles for hot and cold. Remove both handles by lifting off and removing screws; inspect stems for wear; align each handle onto its respective stem. Reinstall the screws, ensure the handles align properly, replace any decorative caps, and test with water on to check for leaks.
Replacing worn components and cartridges
If wobble or drips persist, consider replacing cartridge or bonnet nut. Before buying, identify the model or bring the old part to the hardware store. Follow the manufacturer’s instructions to remove old cartridge and install new one, applying light plumber’s grease to O-rings and seals. Keep the replaced part handy for future maintenance.
Testing and leak checks after reinstall
Turn on water slowly, run hot and cold cycles, and inspect around the bonnet nut and stem. Use tissues or a dry paper towel to detect tiny drips; if moisture appears, tighten slightly and reseat as needed. Recheck after a minute or two of operation to confirm a steady seal. Faucet Fix Guide notes that regular testing helps prevent hidden leaks from becoming bigger problems.
Maintenance to prevent handle loosening
Schedule a quick inspection every six months and clean mineral buildup from the valve stem. Tighten screws gradually when you notice wobble, and replace worn gaskets or O-rings as needed. Consider upgrading to a faucet aerator that reduces debris in the line and minimizes wear on internal components.
Common mistakes and quick fixes
Avoid overtightening, forcing parts, or using the wrong screw type. Misidentifying the handle type leads to the wrong parts and more damage. If you’re unsure, stop and consult the faucet’s manual or a professional plumber. Brand-specific notes from Faucet Fix Guide remind readers that matching parts to model numbers saves time and reduces frustration.
Tools & Materials
- Adjustable wrench(Used to secure bonnet nuts and stems under the sink.)
- Allen wrench / hex key(Choose the size that fits the set screw (often 1.5–2.5 mm).)
- Screwdrivers (Phillips and flat-head)(Needed for screws on handle and covers.)
- Replacement faucet handle (optional)(Only if the handle is damaged or the cartridge needs replacement.)
- Towel or cloth(Catches drips and keeps parts clean.)
- Plumber's grease(Light lubrication can ease reassembly.)
- Bucket or tray(Collect any residual water during disassembly.)
Steps
Estimated time: Estimated total time: 25-45 minutes
- 1
Shut off water supply and relieve pressure
Begin by turning off the hot and cold shut-off valves under the sink. Open the faucet to relieve residual pressure and drain any standing water. This prevents splashes and makes handle removal safer.
Tip: Having a towel ready helps keep the workspace dry. - 2
Remove handle cap and locate set screw
Lift or pry off the decorative cap to expose the set screw. Use a flashlight if needed to see the screw head. Confirm whether the screw is hex, Phillips, or flathead before choosing your driver.
Tip: If the cap is stubborn, twist gently with a plastic pry tool to avoid scratching. - 3
Loosen and remove the set screw
With the correct screwdriver size, loosen the set screw a few turns. Do not remove it completely yet in case you need to re-seat the handle. Slip the handle straight up and off the stem.
Tip: If the screw is stripped, apply a drop of penetrating oil and let it sit for a minute. - 4
Inspect the stem, cartridge, and bonnet nut
Check the stem and any cartridge for wear; worn cartridges or a loose bonnet nut can cause wobble. If the bonnet nut is worn or the cartridge feels loose, plan to replace the component.
Tip: Take a photo of the assembly for reference during reassembly. - 5
Reinstall the handle onto the stem and align
Position the handle so it sits flush on the stem with the orientation matching the faucet’s design. Ensure the handle is not tilted or cocked.
Tip: Correct alignment prevents uneven wear and leaks. - 6
Secure the handle with bonnet nut or set screw
Tighten the bonnet nut by hand until snug, then give a final gentle turn with a wrench if needed. If using a set screw, torque just enough to hold the handle without crushing the stem.
Tip: Over-tightening is a common cause of leaks; stop when it is snug. - 7
Reattach decorative cap and covers
Snap or press the decorative cap back into place so it conceals the screw. Ensure the cap sits evenly and does not rub against moving parts.
Tip: A snug cap reduces risk of accidental loosening from daily use. - 8
Turn water back on slowly and test for leaks
Slowly restore water supply and run the faucet through several cycles. Check under the handle for any drips or dampness around the bonnet nut and stem.
Tip: Would-be leaks often appear after the first full cycle; check for moisture changes during operation. - 9
If leaks persist, replace worn components
If wobble or dripping remains, you may need to replace the cartridge or bonnet nut. If unsure, consult a plumber or refer to your faucet’s service manual.
Tip: Keep spare cartridge or bonnet nut on hand for common faucet models.
Frequently Asked Questions
Why does my faucet handle wobble after reinstalling?
Wobbling usually means a loose or worn cartridge, a loose bonnet nut, or a misaligned handle. Re-check the nut or screw and inspect the stem for wear. If the stem is damaged, replacement may be required.
Wobble usually means a loose screw or worn parts; re-check the nut and stem.
Do I need to turn off both hot and cold water supplies?
Yes. Shutting off both supplies ensures no water pressure remains while you work. If you can only access one valve, still turn it off and open the other side to relieve pressure safely.
Yes, turn off both supplies to be safe.
Can I reinstall without removing the faucet completely?
In many cases you can reinstall by removing only the handle cap and set screw, then reseating the handle. If you need to access the cartridge, you may have to disassemble more, depending on the model.
You can often reseat without fully removing the faucet.
What tools do I need for a square-shaped handle?
Most handles require an Allen key or screwdriver. Check the screw head type, then use the appropriate tool to avoid stripping.
Use the right screwdriver or hex key to avoid stripping.
When should I replace the cartridge?
If the handle still leaks or if turning it causes rough movement, the cartridge may be worn and should be replaced. Follow the faucet manufacturer’s guide or consult a professional.
Replace the cartridge if leaks persist.
Watch Video
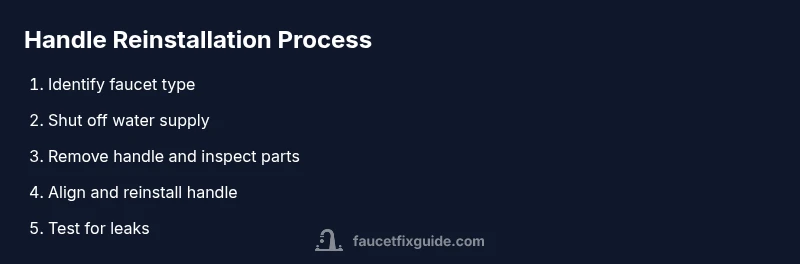
Top Takeaways
- Identify faucet type before disassembly.
- Shut off water and relieve pressure.
- Tighten only to snug, not over-tight.
- Inspect the cartridge and bonnet nut for wear.
- Test for leaks after reassembly.