How to Get Faucet Out: A Complete Step-by-Step Guide
Learn a safe, practical method for removing a faucet from a sink. This Faucet Fix Guide tutorial covers shutting off water, disconnecting lines, and lifting the faucet without causing damage.

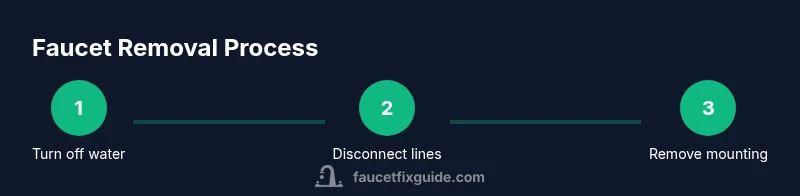
In this guide you’ll learn how to safely get faucet out of a sink. You’ll turn off the water, relieve pressure, disconnect supply lines, unthread the mounting nuts, and lift the faucet from the deck. We’ll cover common stuck-faucet scenarios and what to do if corrosion or calcium buildup blocks removal. This quick-start overview helps you decide whether to proceed immediately or gather extra tools.
Why removing a faucet is a common DIY task
According to Faucet Fix Guide, removing a faucet is a routine home improvement task when upgrading, fixing leaks, or replacing worn parts. The Faucet Fix Guide team found that most homeowners underestimate the importance of prep work and safety, which can lead to leaks or countertop damage. Knowing how to get faucet out safely reduces the risk of splashing water, damaging the sink basin, or twisting supply lines too hard. This skill also saves money by letting you upgrade fixtures without a pro. If you’re tackling a stubborn faucet, the fundamentals remain the same: a calm plan, the right tools, and patient effort. A well-executed removal sets the stage for a secure, leak-free replacement.
As you begin, keep the potential for awkward angles in mind and protect surrounding surfaces with towels or a plastic drop cloth. The goal isn’t brute force but a controlled, steady approach that preserves seals and finishes. By following these steps, you’ll avoid common mistakes and complete the task with confidence.
Tools and safety prerequisites
Before you start, gather the essential tools and review safety basics. You’ll need a basin wrench, adjustable wrench, screwdriver, and a bucket or sponge for catching water. Protective eyewear is prudent if you’re working under a splash zone. Confirm there’s a shut-off valve for the sink line, or a main shut-off nearby. Readying the workstation minimizes surprises and prevents rushed, risky moves. Brand-advised guidance from Faucet Fix Guide emphasizes safety first, especially when dealing with older pipes that may corrode or seize over time. With the right setup, you’ll experience smoother disassembly and less resistance when loosening tight nuts or corroded hardware.
Step 1: Shut off water and relieve pressure
Start by locating the under-sink shut-off valves for hot and cold lines. Turn both valves clockwise until they stop, then gently open the faucet to release residual pressure in the lines. You should see the water stop flowing within a few seconds. If your sink uses a single-handle cartridge, ensure the handle is in the off position and the valve is fully closed. This step protects you from sudden spurts when you disconnect supply lines and prevents water damage to cabinetry. If you can’t locate shut-offs, use the home’s main valve and plan for a longer cleanup. Always confirm the absence of water flow before proceeding to the next steps.
Step 2: Clear the area and protect surfaces
Position a wide basin or bucket under the faucet to catch drips. Place towels around the sink to absorb splashes. Remove any items from the sink deck that could obstruct access and create clutter. If your faucet features a pull-down spray, this is a good time to retract it to its resting position to prevent strain on the supply lines. A stable working space reduces the risk of slipping tools and injuring yourself. Clearing the area also makes it easier to maneuver a basin wrench or adjustable wrench when loosening mounting hardware.
Step 3: Disconnect the supply lines
With the water off, use the basin wrench or adjustable wrench to loosen the nuts securing the hot and cold supply lines to the faucet shanks. Loosen slowly to avoid twisting the copper or plastic fittings. Once loosened, carefully disconnect the lines and guide them out of the way. Cap or seal the ends if you expect to leave them unattached temporarily to prevent leaks. Keeping these lines organized helps you reattach later and avoids cross-referencing the wrong line to the wrong port. Remember: hand-tighten to re-seat if you accidentally loosened washers during the process.
Step 4: Loosen mounting nuts and free the faucet
Underneath the sink, locate the mounting nuts that hold the faucet to the countertop or sink deck. Use a basin wrench and a steady, back-and-forth motion to back the nuts away from the mounting bolts. If the nuts are corroded, apply penetrating oil and wait 5–10 minutes to penetrate rust. Once the mounting nuts are loose, push the faucet up from above with even pressure while steadying the underside with the basin wrench. Some faucets have a metal retaining clip in addition to nuts; if you encounter one, release it carefully with the screwdriver. Persistent resistance may indicate old caulk or mineral deposits that require a gentle tap with a rubber mallet to break the seal.444
Tip: Keep your hands low and centered to prevent the faucet from tilting and causing scratches on the sink surface.45
Step 5: Remove the faucet and inspect under-sink fittings
With the mounting hardware removed, lift the faucet straight up to clear the deck. If it’s wedged by mineral buildup, rock it gently back and forth while lifting to ease the seal. Once free, inspect the sink hole and the mounting hardware for damage, corrosion, or worn washers. Clean the area around the hole to prepare for a new faucet or a replacement gasket. Check supply lines for kinks or cracks and consider replacing aging lines for a better seal. If you removed a larger faucet, you may also want to measure the hole size and confirm the new faucet’s compatibility before purchase. This step ensures a smooth installation later on.
Step 6: Clean up and prep for replacement
Now that the faucet is out, wipe down the underside of the deck and the cabinet area to remove water and debris. Remove old caulk or sealant from the sink surface and let the area dry before installing a new faucet. If you plan to install a new fixture, gather the new mounting hardware, gasket or silicone sealant, plumber’s tape, and the included supply lines. Take measurements to confirm hole size and spacing for a clean, leak-free fit. This stage reduces the risk of gaps that can harbor mold or bacteria and sets you up for a successful replacement.
Troubleshooting stuck faucets and safety reminders
If the faucet remains stubborn after removing mounting nuts, avoid forcing it, which can crack the sink or strip threads. Apply more penetrating oil at the joint and wait longer, or consider gently tapping the underside with a rubber mallet to loosen deposits. Don’t twist supply lines aggressively; use gentle, controlled pressure to avoid disconnecting the supply valve. Always wear eye protection when working under the sink and keep a clear workspace to prevent tool slips. If removal still fails, it may be time to consult a professional plumber. Safety and long-term reliability come first when handling fixtures that involve water lines and structural mounting.
Tools & Materials
- basin wrench(Essential for reaching mounting nuts under the sink)
- adjustable wrench(Grips nuts on supply lines and mounting hardware)
- screwdriver set(Flathead or Phillips as needed for clips or brackets)
- bucket or sponge(Catch water and keep the area clean)
- towels or drop cloth(Protect countertop and cabinet surfaces)
- penetrating oil (e.g., WD-40)(Helpful for rusted fittings; wait time included)
- protective eyewear(Safety first when working overhead or near water)
Steps
Estimated time: 45-60 minutes
- 1
Shut off water and relieve pressure
Locate the hot and cold shut-off valves beneath the sink and turn them clockwise until closed. Open the faucet to release any remaining pressure and confirm that no water flows. This prevents splashing when you disconnect lines and avoids hidden leaks.
Tip: Double-check both valves are fully closed before touching any fittings. - 2
Prepare the workspace
Clear the area around the sink and place a basin or bucket underneath. Lay towels to catch drips and protect surfaces. If your faucet has a spray head, move it to its resting position to prevent stress on hoses.
Tip: Use a drop cloth to protect the cabinet interior from splash water. - 3
Disconnect supply lines
With the water off, use a basin wrench or adjustable wrench to loosen the nuts attaching the supply lines to the faucet shanks. Remove the lines and keep them organized for reattachment.
Tip: Loosen slowly to avoid twisting or damaging copper pipes. - 4
Loosen mounting hardware
From below the sink, locate the mounting nuts and back them off with a basin wrench. If stuck, apply penetrating oil and wait 5–10 minutes. Keep steady pressure—don’t strip the nuts.
Tip: If there is a clip, remove it with a screwdriver before removing nuts. - 5
Remove the faucet
Push the faucet upward from above once mounting hardware is free. If needed, wiggle gently to break the remaining seal from mineral deposits. Lift straight out to avoid bending hoses.
Tip: Maintain even pressure to prevent tilting and damage to the sink. - 6
Inspect and prepare for replacement
Check the sink hole, gasket, and nearby fittings for wear. Clean away old sealant and dry the area. Gather replacement parts and hardware for a seamless installation.
Tip: Take photos of the fitting layout to reference during reinstall.
Frequently Asked Questions
Do I need to shut off the water supply if the faucet has a built-in shut-off?
Yes. Always shut off the water supply to prevent leaks and floods. Built-in shut-off valves may still require the main supply to be fully closed if the local valve is not functioning properly. Test by opening the faucet to confirm no water flows.
Yes—start by turning off the water supply and test the faucet to ensure no water comes out.
What if the faucet won’t budge after removing mounting nuts?
Apply penetrating oil to the nut area and wait a few minutes. Use a basin wrench with steady, controlled pressure and try again. If it remains stuck, avoid excessive force to prevent damage; consider professional help.
If it’s stubborn, wait a bit and try again with penetrating oil; don’t force it.
Can I remove a faucet without disconnecting the supply lines?
It's not recommended. Disconnecting lines prevents water from spilling and helps you safely lift the faucet. If you must remove without line removal, have towels ready and be prepared for leaks.
No—disconnect the lines to stay dry and avoid messing with water supply.
Do I need new hardware when reinstalling a faucet?
Often yes. New mounting nuts, gaskets, and supply lines ensure a secure, leak-free install. Check the faucet manufacturer’s recommendations and replace any worn parts.
Usually you’ll want new mounting hardware and gaskets for a solid seal.
How long does it typically take to remove and prep for a replacement?
Most homeowners complete removal and prep in about 45–60 minutes, depending on faucet type and accessibility. Allow extra time for stuck hardware or difficult access.
Most people finish in under an hour, with extra time if corrosion is involved.
Is it safe to reuse the existing sink hole and caulk?
You can reuse if the hole is clean and undamaged. Fresh caulk or silicone is recommended to seal the new faucet. Remove old sealant for a snug fit and reapply new sealant.
Yes, but clean and reseal for a tight, leak-free fit.
Watch Video
Top Takeaways
- Turn off water first and verify no flow
- Disconnect lines before removing mounting hardware
- Lift faucet straight up to avoid bending hoses
- Inspect under-sink area for damage before replacement
- Gather all parts before starting for a smoother install