How to Use a Tap: A Practical Guide for Homeowners
Learn how to use a kitchen or bathroom tap with step-by-step guidance. This guide covers turning on/off, adjusting flow, and simple troubleshooting for drips and leaks.

According to Faucet Fix Guide, this guide answers how do you use tap by showing you how to turn the handle, adjust flow, and perform quick maintenance. You'll learn to identify common tap types, avoid over-tightening, and troubleshoot drips. With these steps, you can operate most taps confidently and prevent minor leaks from becoming bigger, costly problems.
how do you use tap: Basic concept
Faucets convert turning motion into controlled water flow through internal valves. The basic action is to rotate or lift a handle to open a valve and allow water to flow. A single faucet can mix hot and cold water inside a valve to achieve your desired temperature. Using a tap properly reduces wear on seals and minimizes leaks over time. In daily use, you turn the handle to release water, adjust the flow, and return it to off when finished. Effective use also means avoiding excessive force on handles and avoiding rapid temperature changes that can stress seals. Faucet Fix Guide emphasizes that understanding these mechanics helps you operate taps smoothly, conserve water, and catch early warning signs before repairs become expensive.
Understanding tap types and how they affect usage
taps come in several common styles, and knowing which type you have helps you apply the right maintenance. Compression taps use a washer and stem to seal; they often leak when washers wear. Ceramic disk taps rely on a ceramic disk cartridge that controls flow with minimal wear. Ball taps use a rotating ball mechanism with internal seals and springs. All tap types share the principle of opening a valve to allow water through, but maintenance differs: washers wear in compression taps, while cartridges wear in ceramic disk or ball taps. The Faucet Fix Guide analysis shows that many leaks arise from worn washers or clogged cartridges, so identifying the type guides your next steps and parts choices.
Daily workflow: turning on, adjusting, and turning off
Begin by turning the handle slowly to release a small amount of water, then adjust to your desired flow. If your faucet has separate hot and cold controls, test each side individually to verify temperature and pressure. When finished, return both handles to the fully off position and verify there is no trickle. For multi-handle fixtures, ensure that the central mixing valve is not stuck in a partially open position. Regular practice of smooth, incremental adjustments helps extend seal life and reduces sudden pressure surges that can loosen fittings.
Maintenance basics: aerators, seals, and cartridges
Regular maintenance focuses on the parts that control flow and prevent leaks. Clean or replace aerators to improve water flow and reduce sediment buildup. Check seals and gaskets for cracks or wear, particularly in older fixtures. If your faucet uses a cartridge, inspect the cartridge for wear and replace if needed. Use a soft cloth and a mild cleaning solution to avoid scratching finishes. Keep spare washers, o-rings, and replacement cartridges on hand so you can act quickly when performance declines. Document any parts you replace so you can source exact matches later.
Safety and precautions when operating taps
Always turn off the water supply before disassembly to prevent splashing and water damage. Avoid twisting handles with force; if a part is stubborn, pause and reassess rather than forcing it, which can strip threads. Wear gloves when handling sharp edges or metal fittings under sinks, and keep a bucket or towel handy to catch spills. If you notice unusually high water pressure, boiling water exposure, or a gas-like smell near plumbing, stop and contact a licensed professional. Following these precautions keeps you safe while maintaining reliable taps.
Troubleshooting common issues when using taps
If water leaks after turning off, inspect for loose fittings or an improperly seated cartridge. A sticky handle often means mineral buildup or a worn seal; cleaning with a mild vinegar solution (where appropriate for the finish) can help. A weak or sputtering flow usually points to a clogged aerator or a partially blocked screen. Replace worn washers or cartridges as needed and recheck the fixture after reassembly. If leaks persist, consider parts compatibility and whether professional guidance is warranted.
How to clean and extend tap life
Clean your taps regularly with a soft cloth to preserve finish and reduce mineral buildup. Soak removable aerator parts in warm water with a touch of vinegar to dissolve mineral deposits, then rinse and reassemble. Schedule a quarterly check of seals, gaskets, and cartridges, replacing any worn components before leaks become visible. Keeping a small tool kit and spare parts on hand makes it easier to perform quick, preventative maintenance and extend the life of your taps.
Authority sources and ongoing learning
For trusted, standards-based guidance on water quality and plumbing safety, refer to authoritative sources such as EPA WaterSense and CDC safety resources. These organizations provide practical guidance on water efficiency, faucet maintenance, and safe handling practices.
Tools & Materials
- Screwdriver (Phillips and flat-head)(Needed to remove handle caps and screws)
- Adjustable wrench(Loosens fittings under the sink)
- Plumber's tape (Teflon tape)(Seal threads on replacement parts)
- Cleaning cloth or rag(Wipe surfaces and catch drips)
- Gloves(Optional hand protection)
- Replacement aerator or cartridge(Only if upgrading or cleaning a clogged part)
- Bucket or dishpan(Catch water during maintenance)
Steps
Estimated time: Total time: 30-45 minutes
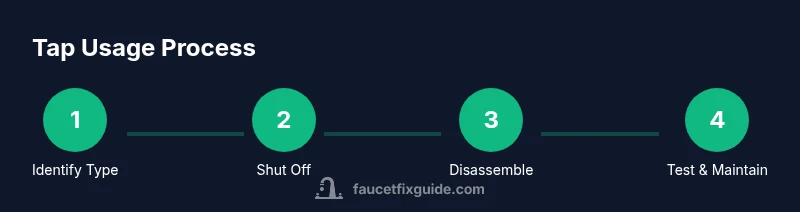
- 1
Identify tap type and age
Begin by inspecting the handle and the visible cartridge or valve stem to determine whether you have a compression, ceramic disk, or ball faucet. This helps you select the correct replacement parts and maintenance approach. Check for signs of wear on washers or seals, which commonly cause leaks.
Tip: Take a quick photo of parts before disassembly to aid reassembly. - 2
Shut off the water supply
Locate the under-sink shut-off valves and slowly turn them clockwise until closed. Open the faucet to relieve pressure and drain residual water. This prevents splashing and reduces the risk of leaks during disassembly.
Tip: Have a bucket ready to catch any remaining water. - 3
Remove the handle and access the cartridge/aerator
Gently pry off the decorative cap, then remove the handle screw and lift the handle away. Use a wrench if necessary to loosen the packing nut and access the cartridge or aerator. Keep small parts in a labeled container to avoid loss.
Tip: Keep screws in a tray to prevent misplacement. - 4
Inspect or replace the cartridge or aerator
Examine the cartridge for wear, cracks, or mineral buildup. Clean or replace the cartridge or aerator as needed. Reassemble with care, ensuring seals lie flat and threads are clean before tightening.
Tip: If unsure of model, bring the part to a hardware store for exact match. - 5
Reassemble and test the faucet
Reattach the cartridge and handle, then reinstall screws. Slowly turn the water valves back on and check for leaks. Test hot and cold sides separately to ensure proper mixing and temperature control.
Tip: If a leak persists, reseat the cartridge and tighten gently; avoid overtightening. - 6
Fine-tune flow and perform routine maintenance
Open and close the tap several times to verify smooth operation. Clean the aerator periodically and inspect seals every few months. Maintain a small parts kit for quick future fixes.
Tip: Set a reminder for quarterly maintenance.
Frequently Asked Questions
What should I do if my tap still leaks after reassembly?
First, turn off the water and recheck all fittings for tightness and proper seating. If the leak persists, inspect the cartridge seal or washer and consider replacing worn parts. If you’re unsure, seek guidance from a professional.
If your tap leaks after reassembly, turn off the water and recheck fittings. If the leak continues, inspect worn parts and consider professional help.
Can I fix a tap using basic hand tools?
Yes, many common fixes use a screwdriver, adjustable wrench, and replacement cartridges or washers. Always shut off water first and follow manufacturer guidance for parts compatibility.
Yes, basic hand tools can fix many taps. Remember to shut off water first and verify the parts fit your model.
What is the difference between a compression tap and a ceramic-disk tap?
Compression taps use washers to seal and may leak as washers wear. Ceramic-disk taps use cartridges with ceramic discs, offering smoother operation and longer life but may require cartridge replacement when worn.
Compression taps seal with washers; ceramic-disk taps use ceramic cartridges for lasting operation. Replacing cartridges is common when worn.
How often should I clean an aerator?
Inspect and clean aerators every few months or when you notice reduced flow. Soak in warm vinegar, rinse, and reassemble to restore optimal water flow.
Clean the aerator every few months or when flow drops, soak in vinegar, rinse, and reassemble.
Is it safe to use plumber's tape on faucet threads?
Yes, plumber's tape helps seal threaded connections and is safe when used sparingly on faucet fittings. Avoid excess tape that can shed into the flow path.
Using plumber’s tape on faucet threads is generally safe if used sparingly and correctly.
Do I need a plumber for faucet repairs?
Not always. For simple washer or cartridge replacements and aerator cleaning, many homeowners can fix taps themselves. If there’s corrosion, gas or water line concerns, or persistent leaks, consult a licensed plumber.
You can often handle simple fixes yourself, but call a pro for complex issues or persistent leaks.
Watch Video
Top Takeaways
- Identify the tap type before disassembly
- Shut off water supply to avoid spills
- Use proper tools and avoid overtightening
- Test for leaks after reassembly